Create Stunning Workflow Diagram on Mac
Open Workflow Diagram Templates
Here are some workflow diagram examples. They are fully customizable and can help you gain workflow diagrams in the fastest way.
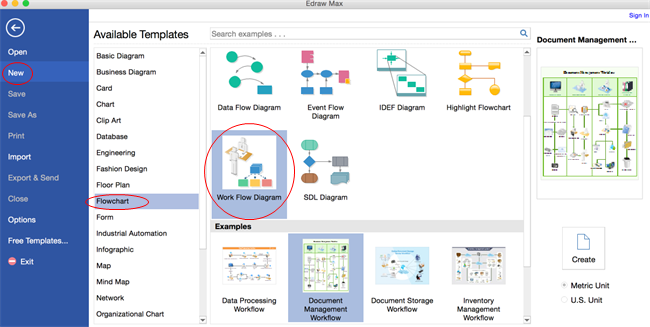
Open a blank canvas and the libraries including shapes needed for creating Workflow Diagrams for Mac OS X. On the File menu, point to New. Click Flowchart, and then double click the icon of Workflow Diagram.
EdrawMax
All-in-One Diagram Software
- Superior file compatibility: Import and export drawings to various file formats, such as Visio
- Cross-platform supported (Windows, Mac, Linux, Web)
Add Workflow Diagram Shapes
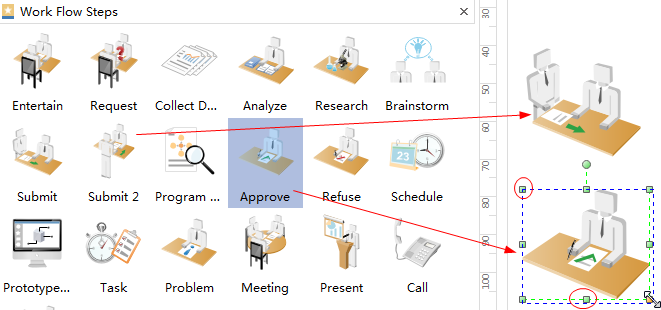
Drag and drop shapes from the left libraries onto the canvas to represent actions, people and objects of the process.
Drag the green square handles to resize shapes.
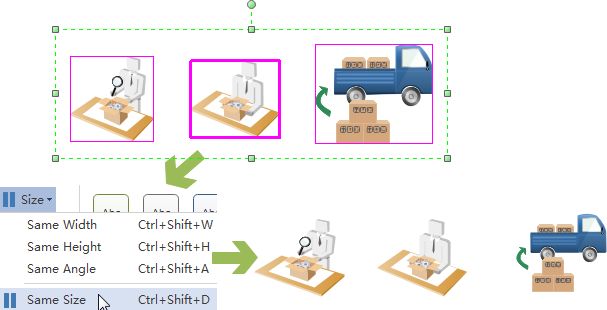
You can use Same Size tool under Home tab to make several shapes the same size quickly.
Connect Workflow Diagram Shapes
The built-in workflow shapes are designed with 4 connection points and 4 floating action buttons that allow auto connection.
Clicking the floating action button pointing to a nearby shape will generate a connector which links these two shapes.
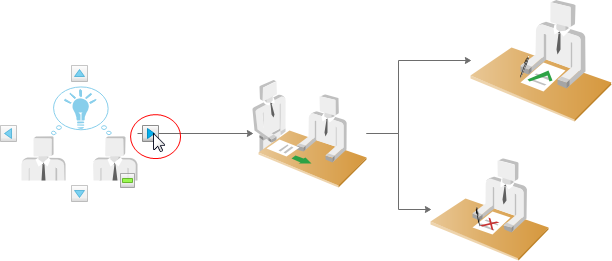
You can also use the Connector tool to connect shapes manually. One more way is to use arrow connectors.

Add Background
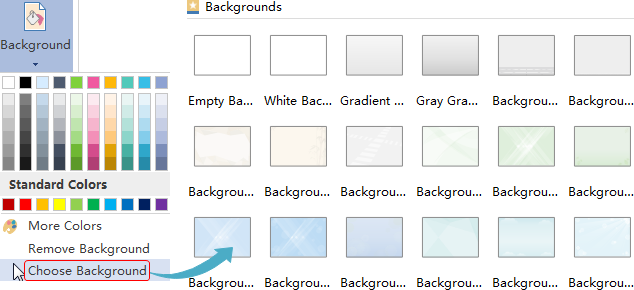
To add a background, go to Page Layout tab and then:
- Click a color for colorful background.
- Click Choose Background to select a predefined background.
- Click Remove Background if you don't like the added background.
- Switch to View tab and then click Background View to edit and personalize the background.
Add Workflow Diagram Contents
- Double click a shape to type in text.
- Press Ctrl + 2 to add more text boxes. Press Ctrl + shift + 2 to adjust text box.
- Choose a different font under Home tab. Customize the size, color and alignment by clicking the relevant menus.
- Drag the yellow control point to move text box quickly.

Change Workflow Diagram Theme
The predefined themes help you apply professional
Switch to Page Layout tab, select another theme.

Save or Export Workflow Diagram
Click Save on File tab to save as the default format. Choose Save as on File tab to save as other formats.
You can choose to save in local files or save in your Cloud. Saving it in Team Cloud can share it with more people.

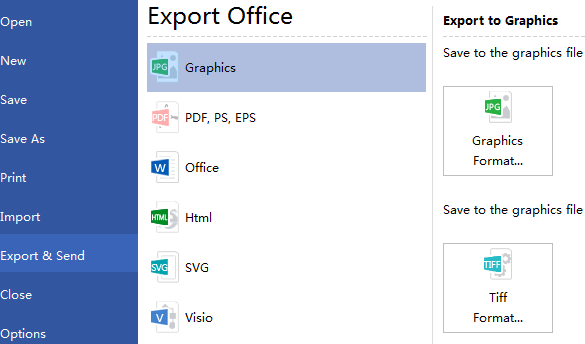
Hit Export & Send under File to export the workflow diagram as graphics, slides and web documents and so on.
Print Workflow Diagram
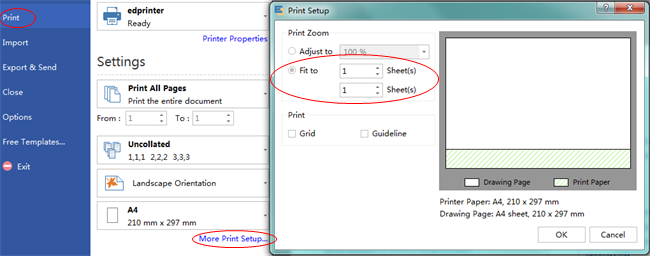
- Click File tab and then choose Print. A preview of your document automatically shows.
- To view each page, click the arrows below the preview.
- TIP: Use the zoom slider below the preview to magnify the image of the document.
- To go back to your document and make changes before you print it, click the top left arrow.
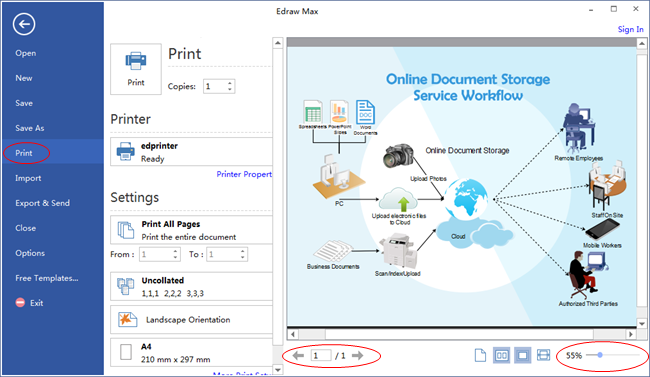
The drawing will be printed on several papers if it is larger than the specified printing paper.
To print it on only 1 paper,
click More Print Setup... and then choose Fit to.
