Reflected Ceiling Plan Complete Guide
Edraw Content Team
Do You Want to Make Your Reflected Ceiling Plan ?
EdrawMax specializes in diagramming and visualizing. Learn from this reflected ceiling plan complete guide to know everything about reflected ceiling plan. Just try it free now!
Ever went on to a house and saw the magnificent ceiling they have? Ever imagined what they did differently than the other houses you ever visited? They created a rough plan with their architecture and finalized everything they wished to have on the ceiling or the roof even before they started the construction. The initial planning and execution of those ideas to reality are all about the reflected ceiling plan. As Jordan Smith said,
"Sometimes we'll do a reflected ceiling plan on the floor plan, which means that whatever's happening up on the ceiling is reflected down on the floor and then drawn for our benefit as builders."
In this elaborated guide, we will walk you through the importance of having a reflected ceiling plan (RCP) in your building's blueprint, how it is different from a regular floor plan, and will even shed light on the important symbols that you will require in order to create an RCP drawing. After completing this complete guide, you will be able to differentiate between a reflected ceiling plan and a floor plan and learn how easy it is to create an RCP diagram using EdrawMax.
However, even before we dive into the process of making a reflected ceiling plan from scratch or by using free templates and symbols, let us help you understand the importance of having a reflected ceiling plan and what the process is to read it.
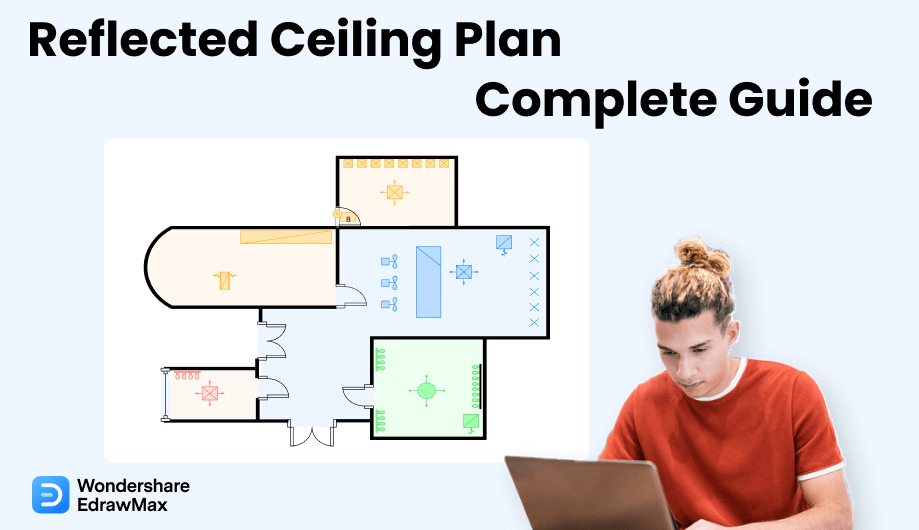
1. What is a Reflected Ceiling Plan
In the architecture and building world, a reflected ceiling plan is a graphical illustration that depicts the items located on the ceiling of a room. Such plan designs got such a name since it is a drawing to illustrate a bird-eye view of the ceiling as if it was reflected onto a mirror on the floor.
In a well-defined reflected ceiling plan, you will find electrical wiring, ceiling treatment, information about multiple components, patterns, and other important components that you might mount from the ceiling, like light, CCTV camera, and such. A good RCP design is drawn to the same scale as the floor plan, ensuring that everything designed in the ceiling is and will be suited best for that particular room.
A reflected ceiling plan is a graphical illustration that depicts the items located on the ceiling of a room. A good RCP design is drawn to the same scale as the floor plan, ensuring that everything designed in the ceiling is and will be suited best for that particular room.
2. What is Included in a Reflected Ceiling Plan
As a rule of thumb, an RCP is a drawing that shows you the dimensions, required materials, and other key information about the ceiling of each of the rooms that you have illustrated in your building's blueprint. It means that if you have added two bedrooms, two bathrooms, and one kitchen in your blueprint, you will have to create a reflected ceiling plan for each of these spaces. In some cases, you can have the same kind of ceiling. However, the dimension of each of these spaces will vary as per the property, and that is why it is highly recommended to have a separate reflected ceiling plan for each of these spaces.
When you draw a reflected ceiling plan, you will have to include several important features, like:
- Dimensions of the ceiling include the height of the ceiling above the floor. We use the completed floor to get the correct height in most cases.
- Specifications on different types of ceilings are another important feature that is included in the RCP. You can have conventional, suspended, tray, and beam types of specifications.
- In the RCP, you should also mention the specifications of the finished ceilings. For instance, it should be marked whether it will be a plaster ceiling or a drywall ceiling.
- Mentioning the symbols and their meanings in the reflected ceiling plan is always appreciated. Most of us are not technically sound, and if you mention the legends on the reflected ceiling plan design, you make it easier for everyone to understand it.
- Another special feature that you can include in your RCP design is the details and specifications for other components necessary to design such plans. For instance, you can mention the usage of HVAC systems, CCTV camera, smoke detectors, light, fans, speakers, and more.
- Dimensions of the ceiling include the height of the ceiling above the floor.
- Specifications on different types of ceilings are another important feature that is included in the RCP.
- You should also mention the specifications of the finished ceilings.
- Mentioning the symbols and their meanings in the reflected ceiling plan is always appreciated.
- Another special feature is the details and specifications for other components necessary to design such plans.
3. The Purpose of the Reflected Ceiling Plan
The primary function of the reflected ceiling plan is to allow the interior designers or the architects to understand how the lighting functions in the room. Other than this, the RCP serves some of the other important purposes, like:
- It provides vital information about light fixtures and lighting plans.
- System engineers can benefit from it if you have installed HVAC mounts.
- It provides the right dimension and scales and even helps understand the exact height from the finished floor.
- When a technical expert looks at a well-designed RCP, they understand the structural layout of the space and insert the lighting requirements.
- In addition to this, interior designers can easily understand the electrical plans and add other components, like dimmers, electrical and telecom connections, and more.
The primary function of the reflected ceiling plan is to allow the interior designers or the architects to understand how the lighting functions in the room. Moreovre, they can find more details on it.
4. Reflected Ceiling Plan Vs. Floor Plan
Several architecture students usually get confused between a reflected ceiling plan and a floor plan. Here we have laid out some of the similarities and differences between the two to give you an understanding of these drawings.
Before we discuss the similarities and the differences, let us first explain these two in layman's terms. A floor plan is a drawing that refers to the floor designs. It will include the details of the room size, equipment, and components. In addition to this, a floor plan will include walls, doors, stairs, and windows. Unlike a floor plan, a reflected ceiling plan reflects the ceiling plan. It will include the ceiling details, like fixtures, dimensions, types, and more. In addition to this, a reflected ceiling plan will also include ceiling components, like light, CCTV camera, ceiling design, and more. Now that you have understood the general meaning of these two let us talk about the similarities and differences between a reflected ceiling and floor plans.
Similarities:
-
Both the reflected ceiling and floor plans depict the bird-eye view of the property.
-
The reflected ceiling and floor plans depend upon the dimensions and scaling.
-
A reflected ceiling plan and floor plan help understand the house's final structure before being built.
Differences:
-
A reflected ceiling plan shows the orientation of various electrical and mechanical devices, like ceiling lights, HVAC mounts, fans, and others.
-
Floor plans illustrate the placement of various objects, like furniture, beds, doors and windows, stairway, and more.
-
You first design the floor plan and then work on the reflected ceiling plan.
5. The Symbols of Reflected Ceiling Plans
Since the reflected ceiling plan is yet another engineering drawing, one should understand that its design will be different from the architectural drawing. As you will learn here, RCP includes symbols specific to light fixtures, special ceiling features, HVAC mounts, and other elements. In order to explain the reflected ceiling plan symbols in the right way, we have categorized them into two sections: Lighting Symbols, Electrical & Telecom Symbols, Diffuser Symbols, Sensor Symbols, HVAC Symbols, Fire and Security Symbols, and Ceiling Fan Symbols.
Lighting Symbols: As the name suggests, the lighting symbols are those symbols that depict different types of lights that are used in the house. Some of the most common lighting symbols that we use while creating the reflected ceiling plan are:
- Downlight: A light with an angle towards the floor.
- Multi-light bar: A bar with multiple lights on it.
- Batten Flores: A batten light is a long tubular light that lights a large area.
- Modular Flores: A modular fluorescent light fixture is designed with the tubes in both modules being parallel or perpendicular..
- Emergency Sign: It is used for showing an emergency of any kind in the building.
Telecom Symbols: In recent years, several buildings and households have started enabling different telecom services in their places. Some of the important and most used telecom symbols are:
- Digital Satellite System: It shows the satellite system of any radio station.
- Telephone Jack: It is a symbol that shows an outlet for connecting the telephone.
- Radio Relay Station: It shows the delay in receiving the radio signals.
- Radio Station: These are for electronic equipment responsible for radio wave communication.
Sensor Symbols: These days, you will find sensors installed in most buildings. However, there are government guidelines on the types of sensors one can use at a particular place. Here is the list of the RCP sensors that you might use while creating the plan.
- Temperature Sensor:It signals when the temperature goes out of range.
- Humidity Sensor: It shows the humidity level of the house.
- Pressure Sensor: It shows the current air pressure of the house or the corporate compound.
- Flow Sensor: It senses the flow of liquid and gasses.
- Smoke Detectors: They are for fire safety and emit sound in any emergency.
HVAC Symbols: Heating, Ventilation, and Air Conditioning play a crucial role in creating the reflected ceiling plan. Some of the important HVAC symbols that you might use while creating the RCP diagram are:
- Diffuser:There are several types of diffusers that you might use, like Grille Diffuser, Return Diffuser, Linear Diffuser, Troffer Diffuser, and Grille Side. These diffusers are used to supply and extract air vertically without any deflection.
- Thermostat: Thermostat is an instrument allowing the temperature to be maintained within given limits by using a device that cuts off the supply of heat when the required temperature.
- Supply Air Diffuser: These air diffusers are found in the ventilation system, whose function is to allow airflow from the outside into the room.
Switches Symbols: In electrical engineering, switches include all devices that can control any electronic fixture's turning off and on. Some of the highly used switch symbols are:
- Single Pole Switch:It has one input and one output.
- Three-Way Switch: It has three terminals used to control a circuit from two different points.
- Pull Switch: Such switches work after pulling a cord.
- Dimmer Switch: Dimmers are devices connected to a light fixture and used to lower the brightness of the light.
- 2DP Switch: A Double Pole Single Throw (DPST) switch has four different terminals and is often used to connect two source terminals.
Electrical Outlet Symbols: Electrical outlets play a very important role in creating the RCP. Some of the most used and highly recommended electrical outlet symbols are:
- Singleplex Receptacle Outlet:A single receptacle is a single contact device with no other contact device on the same yoke.
- Duplex Receptacle Outlet: A duplex receptacle is an electrical receptacle or outlet that accommodates two plugs.
- Range Outlet: A range receptacle is a high-power electrical outlet installed specifically for an electric range or oven.
- Weatherproof Convenience Outlet: The weatherproof outlet is a particular type of electrical outlet designed for installation outside the home.
Fire and Security Symbols: Safety and security are the most important features that have to be present in any house floor plan. We create an access plan that shows the security features in most cases. In addition to this, we use these symbols in the RCP designs as well. Some of the highly used fire and security symbols are:
- Smoke Detector:Helps in detecting any kind of smoke.
- Buzzer: Usually works as an alarm system.
- Doorbell: Signals when someone presses the switch, placed outside the apartment or the building.
- Fire Alarm:It starts in case it senses any fire.
- Card Access:It is a docket for entering a biometric-enabled card.
Ceiling Fan Symbols: Ceiling fan symbols are those symbols that represent anything that you fit on the ceiling. It can either be an exhaust fan to ceiling fan! Some of the most used ceiling fan symbols are:
- Ceiling Fans:It represents the normal fan that we place at home.
- Exhaust Fan: We put EF marking right next to the symbol to let the viewer know what the symbol is all about.
- Air exhaust fan: Air exhaust fans are for those symbols that show the air exhaust panel in the house.
In order to explain the reflected ceiling plan symbols in the right way, we have categorized them into two sections: Lighting Symbols, Electrical & Telecom Symbols, Diffuser Symbols, Sensor Symbols, HVAC Symbols, Fire and Security Symbols, and Ceiling Fan Symbols.
6. How to Read a Reflected Ceiling Plan
Like an HVAC floor plan, which has a learning curve to read, you should have a proper understanding of reading a reflected ceiling plan. In the architecture classes, most of the professors teach their students that the best possible way to read an RCP is to think about the floor first and then imagine that one is levitating just above the ceiling, which is transparent, and there is a mirror placed that reflects everything on the ceiling to you. In simpler words, the reflection of the ceiling that you will see in the mirror is what the reflected ceiling plan is all about.
You will only find minute details present in the reflected ceiling plan in some cases. It is also to be noted here that you do not have to show the furniture or different components of the floor, as we are not talking about the floor plan in particular. However, even if you have mentioned and drawn the furniture, always outline them with dotted lines, which indicates to the viewer that they are present on the lower plane.
At the same time, such reflected ceiling plans are filled with different symbols that are added to the design to illustrate the features. Each of these fixtures added in the RCP will have its identifying letter that you will later explain in the key region.
7. How to Draw a Reflected Ceiling Plan in General?
There are two ways of creating a reflected ceiling plan -- one is an old-age traditional way where you sit down with pen and paper to jot down everything, and another is where you use a tool well equipped to create the RCP. Before we share the easy ways of creating the reflected ceiling plan, let us walk you through the traditional ways of creating the diagram with you.
Remember that creating a reflected ceiling plan is a complex process if you do not access the symbols. So, even before you start visiting the site, you should finalize all the important symbols you might need while creating the reflected ceiling plan.
Step 1: Analyze the site
Understanding the floor, analyzing the site, and noting the height of the room (finished floor to the ceiling) is the very step you should do when you start creating the reflected ceiling plan.
Step 2: Discuss with a constructor
Discussions with the constructor are yet another step that you have to do if you are not aware of the right dimensions of the building. Discuss with them and understand what fixtures they intend to use in the building.
Step 3: Create a layout
Once you have analyzed the site, it is time to create the outline. Ensure that the ceiling dimension that you use should be the exact size of the floor plan.
Step 4: Add Floor Plan
Another important step in creating the reflected ceiling plan is to make a floor plan that you should keep next to you when making the RCP. If you have any furniture, you should make them using dotted lines. It would be clear for the viewer to understand that the furniture is placed on the lower plane.
Step 5: Add ceiling features
Start adding ceiling features to your RCP. Depending upon your requirement and need, you can add or modify the ceiling features, like smoke detectors, alarm systems, cameras, ceiling fans, lights, and more.
Step 6: Revision
After you add the ceiling features and components, you should visit the site again and see personally how your vision might look in reality. At the same time, your reflected ceiling plan design should have the option to make multiple revisions. For instance, if you have added a particular feature and your builder or constructor says that it will not go with the design, you should be able to make the appropriate changes.
- Analyze the site and understand the right dimensions of the building;
- Add floor plan, floor plan and ceiling features;
- Make the appropriate changes.
8. How to Draw a Reflected Ceiling Plan in EdrawMax?
Now that you have understood the basic symbols and how tough it is to create a reflected ceiling plan using traditional methods, it is time to navigate you through the steps of creating your first RCP using EdrawMax. Even if this is your first time accessing the tool, you will find it intuitive and user-friendly. If you have been designing the reflected ceiling plan for ages, you will find all the important tools and symbols right in the symbol library present in EdrawMax.
Instead of wasting time drawing a reflected ceiling plan on paper, you should look for a way to design a reflected ceiling plan easily. EdrawMax is well equipped to design a reflected ceiling plan. There are only a couple of steps that you need to follow in order to easily create it, like:
Step1 Open EdrawMax and Login
If you are using the offline version of EdrawMax, then open the tool in your system. If you wish to have remote collaboration, head to https://www.edrawmax.com/online/ and log in using your registered email address. If this is your first time using the tool, you can register yourself using your personal or professional email address.

Step2 Template Selection
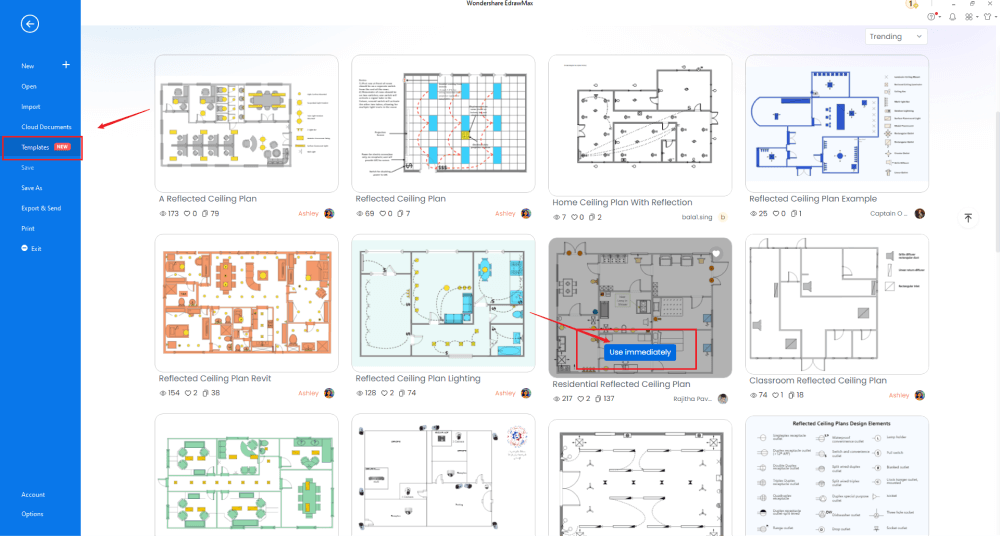
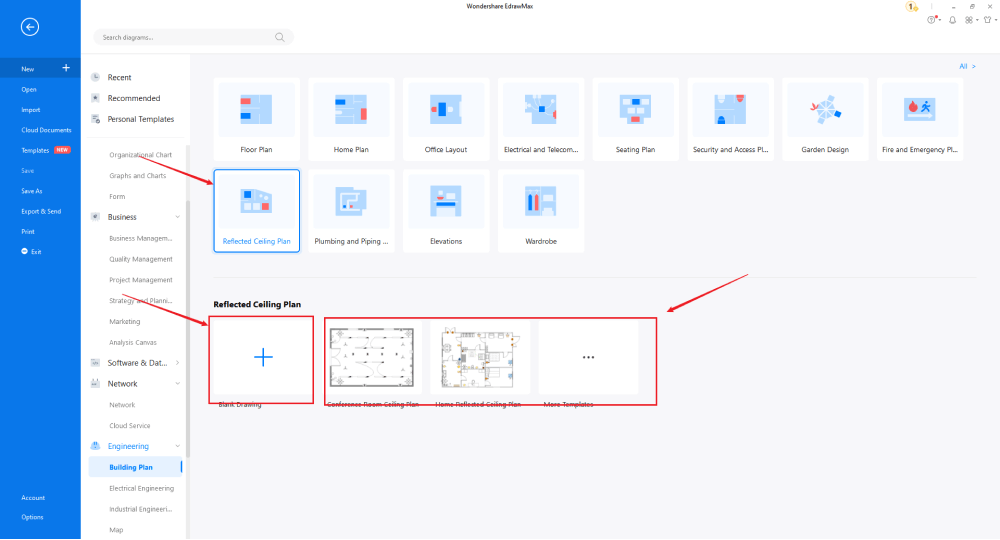
If you need to access the free reflected ceiling plan templates, click on the 'Templates' option from the left panel of the EdrawMax tool and type 'Reflected Ceiling Plan' in the search bar. You will see hundreds of free reflected ceiling plan templates readily available at EdrawMax. Click on any of these templates and start customizing them as per your requirement. Alternatively, you can also click on 'Building Plan' on the left side of the diagram panel. It will open up different diagram types, like Floor Plan, Electrical and Telecom Plan, Seating Plan, and more. Click on 'Reflected Ceiling Plan.' It will open up security and access plan templates for you.
Step3 Create from Scratch
In order to create the Reflected Ceiling Plan from scratch, click on Building Plan, which you can find on the left panel of the tool. Upon clicking, you will see a list of different Building Plans that you can create with EdrawMax, like Floor Plan, Home Plan, Office Layout, and more. Click on Reflected Ceiling Plan and click on + to design the security and access floor plan from scratch.
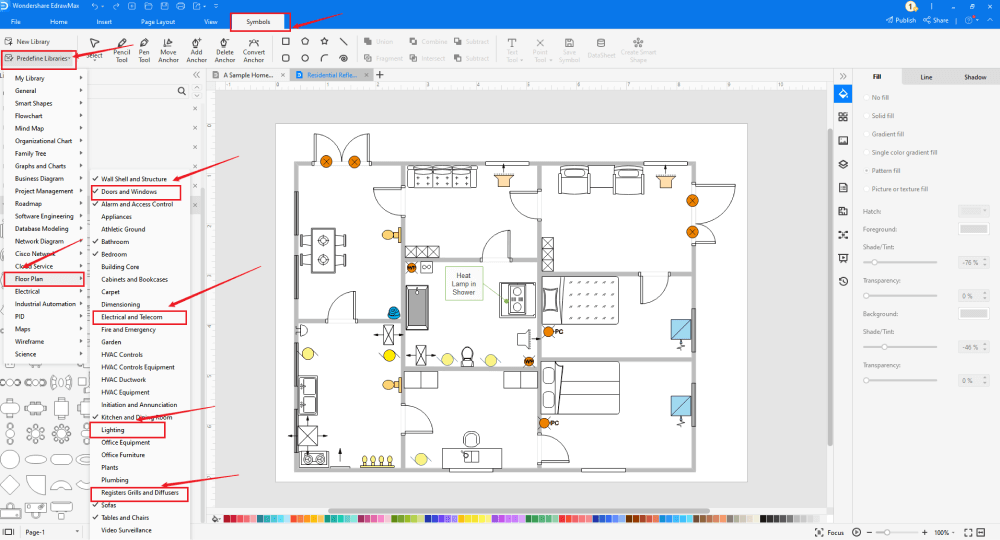
Step4 Select the Symbols
EdrawMax comes with over 50,000 vector-enabled symbols. In the drawing canvas, you will find all the required symbols, like Doors and Windows, Electrical and Telecom, Lighting, Registers, Grills and Diffusers, and more. You can import them on the canvas and start customizing as required.


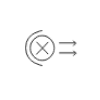

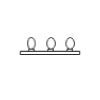










Know more about reflected ceiling plan symbols, and try to drag and drop the symbols you want to customize your reflected ceiling plans.
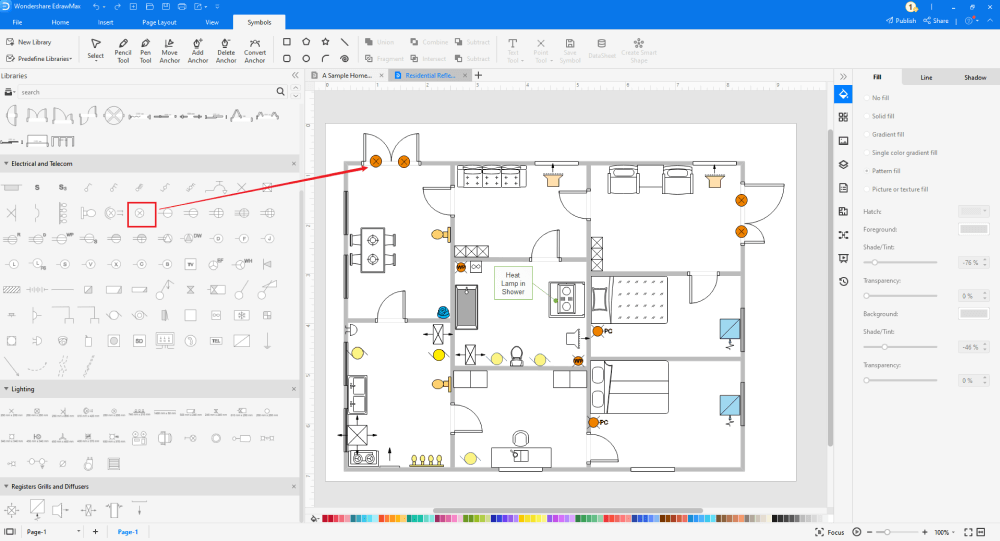
Step5 Add Components
Now that you are on the drawing canvas, you can create the Reflected Ceiling Plan. Remember to add additional electrical equipment you deem fit for the house. You can add different CCTV cameras, dome cameras, gas detectors, heat detectors, smoke detectors, recording devices, and more.
Step6 Change Dimension
You will find Dimensioning in the Symbol section. Click on the one that you need. EdrawMax lets you change the dimension of them without losing the formatting. Click and hold them and increase or decrease their size as per your requirement.
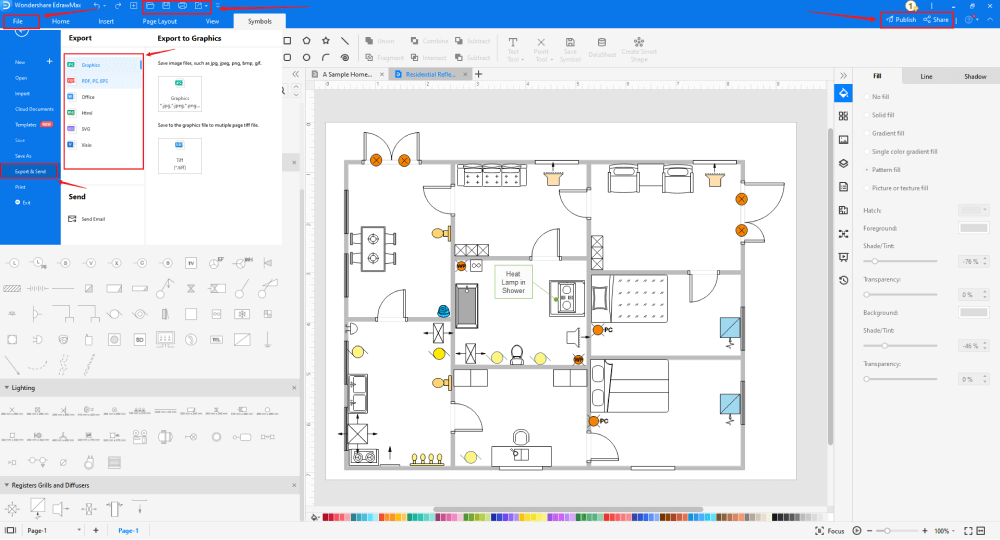
Step7 Export or Share
Once your Reflected Ceiling Plan is ready, you can easily share it using EdrawMax's special sharing feature. This Reflected Ceiling Plan maker lets you export your file in multiple formats, like JPEG, PNG, PPTX, PDF, and more. In addition to this, you can easily share the RCP via email or on different social media platforms, like Facebook, Pinterest, Line, and LinkedIn.
Basically, it is simple to create a reflected ceiling plan in EdrawMax, just grab a template and keep customizing, drag and drop professinal reflected ceiling symbols to make your plan better. If you are still confusing about how to make a reflected ceiling plan in EdrawMax, just check this reflected ceiling plan guide, or check the video below. Or you can find more tutorial videos from our Youtube
9. The Reflected Ceiling Plan Examples & Templates
There are 4 examples of reflected ceiling plans that you can refer or use immediately. Just click the image to download EdrawMax, and download the templates accordingly. Then double click to open the templates and customize as your prefer. Or open the templates from EdrawMax Online , and duplicate the templates. Click this reflected ceiling plan examples to get more inspirations.
Example 1: Lighting Reflected Ceiling Plan
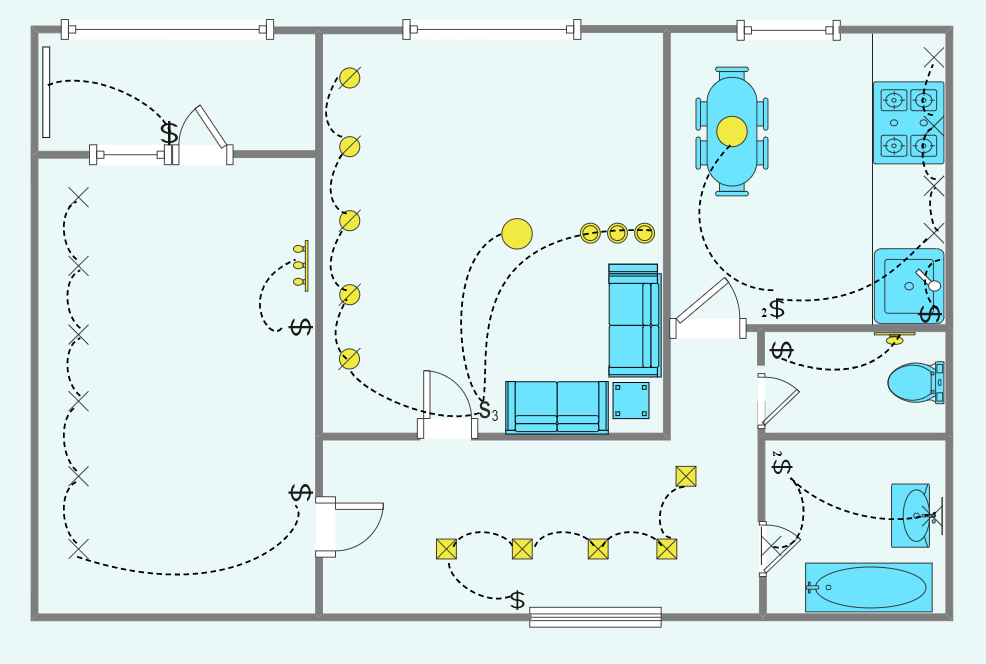
The following reflected ceiling plan depicts the lighting scheme of a building. As you see here, the scheme of lighting space allows the residents to designate the location of lighting fittings and their numbers, to clarify their types, and understand the degree of illumination. It should be noted here that all types of lighting fixtures have their conventional designation, and therefore every type of lighting symbol you use in your RCP design should be clear for the readers to understand. In addition to this, whenever you create a building RCP design, try to use the dotted lines for the furniture as it will make it clear that the furniture or the beds are placed on the lower plane.
(For Win)
(For Mac)
(For Linux)
Example 2: Office Reflected Ceiling Plan
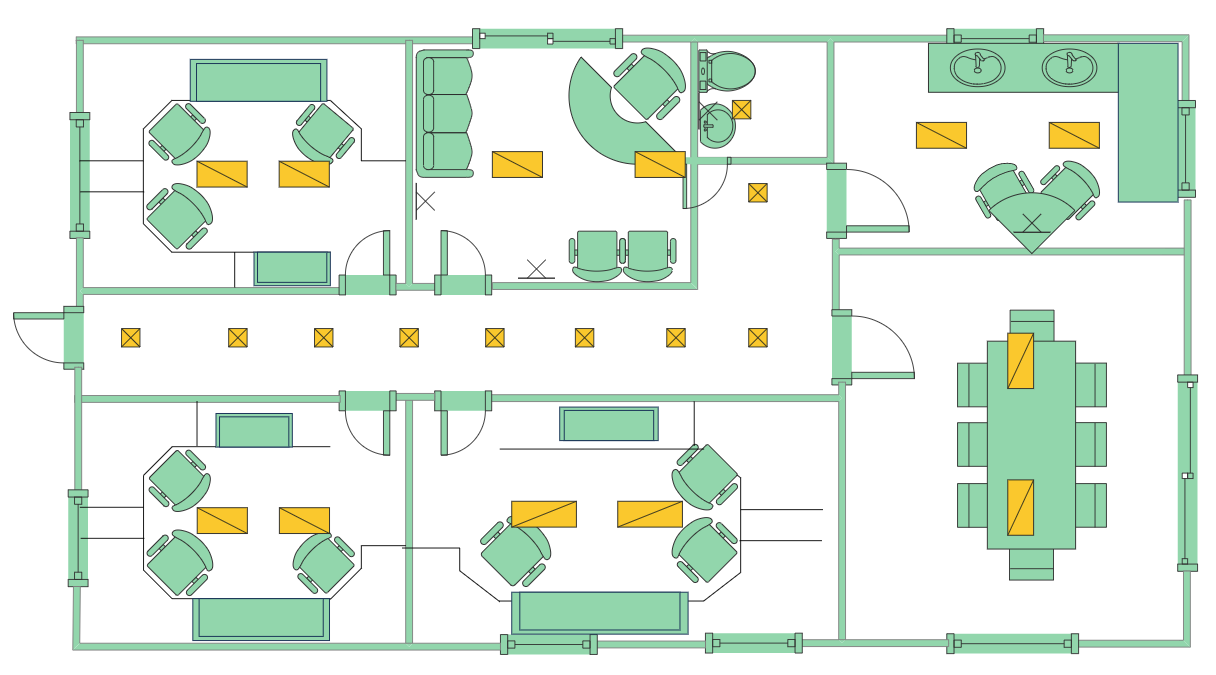
The following is an office reflected ceiling plan showing the top-view illustration of multiple cabins, conference rooms, working areas, kitchen/pantry, and restroom. Since lighting and ventilation play an important role in such activities, we have added several ceiling lights in the multiple rooms. The well-designed lighting setup directly reflects the quality of work provided by the employees. In addition to this, you should always add smoke detectors in the kitchen areas as it is one of those areas prone to such hazardousness. EdrawMax comes with free built-in templates that help you create similar reflected ceiling plans for your professional work.
(For Win)
(For Mac)
(For Linux)
Example 3: Prototype Bathroom Design
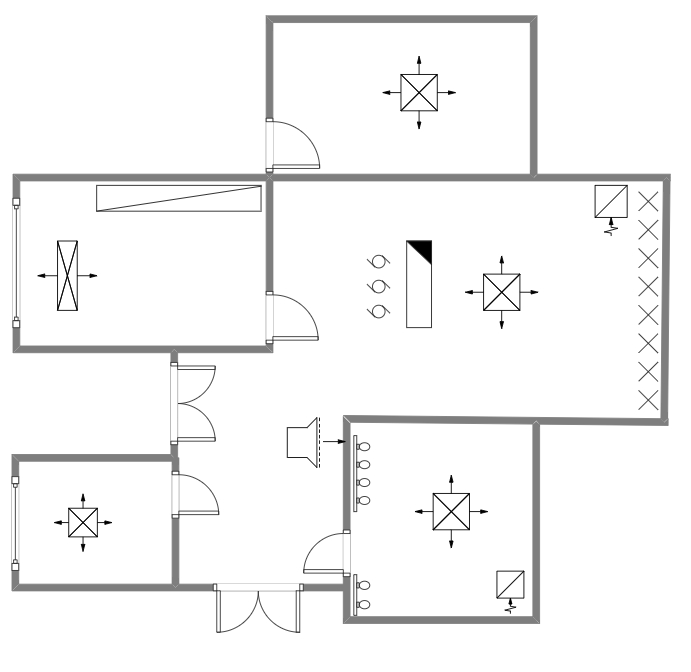
Following is the reflected ceiling plan design showcasing the bathroom area. As you can see in the following reflected ceiling plan design, we have multiple components, like HL that shows Heat Lamp, which is located at likely towel-off area and to speed the drying of wet surfaces; we also have a fan which is connected to a light switch that automatically turns off after a set period, and then we have one ceiling mounted shower curtain and wall mount vanity light in the bathroom. In addition to this, you can also have smoke detectors installed in the bathroom.
(For Win)
(For Mac)
(For Linux)
Example 4: Simple Reflected Ceiling Plan
The following is a simple reflected ceiling plan designed in EdrawMax. The special part of this diagram is that it shows the RCP of the crawl space, the first floor, and the second floor. It gives an idea of what kind of RCP you have to design for the particular floor plan. As you see, we also have labeled electronic devices, like light, ceiling fans, and smoke detectors. Such reflected ceiling plan designs are great to understand the importance of RCP and how easy it is to create a reflected ceiling plan in EdrawMax using free templates.

(For Win)
(For Mac)
(For Linux)
10. Free Reflected Ceiling Plan Software
Reflected ceiling plans, commonly known as RCP, may sound like a complex design because of their nature and the complexities it brings when you start working on the building's site plan. However, if you have the right information and the right tool, you can create technically correct reflected ceiling plans and share them with your architect to get their feedback.
After reading the simpler steps of creating the reflected ceiling plan in EdrawMax , we have pointed out some amazing features that you will get once you start using it to make the floor plan and RCP for your building's current or ongoing requirements.
key Features of EdrawMax:
- EdrawMax is a power-packed tool that offers several incredible features, giving users access to the free template sections. Unlike other tools where you will find a limited number of templates, EdrawMax comes with over 3000 different types of templates that are 100 percent customizable.
- EdrawMax offers over 50,000 vector-based symbols readily available in the library section. What is amazing about these vector symbols is that you can resize, recolor, reshape them as much as you want, and you will not lose single formatting.
- With EdrawMax, you can also create your symbol or create your vector-enabled text.
- If you wish to have a remote collaboration with your team, go to the online version of EdrawMax and register using your email address. Once you are into the EdrawMax dashboard, you can easily collaborate with your team members in real-time.
- With EdrawMax, you do not have to worry about the dimensions or scales of the reflected ceiling plan or any other floor plan. We have created a tool keeping the real world in mind. Whatever dimensions you enter in EdrawMax will be scalable and can easily be converted to real-world shapes and sizes.
11. Final Thoughts
As you learned from this complete guide to understanding the importance of a reflected ceiling plan, an RCP includes all the important information involved in the building process. Even if you are an architect or an interior designer, you will find that RCP serves a much higher purpose than simply elaborating the structure of the ceiling of any building. It includes HVAC mounts, sprinklers, fixtures, lighting plans, and more. When creating a reflected ceiling plan, it is recommended to opt for a tool like EdrawMax that eases your efforts in making RCP without any worry.
We have designed EdrawMax keeping one thing in mind -- it should be accessible to beginners and professionals. From changing the dimension to modifying the vector-enabled symbols, from importing floor plans and HVAC plans in one layout to sharing them on different social media platforms, EdrawMax is a powerful tool well equipped to create beautiful and technically correct reflected ceiling plan designs.
Floor Plan Complete Guide
Check this complete guide to know everything about floor plan, like floor plan types, floor plan symbols, and how to make a floor plan.
You May Also Like
Landscape Plan Complete Guide
Knowledge
Table Plan Complete Guide
Knowledge
Seating Chart Complete Guide
Knowledge
Office Layout Complete Guide
Knowledge
HVAC Plan Complete Guide
Knowledge
House Plan Complete Guide
Knowledge

