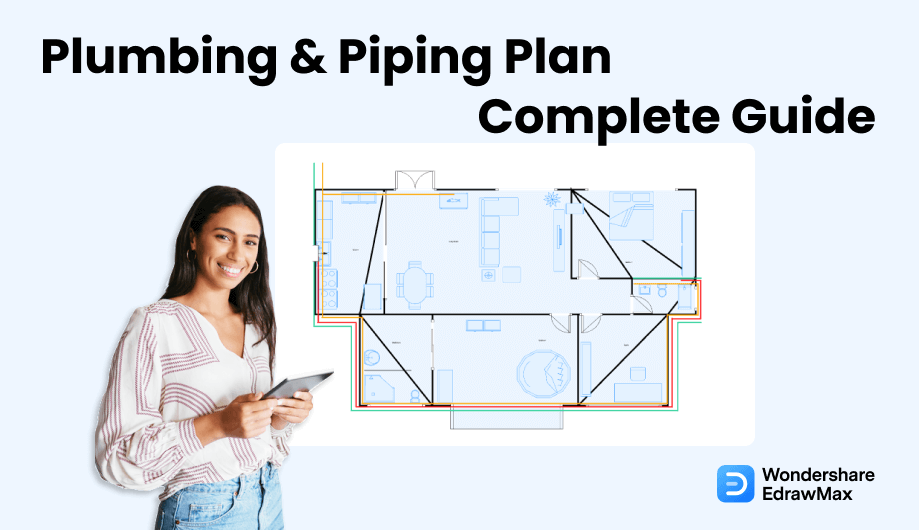
Plumbing & Piping Plan Complete Guide
Edraw Content Team
Do You Want to Make Your Plumbing Plan?
EdrawMax specializes in diagramming and visualizing. Learn from this plumbing plan complete guide to know everything about plumbing plan. Just try it free now!
Just like an electrical system and an HVAC layout, the plumbing system is yet another important system of the house or the commercial complex. An elaborated plumbing plan provides all the required information on the plumbing system's design for a house, including the dimension, location, fixture location, storage-tank capacities, hot-water-heater capacities, and more. In most cases, plumbing diagrams are part of the construction-drawing sets and are submitted alongside your floor plan, reflected ceiling plan, electrical plan, and more.As Arthur Baer said,
"A plumber is an adventurer who traces leaky pipes to their source."
This elaborated guide to understanding plumbing plan will help you understand how a plumbing system in the house includes multiple elements, like a sewer system, water heater, and more. This article will explain different types of plumbing piping systems, some of the highly used plumbing plan symbols, and how easy it is to create a plumbing diagram using EdrawMax.
1. What is a Plumbing Plan
In very simple words, a plumbing plan or a plumbing drawing is a technical overview of the system that shows the piping for freshwater going into the building and waste coming out. In most cases, you will find that a plumbing plan includes drawings of the water supply system, drainage system, irrigation system, stormwater system, and more. A plumbing plan will differ from building to building. For instance, you will have a very detailed plumbing plan if you plan to build a manufacturing unit or a chemical factory. In addition to this, you might need a basic plumbing plan structure when you plan an apartment building or your personal residence compound.
As you will learn here today, a structure's plumbing system is not only important to illustrate the water supply of your building, but it is also important to the health and safety of the occupants. No one wishes to live in places with constant drainage issues or if the solid or liquid waste does not pass out from the building on time.
Plumbing plan or plumbing drawing is a technical overview of the system that shows the piping for freshwater going into the building and waste coming out.
2. What is Included in a Plumbing Plan
A well-planned plumbing diagram illustrates the housing system that will bring water in and take the waste out. If you are renovating your kitchen or the bathroom or starting a project from scratch, you should be aware of the features and elements included in a plumbing plan.
It should be noted here that a plumbing plan system is very advanced, and its elements completely depend upon the environment and what kind of building you are currently working on. That being said, there are some of the most important elements and features that every plumbing drawing should possess. In most cases, plumbing drawings consist of water supply systems, stormwater systems, irrigation system drawings, and more. Typically, in every plumbing drawing, you will find some of the additional elements, like:
- A layout with dimensions, lines, and symbols representing all of the piping.
- Fixture schedules are properly marked, specifying the manufacturer and model for each item.
- All piping sizes include the layouts for cold/hot water, sanitary, vent lines, and more.
- A detailed document is about information related to the water heater, building plan, and requirements.
- One of the most important parts of a plumbing diagram is symbol legend, general notes, and specific keynotes.
In addition to this, other important information can be included in your plumbing system, like designs for special equipment, fire-protection notes, fire-sprinkler notes, drawings of water heater and floor drains, natural gas lines, and more.
3. The Types of Plumbing Plan
- Water Supply Plumbing & Piping System
In a building's architecture, a plumbing system consists of an underground tank with supply lines and a supplied water system. A well-defined water supply plumbing and piping system are responsible for delivering the water to your bathroom (showers, toilets, basin, bathroom) other house appliances (water heater, washing machine, gardening). As you see, the mechanism behind the water supply plumbing and piping system is essentially a system of water pipes, service valves, faucets, and fittings. Extra precaution should be taken when installing the water supply system because most of the time, these pipes and fittings are made of plastic, copper, or galvanized iron.
- Drain-Waste-Vent Plumbing & Piping System
GIn any household design or a commercial property, the most important plumbing system is the one that takes away the waste solid or liquid out of the building in the most effective way possible. As you see, the Drain-Waste-Vent or DWV plumbing system's job is to carry wastewater and sewage from sinks, toilets, showers, and other water-using appliances to the public sewer or septic tank.
- Kitchen Plumbing & Piping System
Another important piping system shows the kitchen plumbing. In most households, the kitchen plumbing and piping system are straightforward -- it should include hot and cold water supply lines to the basic faucets. In most urban household kitchens, you will also have piping systems specially dedicated to the dishwasher, disposer, instant hot water, and more.
- Bathroom Plumbing & Piping System
The bathroom is the primary area that uses most of the water in the house. Moreover, that is why you should do extra measures when creating bathroom plumbing and piping systems. As you should know, the bathroom plumbing and piping system must handle the removal of solid and liquid waste out of the bathroom. In order to make the bathroom plumbing and piping system work, you should have two different types of plumbing installed -- one that will handle the water supply inside the bathroom area, and the second one is dedicated to drain-waste-vent.
- Water Supply Plumbing & Piping System;
- Drain-Waste-Vent Plumbing & Piping System;
- Kitchen Plumbing & Piping System;
- Bathroom Plumbing & Piping System.
4. The Purpose of Plumbing Plan
The primary purpose of a good plumbing plan layout is to ensure that the residential and commercial property gets continuous and regular water supply without any drainage, leakage, or overflow. After creating a good plumbing diagram, you will understand how it helps the architects and builders to construct a building with no room for errors. In addition to this, a plumbing plan will assure that you do not have used any unwanted pipes or fittings in the rooms or other living areas.
A plumbing plan, in general, serves a much higher purpose, like:
- If you have created a plumbing plan, in the beginning, you can share it with your maintenance engineer in case you find some leakage or need to repair some pipelines.
- With the right plumbing diagram, you ensure that your rooms do not have any visible unwanted pipes.
- The plumbing plan helps you consider the project in detail, which helps you detect certain issues that were probably missed during the initial planning.
- With the help of your plumbing drawing, you can also correct plumbings from leaking, which could cause other severe damage to your property's strength.
- Plumbing and piping plans will save time and costs in the long run.
The primary purpose of a good plumbing plan layout is to ensure that the residential and commercial property gets continuous and regular water supply without any drainage, leakage, or overflow.
5. What Makes a Perfect Plumbing Plan
When it comes to a plumbing plan, you have first to understand that the design and elements it features vary from building to building. In addition to this, a perfect plumbing plan does not exist -- you have to sit down and make it one for you! Whatever design you make with the correct plumbing plan symbols and tools would be perfect if it serves its core purpose.
That being said, there are certain features and elements that your plumbing plan should always include, like:
- Your plumbing plan should have clear labeling and dimension.
- The plumbing drawing should be properly scaled as per the building.
- If you mention the details of the fittings, pipes, and faucets in the plumbing drawing, you ensure that everyone can easily understand it.
- Try to avoid multiple connection points, as it might result in leakage or some breakage in the future.
- Make your plumbing plan as simple as possible and avoid unnecessary faucet connections.
6. The Symbols of a Plumbing Plan
Just like any other architectural or building plan, there are hundreds of important plumbing plan symbols . These plumbing plan symbols are universal, which means that even if you have studied plumbing drawing in Australia and need to work on a project for a Londen-based house, then you can easily use the same symbols -- the only difference that you might find would be about certain notations.
We have listed out a couple of highly used plumbing plan symbols. Remember that these industry-standard symbols are readily available in EdrawMax.
- Major Pipeline: It is drawn as a long major pipe, used for conveying fluid over long distances.
- Battery Limit Line: It is a line that shows the battery limit.
- Electronic Serial: It is the serial for electronic devices.
- Butt Weld: It is a welding technique used in plumbing plans to connect parts that do not overlap.
- Boiler: It is a fuel-burning apparatus for heating water.
- Heating Coil: It is a special heating device that is shaped in a spiral design.
- Convector: It is also a heating appliance that circulates warm air by convection.
- Shower Head: It is a bathroom device that is connected at the end of a water source that disperses water to provide an even flow.
7. How to Read a Plumbing Plan?
Since the entire plumbing plan is located behind the walls, prepare a plumbing diagram reflecting the walls as transparent elements. As for the underground piping plan, the 2D or 3D illustration must depict some essential elements, like the sewer and municipal water line. At the same time, you should always include the symbols to make the plumbing plan highly readable and technically correct.
In addition to this, there are several other important points that you need to consider in order to read the plumbing plan correctly, like:
- Understand to read the different types of water supply lines, drains, vent pipes, and fixtures.
- Make a note of all the important plumbing plan symbols that will help you understand the piping system in detail.
- Learn to see if the following three parts are included in the plumbing system or not:
- An adequate potable water supply;
- A safe and adequate drainage system; and ample fixtures and equipment
- Understand to read the different types of plumbing plan;
- Make a note of all the important plumbing plan symbols;
- Learn to see if an adequate potable water supply, a safe and adequate drainage system, and ample fixtures and equipment are included in the plumbing system or not;
8. Requirements for Plumbing Plans
Before you sit down to create commercial or private plumbing and piping plans, you need to consider several components. For instance, you should have a proper idea about the building's occupancy and plumbing fixture requirements. Once you have noted plumbing fixtures, you can start working on the restrooms, washing systems, food services areas, and more.
In addition to this, there are several other important requirements for a plumbing plan, which are:
- Understanding and execution of lines and symbols that represent the pipework.
- A detailed symbol legend alongside the required notes and descriptions.
- The detailed description of pipes, sanitary, and vent lines.
- Multiple diagrams illustrating water risers and sanitary stack.
- All the detailed information about the usage of the water heater.
- If possible, mention the details of the manufacturer and model for each fixture that you plan to include in your plumbing plan.
- Understand the lines and symbols;
- A detailed symbol legend alongside the required notes and descriptions;
- Multiple diagrams illustrating the plumbing plan;
- All the detailed information about the usage of the water heater;
9. Preparations Before Starting Plumbing Plan
Now that you have decided to create a plumbing plan for your building or your client's commercial complex, you should note a couple of things before you start working on the layout and fixtures.
Remember that every piping plan is different. So, you might need to exclude a couple of points from the following list. However, the zest of creating a plumbing plan will remain the same. Some of the things that require your attention as you start creating a plumbing diagram is:
- List of Rooms
Ensure that you have proper information about every household room. It will give you an understanding of where the water supply is needed, and which room (like bathroom and kitchen) will have the surplus amount of plumbing fittings. In addition to this, if you need a separate laundry room, you must know where you plan to construct it beforehand.
- Water Outlets
Once you have the proper understanding of the rooms, you need to identify the number of water outlets you will require and at which places you want them to install them.
- Scalability
It is always advised to consider the future when you start your plumbing plan. Along with your current requirement, you should consider what you might need in the future. For instance, you might wish to have multiple water outlets to create another room on it shortly. If you have not considered the future, then when you start working on the new room, you might have to create the entire plumbing from scratch, resulting in unnecessary loss of money and effort.
- Be Practical
You should be well aware that your design and planning should be practical. Instead of going ahead and asking your architect to do all the work for the building, you can take the command and create your plumbing plan using EdrawMax.
Only have a detailed preparation can people to have a good base of plumbing plan. Once have prepared the plumbing and some other elements, you may move into next step.
- Consider that you have proper information about every household room;
- Consider the number of water outlets you will require and at which places you want them to install them;
- Consider the future when you start your plumbing plan;
- Consider that your design and planning should be practical.
10. How to Design a Plumbing Plan in General
There are two ways to draw a plumbing plan for your system -- one is an old way where you draw a layout on the paper, add everything manually, and then consult it with your architect to see if everything is in the right order. The other way is to draw the plumbing plan using power-packed tools, like EdrawMax.
Before we help you create a plumbing plan in EdrawMax, let us show you the traditional ways of drawing the plumbing plan for your private and commercial complex.
Step 1: Understand the layout
Just like every other building plan, you need to have a proper understanding of the layout of the building. Make a layout and learn which areas need advanced plumbing, like bathroom and kitchen. Also, make a list of the equipment you might need to create the plumbing plan.
Step 2: Make Copies
If you already have some architectural drawings, ensure you make several photocopies of them. A gridded straightedge illustration will help you draw parallel lines. In addition to this, you will require color pencils, 30-60-90-degree triangles, erasers, and blank pages. You can use the grid paper to establish the correct scale.
Step 3: Add Fixtures
When you start drawing the plumbing plan, first add all the fixtures to scale size and ensure they are not too close with each other. Do not forget to add the drain lines and vents for the fixtures, followed by the supply lines. You can also make water riser drawings to show vertical pipe runs.
Step 4: Indicate Pipe Sizes
Once you have added the fixtures, you can now indicate the pipe sizes and the exact type of every fitting so your architect can check and confirm. It is always advised to indicate the locations for valve fixtures and specify the type of valve you might use in the building.
Step 5: Use Color Codes
To avoid unnecessary confusion and clutter, start using codes in your map. Show drain pipes with solid lines and supply lines with broken lines. In addition to this, you can indicate vertical runs with notes on the overhead view.
Step 6: Add DWV
Always add a drain-waste-vent elevation that will describe the upward path of the stack and vents.
- Have a proper understanding of the layout of the building;
- Add all the fixtures to scale size and ensure they are not too close with each other;
- Indicate the pipe sizes and the exact type of every fitting;
- Using codes in your map;
- Add a drain-waste-vent elevation.
11. How to Design a Plumbing Plan in EdrawMax
Now that you have seen the process of drawing a plumbing plan using the old-age ways let us walk you through the easy way to create a plumbing plan. With EdrawMax, creating a plumbing plan is extremely easy. With free templates, symbols, scalable options, and remote collaboration, you can draw a plumbing plan in a couple of minutes.
Following are the basic steps you need to follow to create the plumbing plan for your building. It should be noted here that some of the steps may change or upgrade depending upon your requirement, but the zest of designing the plumbing system will remain the same.
EdrawMax
All-in-One Diagram Software
- Superior file compatibility: Import and export drawings to various file formats, such as Visio
- Cross-platform supported (Windows, Mac, Linux, Web, Android, iOS)
Step1 Open EdrawMax and Login
If you are using the offline version of EdrawMax, then open the tool in your system. If you wish to have remote collaboration, head to https://www.edrawmax.com/online/ and log in using your registered email address. If this is your first time using the tool, you can register yourself using your personal or professional email address.
Step2 Template Selection
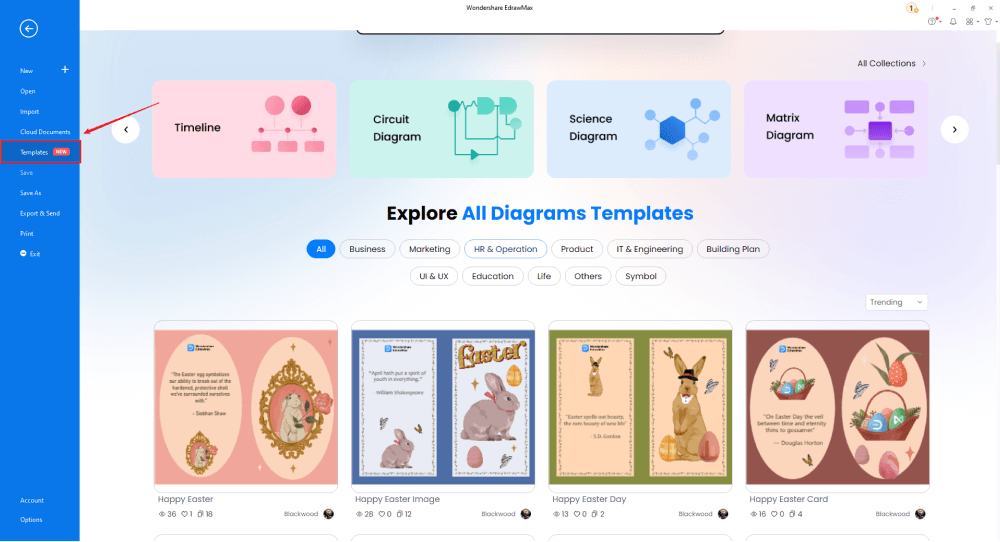
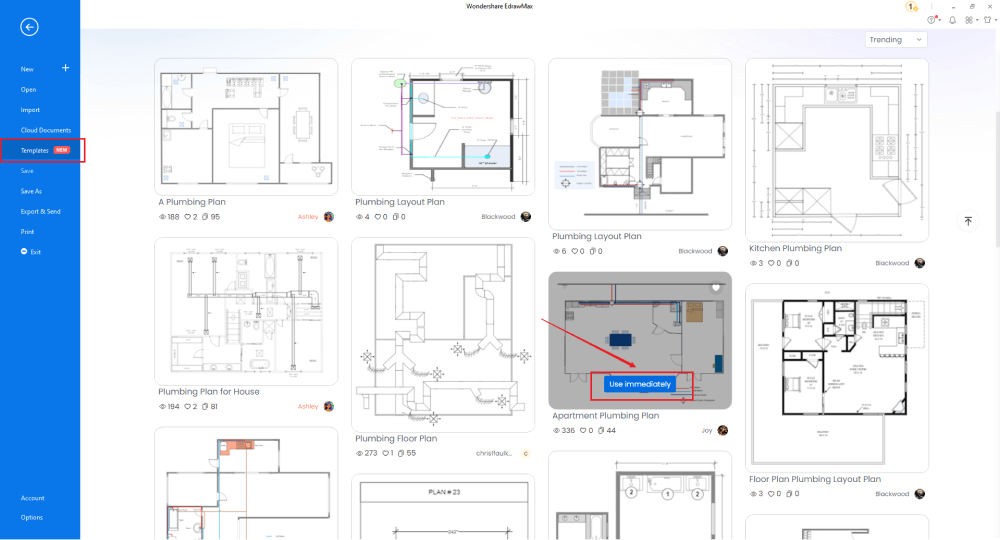
If you need to access the free plumbing plan templates, click on the Templates option from the left panel of the EdrawMax tool and type Plumbing Plan in the search bar. You will see hundreds of free plumbing plan templates readily available at EdrawMax. Click on any of these templates and start customizing them as per your requirement. Alternatively, you can also click on Building Plan on the left side of the diagram panel. It will open up different diagram types, like Floor Plan, Electrical and Telecom Plan, Seating Plan, and more. Click on Plumbing and Piping Plan. It will open up Plumbing and Piping Plan templates for you.
Step3 Create from Scratch
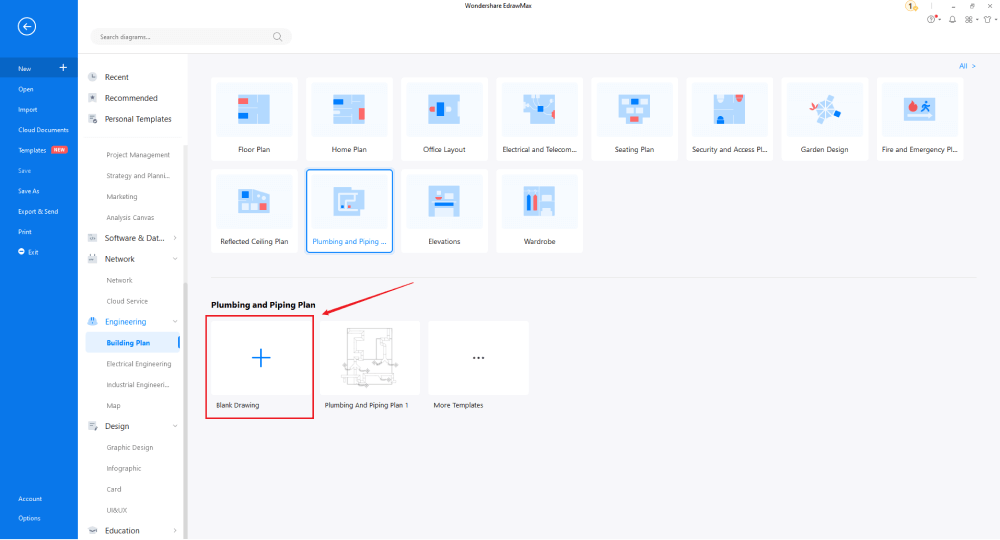
In order to create the Plumbing and Piping Plan from scratch, click on Building Plan, which you can find on the left panel of the tool. Upon clicking, you will see a list of different Building Plans that you can create with EdrawMax, like Floor Plan, Home Plan, Office Layout, and more. Click on Plumbing and Piping Plan and select the free template or click on + to design the Piping Plan from scratch.
Step4 Select the Symbols
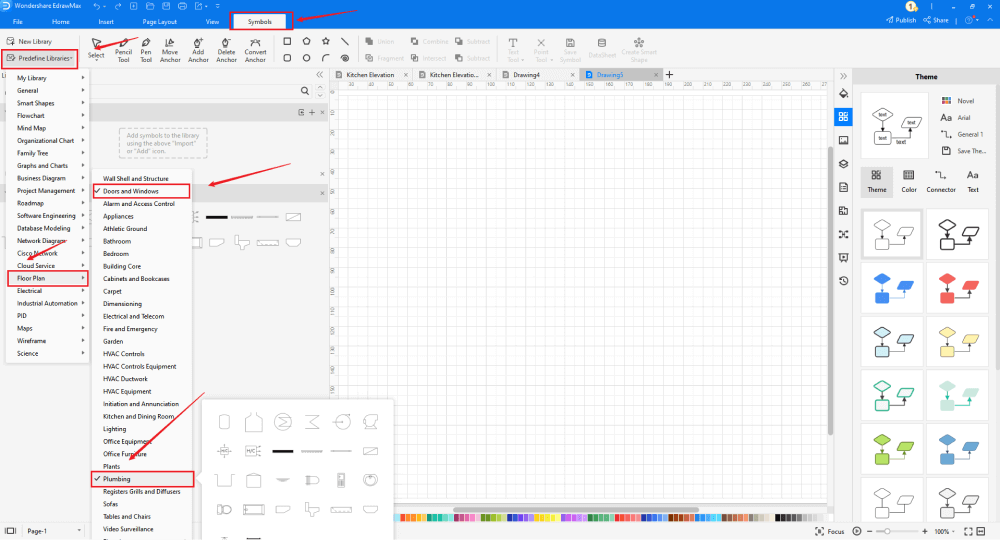
In order to use the Piping Plan symbols, you need to select the Symbols tab from the toolbar. From there, click on Predefined Libraries> Floor Plan, and then select the Piping Plan symbols that you need. From the left side of the drawing screen, you will now easily access and insert these vector-enabled Piping Plan symbols, like Pump, Heater/Cooler Horizontal, Toilet (Side), Heat Exchanges, and more.






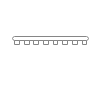



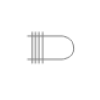


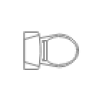



Know more about plumbing symbols, and try to drag and drop the symbols you want to customize your plumbing plans.
Step5 Add Components
Now that you are on the drawing canvas, you can create the Piping Plan. Remember to add additional components and equipment you deem fit for the building.
Step6 Export or Share
Once your Piping Plan is ready, you can easily share it using EdrawMax's special sharing feature. This Piping Plan maker lets you export your file in multiple formats, like JPEG, PNG, PPTX, PDF, and more. In addition to this, you can easily share the Piping Plan via email or on different social media platforms, like Facebook, Pinterest, Line, and LinkedIn.

Basically, it is simple to create a plumbing plan in EdrawMax, just grab a template and keep customizing, drag and drop professinal plumbing symbols to make your plan better. If you are still confusing about how to make a plumbing plan in EdrawMax, just check this plumbing plan guide, or check the video below. Or you can find more tutorial videos from our Youtube
12. The Plumbing Plan Examples & Templates
There are 4 examples of plumbing plans that you can refer or use immediately. Just click the image to download EdrawMax, and download the templates accordingly. Then double click to open the templates and customize as your prefer. Or open the templates from EdrawMax Online , and duplicate the templates. Click this plumbing plan examples to get more inspirations.
Example 1: Plumbing Floor Plan
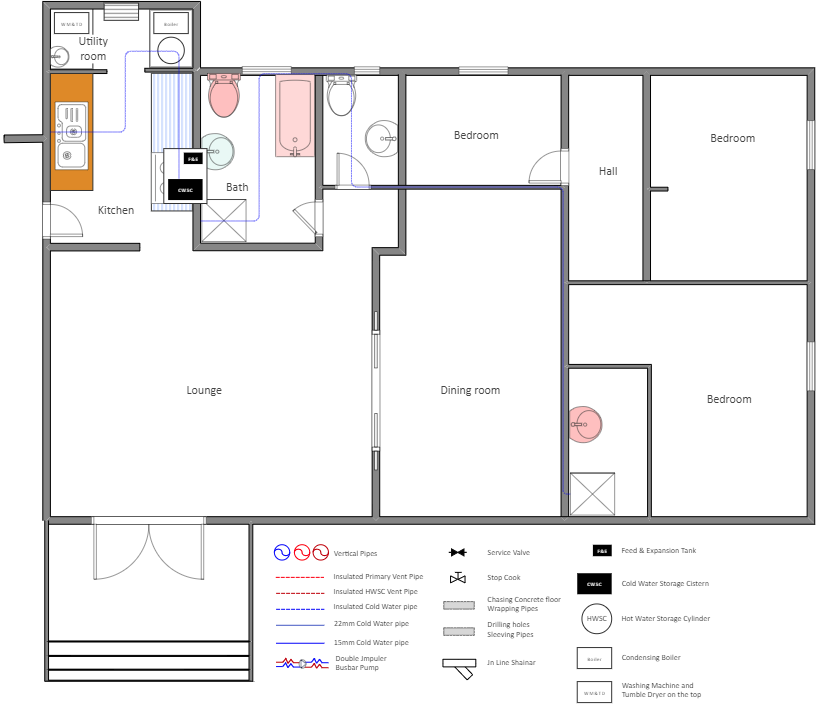
The following plumbing plan diagram shows the plumbing system of the entire residential property. As you can see here, we have multiple rooms, bathrooms, and one huge kitchen. All these places require multiple piping systems to ensure that water flow in and out of the residential property remains unhindered. As you can see, we have used dark dotted lines to show insulate primary vent pipe, red-colored dotted line as insulated HWSC vent pipe, blue-colored dotted line as insulated cold water pipe, thick red line as 22mm primary flow pipe, light green line as 15mm primary flow pipe, dark blue line as 22mm primary return pipe, and light violet-colored line as 15mm primary return pipe. In addition to this, we have added multiple important symbols that are visible in the legends, like Service Valve, Circulating Pump, Radiator, Condensing Boiler, and more.
Example 2: Toilet Plumbing Plan
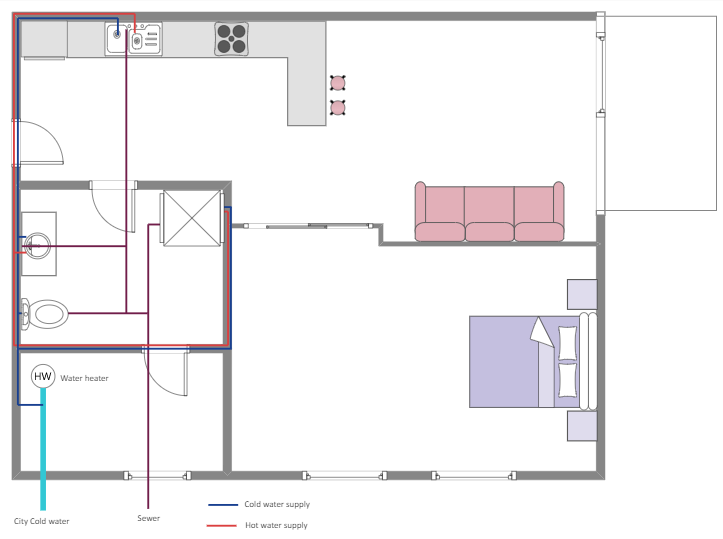
The following is a toilet plumbing plan system created in EdrawMax. As you can see from the legend, we have mentioned the hot and cold water supply in addition to the waste removal system of the apartment. At the same time, we have added several important bathroom symbols, like a bathtub, basin, toilet, towel rain, boiler, shower head, and more. Since the hot water comes from the boiler, there is a line going to the sink unit, located in the far-away corner of the apartment. In most apartments, the sink unit and boiler are installed on the terrace.
Example 3: Kitchen Plumbing Plan
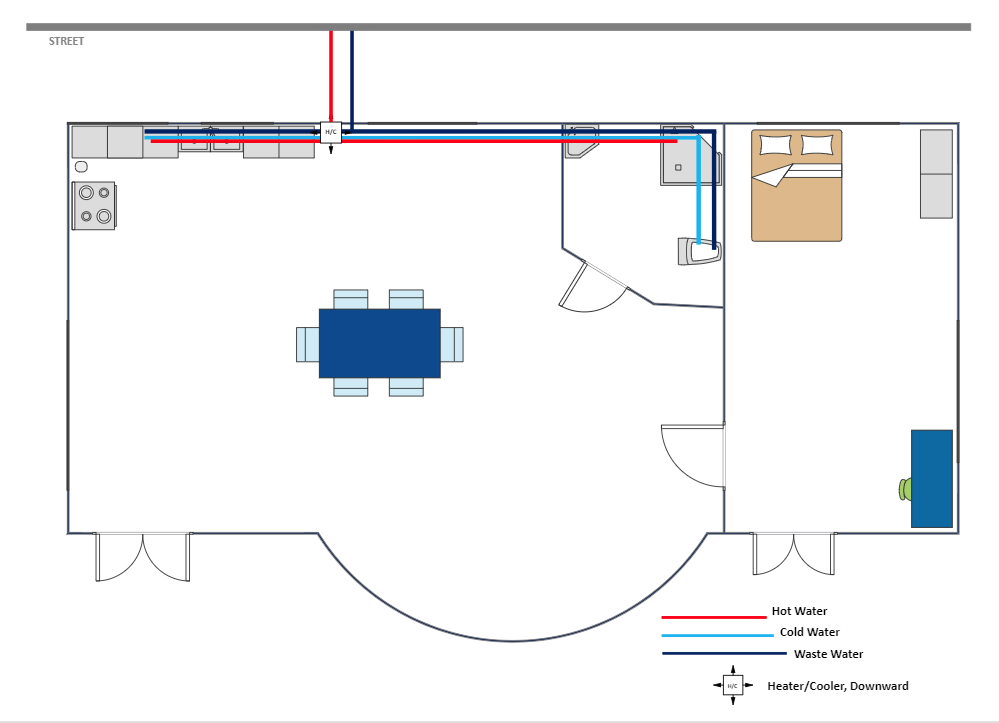
In the following kitchen plumbing layout, we see the important fixtures and faucets installed in the kitchen area. As per the legend section, you can see we have added an in-line valve, water heater connection, water pump at the sink, hot water, cold water, and gray water. In most kitchens, the gray water outlet signifies the waste removal system. Depending upon your kitchen's size and resources, you can have more than one faucet installed. Do not forget to add the legends in the kitchen plumbing system, as it will be helpful to others to understand your plumbing plan in detail.
Example 4: First Floor Plumbing Plan
The plumbing plan layout shows the ground and the first floor of a building. In order to show all the fixtures and the entire drainage systems, you have to indicate them as being on one plane, even though they are located in different parts of the building. All fixtures are trapped and vented and otherwise conform to the code's requirements. With the help of EdrawMax, you can easily create a similar-looking multi-floor plumbing plan diagram.
13. Free Plumbing Plan Software
In this elaborated guide to understand the plumbing plan, you see how easy it is to draw a plumbing system using EdrawMax . You might find other tools in the market that are designed and developed to create plumbing plans. However, unlike other tools, you can create over 280 different diagrams in EdrawMax. With this all-in-one tool, you can design, create, publish, and share all the different kinds of floor plans, HVAC layouts, garden plans, plumbing, and piping plans, reflected ceiling plans, and more.
In addition to this, EdrawMax has several hundred features that let you create and easily share different types of plumbing plans with your prospective clients and architects, like:
- EdrawMax has a user-friendly user interface, making it extremely easy for a beginner to look for different drawing tools;
- EdrawMax comes with thousands of free templates. You can easily find the diagram template in the template community that you are looking to customize;
- EdrawMax comes with over 50,000 vector-enabled symbols, which are fully resizable, recolorable, and reshapable;
- One of the most important points of creating a plumbing plan is to understand the dimension and scale of the layout. With EdrawMax, you can change the dimension and shapes of any imported symbol, shape, icon, image, or even the free template;
- With EdrawMax, all of your designs are stored in the fully-encrypted personalized cloud.
14. Final Thoughts
Some of the essential tips that come in handy while creating a plumbing system are understanding all the symbols, shapes, and designs that you might use while creating the plumbing plan. At the same time, you should have access to a tool that lets you create technically correct dimensions and shapes of the floor plan that you will use to create the plumbing plan.
As you learned in this plumbing plan, EdrawMax not only lets you create a plumbing system for your building by giving you access to templates designed by over 25 million users. It also lets you have real-time collaboration with your team to change the template theme and even update or modify the color scheme. In an EdrawMax, you can create floor plans, reflected ceiling plans, HVAC layouts, security access plans, and more, all in one single canvas board. All the plumbing plans you design in EdrawMax are technically correct, which means that all the symbols and fixture designs you make in the tool can be scaled to the real-life building. All in all, EdrawMax is a powerful tools that are easy to use by beginners and professionals alike.
Floor Plan Complete Guide
Check this complete guide to know everything about floor plan, like floor plan types, floor plan symbols, and how to make a floor plan.
You May Also Like
Security Access Plan Complete Guide
Knowledge
Landscape Plan Complete Guide
Knowledge
Table Plan Complete Guide
Knowledge
Seating Chart Complete Guide
Knowledge
Office Layout Complete Guide
Knowledge
HVAC Plan Complete Guide
Knowledge


 below.
  below.
