EdrawMind User Guide
Features of EdrawMind
What is EdrawMind?
EdrawMind is a cross-platform, multi-functional mind mapping software under Edraw Software. It is a comprehensive solution to help anyone become a mind map design expert in the shortest time possible! EdrawMind has both free trial and professional versions, enabling access to beginners and experts. The software provides a wealth of intelligent layouts, diverse display modes, combined with exquisite design elements and preset theme styles, and strives to help users achieve efficiency. Since its launch, it has been welcomed by the majority of users and has been widely used in problem solving, time management, business strategy and project management.

Features of EdrawMind 10.0
1. Rich Templates: EdrawMind comprehensively covers all relevant fields. Novel designs and diverse styles have become the core competitiveness of EdrawMind.
2. Gantt View in Task Management: The Task Management feature allows users to manage project tasks in both mind map mode and Gantt chart mode.
3. Slide-based Presentation: The slideshow feature offers the perfect combination of mind maps and presentations. It allows slideshow pages to be created automatically with just one click.
4. Styles and Themes: EdrawMind provides a variety of beautiful themes and layouts for users to choose from. Fonts, shapes, colors and line sizes etc. are carefully designed to suit different styles.
5. Powerful Toolbar :
- Relationship Line: Users can insert relationship lines between two subjects to establish an informal relationship. EdrawMind will automatically adjust the position of the arrow direction, and the user can modify the shape, color and description text of the relationship line.
- Callout: A callout represents additional information on a specific topic that can form its own branch.
- Outer Frame: Outer frames are used to emphasize the connection between topics and subtopics, and outlines are inserted around an area on the map to group specific topics to emphasize specific content. EdrawMind provides different styles of frames for users to choose from.
- Summary: This feature summarizes a set of subtopics into a single profile topic and allows that topic to expand again.
- Icon: Icons use unique visual elements to help explain the subject content, giving the mind map a vivid viewing experience. EdrawMind has many preset icon groups, and users are also able to create custom icon groups to suit their styles.
- Clip Art: EdrawMind’s clip art gallery contains 700+ professionally designed clip arts to help users make mind maps with breathtaking visual experience.
- Picture: Users can select any picture from the computer and insert it into the mind map. Oversized images can be compressed to fit the size of the mind map while still preserving its quality and clarity.
- Hyperlink: Hyperlinks act as external files, including URLs, other files, specified graphics or pages of the current file, and folders. Use hyperlinks to avoid cluttering the mind maps when inserting or copying information. Users will also be able to see the updated file or page every time they click a hyperlink.
- Appendix: Users can insert external documents into the topic as part of the mind map.
- Notes: Mind maps are readable because they are concise and to the point. For topics that require more detail, comments can be inserted to supplement the information, and this feature also supports formatted text and images.
- Comment: Users can choose to insert comments in subtopics to prompt the topic.
- Label: In the Task Management function, users can insert tags into topics to mark task information, and the tagged text will be displayed below the topics.
- Formula: EdrawMind supports the insertion of LaTeX formulas and EdrawMath formulas to meet academic needs.
- Sheet: Insert tables directly in the topic, and customize the color, font size, etc. of the table.
6. Rainbow Color: The Rainbow Color function allows users to switch the color-matching mode of the mind map easily.
7. Hand-Drawn Style: EdrawMind allows users to switch maps from conventional styles to hand-drawn styles with just one click.
8. Outline Mode: Outline Mode enables users to understand mind map content at a glance in text outline format.
9. Document Encryption: EdrawMind file encryption protects files from being infringed and viewed at will.
10. Drill-Up / Drill-Down: Collapsing or expanding topics with the drill-down feature helps mapmakers focus on a specific topic without getting distracted by other topics.
11. File Recovery: If the software is closed unexpectedly and the file is not saved in time, EdrawMind can still restore unsaved mind map files.
12. Sharing: Users can post mind maps directly to social media via a shareable link.
13. Import: EdrawMind allows users to import mind maps made by other software, such as MindManager, FreeMind and Edraw, etc. It also supports Word, HTML, Markdown and other formats to quickly generate maps.
14. Export: EdrawMind supports exporting files to various image formats, as well as file formats such as PDF, Word, Excel, PPT, Html, SVG, and MindManager.
15. Hot-Keys: Various and complete shortcut key operations will greatly improve the user's drawing efficiency.
16. Brainstorming: The Brainstorming feature provides a platform for creative collection for teams as well as an immersive creative environment for individual users.
17. Mapping Community: The map community brings together tens of thousands of original mind map works, which are convenient for users to refer to.
PC Client
EdrawMind has a PC Client (supports MacOS, Windows and Linux), an APP (supporting iOS and Android) and a web collaborative version.
The EdrawMind PC client supports MacOS, Windows and Linux. This version has powerful functions, which can not only customize the color, line, font, etc. of the map layout, themes and branches, but also have functions such as Outline Mode, Gantt Mode, and Brainstorming Mode.
APP
The APP can be searched and downloaded in major app stores, and it supports iOS and Android systems. Just log in to the same account, and the Edraw Mind Map APP can synchronize the cloud files of the computer client in real time, supporting editing and sharing anytime, anywhere.
Web Collaborative Edition
In the network environment, users can use the online collaborative version by visiting https://www.edrawmind.com/app/create. The online collaboration version has three major advantages: automatic saving, multi-person real-time online collaboration, and team management.
Installation and Uninstallation
Installation
Visit https://www.edrawsoft.com/download-edrawmind.html to download the installation package of Edraw Mind Map. After the download is complete, double-click the file with the extension .exe to install it. Users can find different installation and uninstallation methods on the download page for Windows, Mac OSX and Linux.
Uninstallation
You can click Unins000.exe in the installation folder to completely remove the program.

Activation and Deactivation
Activation
After the software is installed successfully, enter the user’s name and product key and click the "Activate" button to activate the software.
If the user has not obtained the product key, they can go to the official website https://www.edrawsoft.com/edrawmind/ and click "Buy Now" to get it.
The operation steps are as follows:
- Run EdrawMind.exe on the computer as Administrator.
- Click "File" in the menu bar, and then click "Account" in the lower left corner.
- Click the “Activate” button in the “Account” menu.
- Enter a username (any name will do) and the product key.
- Click “Activate” to run the Activation Wizard.


Deactivation
Deactivation is mandatory if the user wishes to move the EdrawMind software to another computer. Please note that deactivations can only be done once every 30 days.
The deactivation steps are as follows:
- Under the "File" - "Account" menu, click "Deactivate".
- Once deactivated, the EdrawMind software currently on the user’s computer will be converted to an unlicensed version that can now be activated and used on other devices.

Registration and Login
Users can register an EdrawMind cloud account and log in to use or share their mind maps.

The software currently supports multiple ways to register and log in, including Google Account, Facebook, Twitter, etc.

Check For Updates
- Click "File" in the menu bar, and then click "Account" in the lower left corner.
- "Check for Updates" in the "Account" menu.
- EdrawMind will automatically check and update the software to the latest version.

User Interface and Ribbon
EdrawMind is the place to create and edit maps. Start Edraw Mind Map and click on "Blank Template" to enter the drawing window. The figure below shows the complete interface of the drawing window, including the start menu, the quick access toolbar, the ribbon, the right sidebar and the bottom status bar.

Adjusting Skin Interface
The user interface supports two styles, either light or dark.Users can toggle this option in the upper right corner of the new page.

Dark Style

Light Style

Set Frosted Glass Effect
EdrawMind 10.0 supports setting frosted glass effects.
Click "Options" - "General" in the lower left corner of the new page, and Select “Frosted Glass Opacity”. Users can set different opacity of the frosted glass effect.
Quick Access Toolbar
The Quick Access Toolbar gives users quick access to frequently-used tools.
From this toolbar, users can also use the functions of “Undo/Redo”, “Create New Map”, “Open File”, “Save”, “Print” and “Export File”. They can opt to hide or customize any of the Quick Tools buttons by clicking the down arrow on the right, and choose to place the Quick Access Toolbar at the top or bottom of the ribbon.

Ribbon
1. Start Menu
From the “Start” menu, users can insert topics, relationship lines, callouts, icons, outlines, clip art, pictures, formulas, hyperlinks, attachments, notes, comments or labels. Outline Mode can also be found here.

2. Page Style Menu
In the “Page Style” menu, users can set the format and style of the mind map, including setting the topic, customize topic, topic font, topic color, rainbow color and hand-drawn effects, map background and custom watermark.

3. Slideshow Menu
In the “Slideshow” menu, users can create slideshows page by page, or they can leave it to EdrawMind to automatically generate slideshows based on branches.
After the slideshow is generated, the content in the page is editable, and users can export the slideshow to PPT or print it out.

4. Advanced Menu
In the “Advanced” Menu, users can create, edit and export Gantt charts, as well as set the margin and width of the topic. It also supports setting operations for the different version history of the file, recovery status, encryption status, etc. Document spell-checking is also available from this menu.

5. View Menu
In the “View” Menu, users can choose to display the mind map in different views, whether to show a topic or branch individually. They can also zoom in or out on the map, and fit the map to the interface size with one click.

6. Help Menu
In the “Help” menu, users can easily find relevant guides for reference, including novice guides, graphic tutorials, video tutorials, shortcut keys, intelligent customer service etc.

Right-Side Panel
There are five toolbars in the right panel, namely the Page Style Bar, Topic Style Bar, Icon Bar, Clip Art Bar and Version History Bar.
1. Page Style Bar
In the Page Style Bar, users can change the overall style of the map, including layout, color, theme, and rainbow colors. They can also set the map background and watermark to switch the map to a hand-drawn style.

2. Topic Style Bar
In the Topic Style Bar, users can set fonts, borders, branches, colors, shadows, rounded corners, etc. for their topics. That way, users can edit their own central topic and branch topics as they like, and they can also add numbers to branch topics.

3. Icon Bar
In the Icon Bar, users can see common icons for mind maps, such as priority, progress, arrows, flags, and stars. Inserted icons can also be customized and grouped by clicking the icon management button in the upper right corner of this bar.

4. Clip Art Bar
To use Clip Arts, users can search by category in the clip art library, or they can enter a keyword search in the search box at the top of this bar.

5. Version History Bar
In the Version History Bar, users can see the previous versions that have been automatically saved in the past, and they can also manually create new versions. That way, users will need not worry that their files will be lost.
(Note: The Version History function only supports cloud files.)
Multiple Pages
Build multiple pages into a mind map file, making the content of the file richer and more systematic.

Operating System Requirements
- Windows 7, Windows 8 and Windows 10
- Mac OS X 10 and above
- Linux (Debian, Ubuntu, Mint , Deepin Linux , Kylin OS)
- At least 1 GB RAM
- At least 400 MB free hard disk space
More
Should there be any additional questions, please send an email to support@edrawsoft.com.
Inserting Topics
Topics can be inserted in two ways:
- Press the "Enter" key on the keyboard;
- Under the "Start" menu, click the "Topic" button and select the appropriate level to insert.
- Insert topic (Enter): Insert the same level topic after the selected topic.
- Insert topic (before) (Shift + Enter): Insert sibling topic before the selected topic.
- Insert parent topic (Shift + Insert): Insert parent topic for the selected topic.
- Use the “Insert Multiple Topics" button.

Note: There are three options in the “Insert Topic” drop-down menu:
Inserting Subtopics
Subtopics can be inserted in three ways:
- Select a topic and press the "Tab" key, "Insert" key or "Ctrl + Enter" key on the keyboard.
- Select a topic and click the "Insert Subtopic" button under the "Home" menu.
- Use the “Insert Multiple Topics" button.
Inserting Floating Topics
Independent topics that are not related to the structure of the mind map can be inserted in the following ways:
- Press the “Alt + F” on the keyboard and place the cursor on the place to insert the floating topic.
- Under the "Home" menu, click the "Floating Topic" button.
- Double-click on the page to add floating topics directly. (If users do not need to generate the floating topic effect through double-clicking, they can turn off this setting in "Options" - "General")

Inserting Multiple Topics
If users want to insert multiple topics at once, they may consider using the "Insert Multiple Topics" function.
- Under the "Home" menu, click the "Insert Multiple Topics" button, or press "Ctrl+M" on the keyboard.
- In the pop-up "Insert Multiple Topics" dialog box, enter the topic text of the corresponding topic in each line. Press the "Enter" key on the keyboard to wrap the line or press the "Tab" key to indent the level.
- After entering all the subject text that needs to be inserted, click "OK".

Shortcuts for Inserting Topics
| Insert | Hot Key |
|---|---|
| Central Topic | Automatically Created |
| Subtopics (Created From A Central Topic) | Enter |
| Sibling Topic | Enter |
| Subtopic | Tab /Insert / Ctrl + Enter |
| Parent Topic | Shift + Insert |
| Floating Topic | Alt + F + Mouse Click |
| Multiple Topics | Ctrl + M |
| Subject (Before) | Shift + Enter |
Moving Topics
To move a topic, users can drag the topic to the target position with their mouse, or use the shortcut keys to move the topic up, down, left or right to the same level.
Drag and Drop to Move the Topic
Users can freely move the topics on their mind map by simply clicking and dragging it to a new position. In addition to the central topic, any topic and topic branch can be rearranged and moved under any parent or child topic.

Shortcuts for Moving Topics
| Action | Hot Key |
|---|---|
| Move Up One Position | Ctrl + Shift + Up |
| Move Down One Position | Ctrl + Shift + Down |
| The Beginning Of The Same Topic | Ctrl + Shift + Home |
| The End Of The Same Topic | Ctrl + Shift + End |
| Move To Left Of Parent Topic | Ctrl + Shift + Left Arrow |
| Move To Left Of Parent Topic | Ctrl + Shift + Right Arrow |
Deleting Topics
Deleting Selected Topics
Users can delete a selected topic while still retaining its subtopics.
- Select the topic to be deleted.
- Right-click and choose "Delete Selected Topic" in the pop-up window. The selected topic will then be deleted.
- The remaining subtopics will be automatically retained to the previous level.

Deleting Selected Topics and Its Subtopics
Users can delete the selected topics and their entire branch with one-click, including subtopics and all annotations for that branch.
- Select a topic.
- Right-click and choose "Delete Topic" in the pop-up window.
- The topic and the entire branch will be deleted.
Cut, Copy And Paste Topics
Using the copy and paste feature, users can quickly copy a topic or branch and paste it as a floating topic or a subtopic of a selected topic.
- Select the topic or branch to be copied.
- Under the "Home" menu, click the "Copy" button, or press "Ctrl + C" on the keyboard.
- Select a topic at the desired location, or click an empty space in the action window, then click the "Paste" button, or press "Ctrl + V" on the keyboard.
Notice: The topic position can be changed by "copy" and "paste".
Edit Topic Content
Topic content can be edited by double-clicking on the topic shape.
Below are shortcuts to help users quickly edit their topic content.
| Action | Hot Key |
|---|---|
| Start Edit Mode | F2 |
| Start Edit Mode with Cursor at the End of Topic Text | Space |
| Start edit mode with Cursor at the Beginning of Topic Text | Shift + Space |
| End Edit Mode | Enter / Esc |
| Wrap Line In Topic | Shift + Enter / Ctrl + Enter / Alt + Enter |
| Move to the Beginning of Current Line | Home |
| Move to the Beginning of Topic Text | Ctrl + Home |
| Move to the End of Topic Text | Ctrl + End |
| Cancel Editing | Esc |
| Find And Replace | Ctrl + F |
| Find Next | Enter |
| Spell Check | F7 |
Select Topic
Topics can be selected by topic type or level. Right-click and choose the topic accordingly.
- All Topics
- All The Same Type of Subject
- All Sibling Topics
- All Parent Topics
- All Branches
- Next Level
- All Relationship Lines
- All Frames
- All Summaries
- Topics On All Profiles
- All Floating Topics
- All Callouts
- Invert Selection

Find Topics
Quickly find text in topics, tags, notes, or comments.
- Use the keyboard shortcut "Ctrl + F".
- Open the "Start" menu, click the "Find and Replace" button, enter the subject content to be searched, and click the "Find" icon on the right side of the input box.

Inserting Pictures
Pictures can improve the visual effect of mind maps. Users can insert pictures in various formats into EdrawMind as it supports JPG, PNG, ICO, BMP, and TIF etc.
- Select the topic to insert the picture (if no topic is selected, the picture will be inserted on the floating topic).
- Click the "Insert Picture" button under the "Start" menu, or right-click the selected topic and select "Insert Picture" in the dialog box.

Inserting Images from Local Files
- Select an image from a local file.
- Click "Open".
- Drag the control points at the corners of the image to resize the image.
Inserting Attachments
EdrawMind supports inserting attachments, which will be automatically saved in the mind map.
- Select a topic or subtopic.
- Click "Insert Attachment" under the "Start" menu, or right-click the selected topic and select "Insert Attachment" in the pop-up dialog box.
- Click the "Path" icon to select a file.
- If necessary, users can rename the attachment in the "Name" column.
- Click the "New" button and repeat the above steps to insert more files.
- After selecting a file, click "Delete" to delete the attachment.

Notice:
- After inserting an attachment in a topic, the attachment icon will be displayed on the right side of the topic. Hover the cursor over the icon to see the name of the attachment, and click the name of the attachment to open the attachment.
- 2. Inserting Attachments Quickly: Drag the file to the canvas, and click "Add as attachment".


Viewing Attachments
Click on the attachment to view the content of the attachment.

Editing Attachments
Move the cursor to the attachment, right-click and select "Edit" to edit the content of the attachment, the file name, path, file order, etc.


Deleting Attachments
There are two ways to delete an attachment. Users can right-click the attachment and select Remove to remove the entire attachment. Alternatively, if users want to delete a single file in the attachment, they can do so by right-clicking and selecting “Edit” to enter the attachment editing bar and click the corresponding single file to delete it.

Inserting Hyperlinks
Hyperlinks act as external files, including URLs, other files, specified graphics or pages of the current file, and folders. Use hyperlinks to avoid cluttering mind maps when inserting or copying information, and to ensure that the updated file or page can be seen every time a hyperlink is clicked.
Hyperlinks can link to any of the following:
- A Topic in the Current Document.
- Files or Applications.
- Internet URLs.
- Folders.
- Cloud Files or Topics of Cloud Files.
Inserting Hyperlinks - Current Document
- Select the topic to insert a hyperlink.
- Under the "Start" menu, click "Insert Hyperlink", or right-click the selected topic and select "Insert Hyperlink" in the pop-up dialog box.
- Select the current document.
- Select a topic shape from the drop-down menu in the Shape column and click “OK”.
- To insert multiple topic-shaped hyperlinks to the same topic, click the "New" button and repeat the steps above.

Inserting Hyperlinks - Internet URLs
- In the "Hyperlink" dialog box, select "URL" in the file category on the left.
- In the "Address" box, type the address of a website, FTP site, or email address (starting with http://, ftp:// or mailto, respectively).
- In the "Description" box, enter a name for the link, and this text will appear on the hyperlink icon. Click "OK".
- To insert multiple topic-shaped hyperlinks to the same topic, click the "New" button and repeat the steps above.

Insert Hyperlinks - Files or Applications
- Select "File or Application" in the file category on the left side of the "Hyperlink" dialog box.
- Click Browse and navigate to the file to insert.
- In the "Description" box, enter the name of the file or application that will appear on the hyperlink icon.
- To insert multiple topic-shaped hyperlinks to the same topic, click the "New" button and repeat the steps above.
- Click "OK".

Viewing, Modifying or Deleting Hyperlinks
- Viewing: When there is only one hyperlink, click the "Hyperlink" icon to jump to view. When there are multiple hyperlinks, click the "Hyperlink" icon to expand the hyperlink list, and click the corresponding content to jump to view.
- Modifying: When there is only one hyperlink, right-click the "Hyperlink" icon on the right side of the topic. When there are multiple hyperlinks, right-click the "Hyperlink" icon, and modify the relevant information in the pop-up "Hyperlink" dialog box, click "OK".
- Deleting: Click the "Hyperlink" icon in the upper right corner of the topic, select the hyperlink to be deleted in the pop-up "Hyperlink" dialog box, click the "Delete" button, and then click "OK".
Notice:
- The hyperlink icon is on the right side of the topic. If users move the cursor to the icon, they can see the name or description of the hyperlink. Click to open the corresponding hyperlink.
- Quickly Inserting Hyperlinks: Drag the file to the canvas, and click "Add as Hyperlink".


Inserting Comments
Inserting a comment helps to mark the topic for a later review.
- Click the "Insert Comment" button under the "Start" menu; or right-click the selected topic and select "Insert Comment" in the dialog box.
- Enter the corresponding comment in the text box.
- After editing the comment content, click "Send".
- Click “Change” or “Delete” at the bottom of the dialog to edit or delete the current comment.

After adding a comment to a thread, a green chat icon will appear in the upper right corner of the topic. Move the cursor to the icon to see the commenter's name, date and comment.

Note: Multiple comments can be inserted into the same topic.
Inserting Notes
Mind maps are known to be concise and to the point, and detailed descriptions generally do not appear in the subject text. For topics that require more detail, comments can be inserted to supplement the information, and these may come in formatted texts and images.
- Select the topic to insert a comment.
- Click "Insert Comment" under the "Home" menu, or right-click the topic shape and select the "Insert Comment" option in the dialog box.
- In the pop-up "Comment" dialog box, users can input or paste the comment.
- Click the "Picture" button to add a picture.
- Click the "Calendar" button to add a date.

Notice:
- Use the formatting tools in the "Comment" dialog toolbar to format the content.
- After adding a comment to a topic, a comment icon will appear in the upper right corner of the topic shape. Move the cursor to the icon to see the content of the annotation.
- Click on the right Thumbtack to keep the annotation above the topic. That way, even if the map is zoomed, it will not affect the display of the annotation.


Inserting Clip Arts
EdrawMind provides a rich clip art library for users to use, and the variety includes nature, social life, education, business, technology and other fields.
- Click the "Insert Clip Art" button under the "Start" menu, or click the "Clip Art" button in the right column.
- Click the button of the clip art library, where different kinds of libraries will be displayed. Click the library name to open the corresponding library, use the mouse wheel to scroll through the elements in the library, and select the target clip art.
- Users can also enter keywords in the search box of the clip art library to find the corresponding clip art.
- Click the clip art to add it to the selected topic, or drag the clip art with the cursor to any topic shape or empty area of the map.
Notice: Clip arts can be inserted anywhere around the subject text.
Inserting Icons
F9
Icons use unique graphic elements to help explain the subject content better, giving the mind map a vivid visual experience. EdrawMind has many preset icon groups while giving users the freedom to create customized icon groups.
Inserting Icons to Topics
- Select the topic to insert the icon.
- There are three ways to open the icon bar: press "F9" on the keyboard; click the "Insert Icon" button under the "Home" menu; click the "Icon" button in the right column.
- Choose the appropriate icon and click the icon to add it to the topic shape.
- Users can add multiple icons to a topic shape by repeating the steps above.
Notes:
- Apart from symbol icon groups, the icons within each group are mutually exclusive (only one tag from that group can be added to the topic. Multiple tags from the same group cannot be added into the topic).
- When an icon has been added to the topic shape, other icons of the same group will appear below it. Click any icon to replace the current icon.
Managing Icon Groups
Users can the toggle the presentation for icon groups: 1) List display; 2) Tile display. Click on top right and buttons to switch between the two views.

Adding Icon Groups
Users can customize icon grouping.
- On the upper right corner of the icon window, click to customize the icon group.
- In the "Icon Group Management" dialog box, click "Add Group" and enter a name in the "Group Name" box:
- If users need to define that the icons of this group are mutually exclusive, tick the box to the left of "Mutual exclusion".
- Click "Add Icon" to navigate to the local folder, select the desired icon. and click "Open". The icon will appear in the list of new icon groups.
- If users need to delete an icon group, select it and click "Delete Group", and select "Yes" in the "Delete Group" dialog box.

Hiding Unused Icons
Click the button in the upper right corner of the icon bar to hide unused icons to minimize distractions and ensure users focus on the necessary icons.
Inserting Tags
Ctrl + G
A tag is a text annotation that displays brief information below a topic shape. Tags are often used in mind maps to mark and emphasize information.
Adding a Group of Tags
- Select the topic to add a tag to.
- Enter the "Tag Management" window by:
- Clicking "Insert Tab" under the "Home" menu.
- Or right-clicking on the selected topic and selecting "Insert Tag".
- In the right column, click the button in the upper right corner of the icon bar to enter the "Tag Management" window.

- Click "Add Group" at the bottom left of the "Tag Management" window to name the tag group.
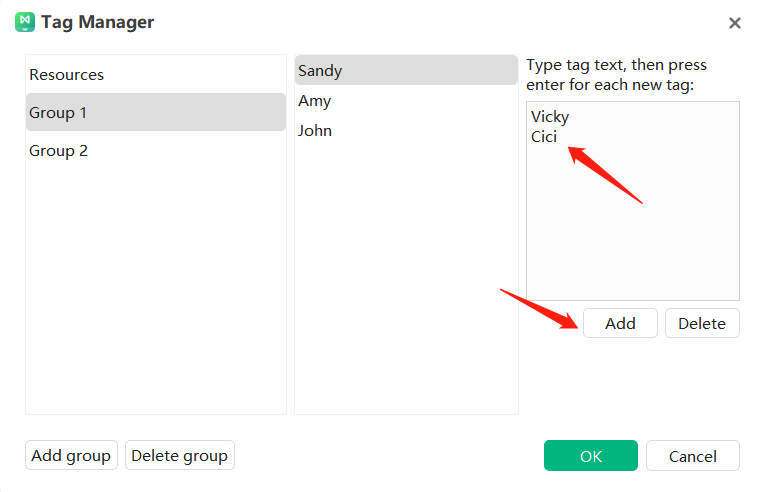
- Enter the "Tag Management" window, type the tag text in the input box on the right, then press "Enter" to display each new tag. Click "Add" below to add these tags to the corresponding tag groups on the left.

Inserting Tags into Topics
- Select the topic that needs to be tagged.
- Enter the "Tag Management" window.
- Select a previously created tag and click "OK" to add it to the topic.
Managing Tags
- Enter the "Tag Management" window.
- Click "Add Group" to add a new tag group.
- Click "Delete Group" to delete unwanted tag groups.
Inserting Relationship Lines
Ctrl + R
Some topics are not directly connected on the map, and a relationship line can be inserted between two topics to indicate the connection between them.
- Select the two topics that need to be connected.
- Under the "Home" menu, click the "Insert Relationship Line" button.
- Move the cursor to another topic that needs to be connected, and click the topic to generate a relationship line connecting the two topics.
- Double-click the text box on the relationship line and enter the relevant text.
Notice:
- Click on the relationship line and two yellow control points will appear. Move the cursor over the control points, and the pointer will change to . Drag the yellow control point to change the arc of the relationship line.
- 2. The text attached to the relationship line has different text styles. Users can click the "Text Style" icon in the right column to adjust them.


Inserting Callouts
Alt + Enter
A callout is additional information on a specific topic that can form its own branch. Annotations can also be used as sticky notes to prompt the mind map readers, such as "Request Feedback", "Important", "Attention", etc.
- Select the subject to insert the annotation.
- Click the "Insert Callout" button under the "Home" menu, or right-click on the topic and select "Insert Callout". ——Any operation can generate an annotation shape.
- Double-click the callout shape with the cursor and enter the callout text.
Notice: Like floating topics, callouts can have their own branches and subtopics, and their formatting can be adjusted in the right column.
Inserting Frames
Ctrl + Shift + B
Inserting a frame around a topic and all of its subtopics can help highlight some of the content.
- Select the topic to insert a frame.
- Click "Frame" on the upper toolbar to insert a frame.

Inserting Summaries
Ctrl + ]
An outline helps to summarize a topic.
- Select the Topic.
- Click "Summary" in the upper toolbar to add a summary.

Inserting Tables
Ctrl + Shift + J
- Click "Table" in "More" in the upper toolbar. Select the size of the table, and enter the table window.
- The top toolbar buttons are from left to right: "Add Row Up", "Add Row Down", "Delete Row", "Add 1 Column to the Left", "Add 1 Column to the Right", "Delete Row", "Merge Cells", " Unmerge " "Cell Fill" "Cell Border Color" "Text Color" "Alignment" "Bold". Row and column editing, formatting, etc. can be performed on the table through the buttons on the top toolbar.
- After entering the text, click OK to insert the table.
- Double-click the table to edit the table again.


Inserting Formula
Insert EdrawMath formula
Ctrl + Shift + L
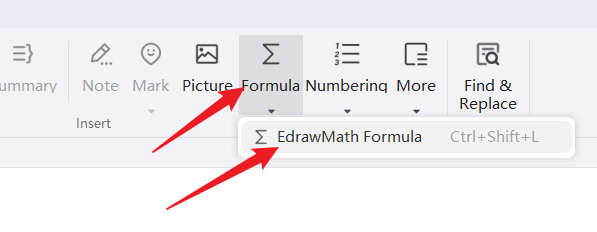
- Select the topic or click on the blank space of the canvas, and select "EdrawMath Formula" in "Formula" in the upper toolbar.
- Enter the characters of the formula in the pop-up "EdrawMath Formula Editor" window, or choose to insert various built-in symbols. Click "OK" after completing the input of the formula to insert the formula into the topic.

Inserting LaTex formula
- Select the topic or click on the blank area of the canvas, and select "LaTex Format" in "Formula" in the upper toolbar.
- Enter the characters of the formula in the pop-up "EdrawMath Formula Editor" window, or choose to insert various built-in symbols. Click "OK" after completing the input of the formula to insert the formula into the topic.
Inserting Font Symbols
- Select the topic and click "Font Symbol" in "More" in the upper toolbar to insert font symbols.
- Click "More Font Symbols..." in "Font Symbols" to select more font symbols.


Changing Map Layouts
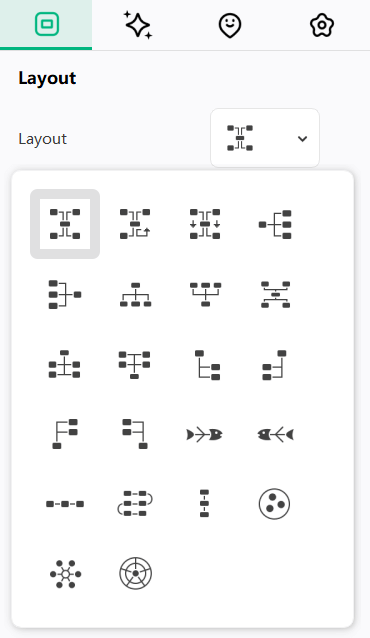
The layout of the topics is controlled by the map layout options. Users will be able to change the map layout style and topic extension via the Layout Type option.
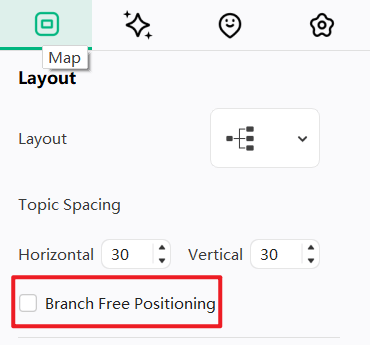
You can edit the current map layout and branches as you like. In 'Map' menu, you can change the layout in one click.
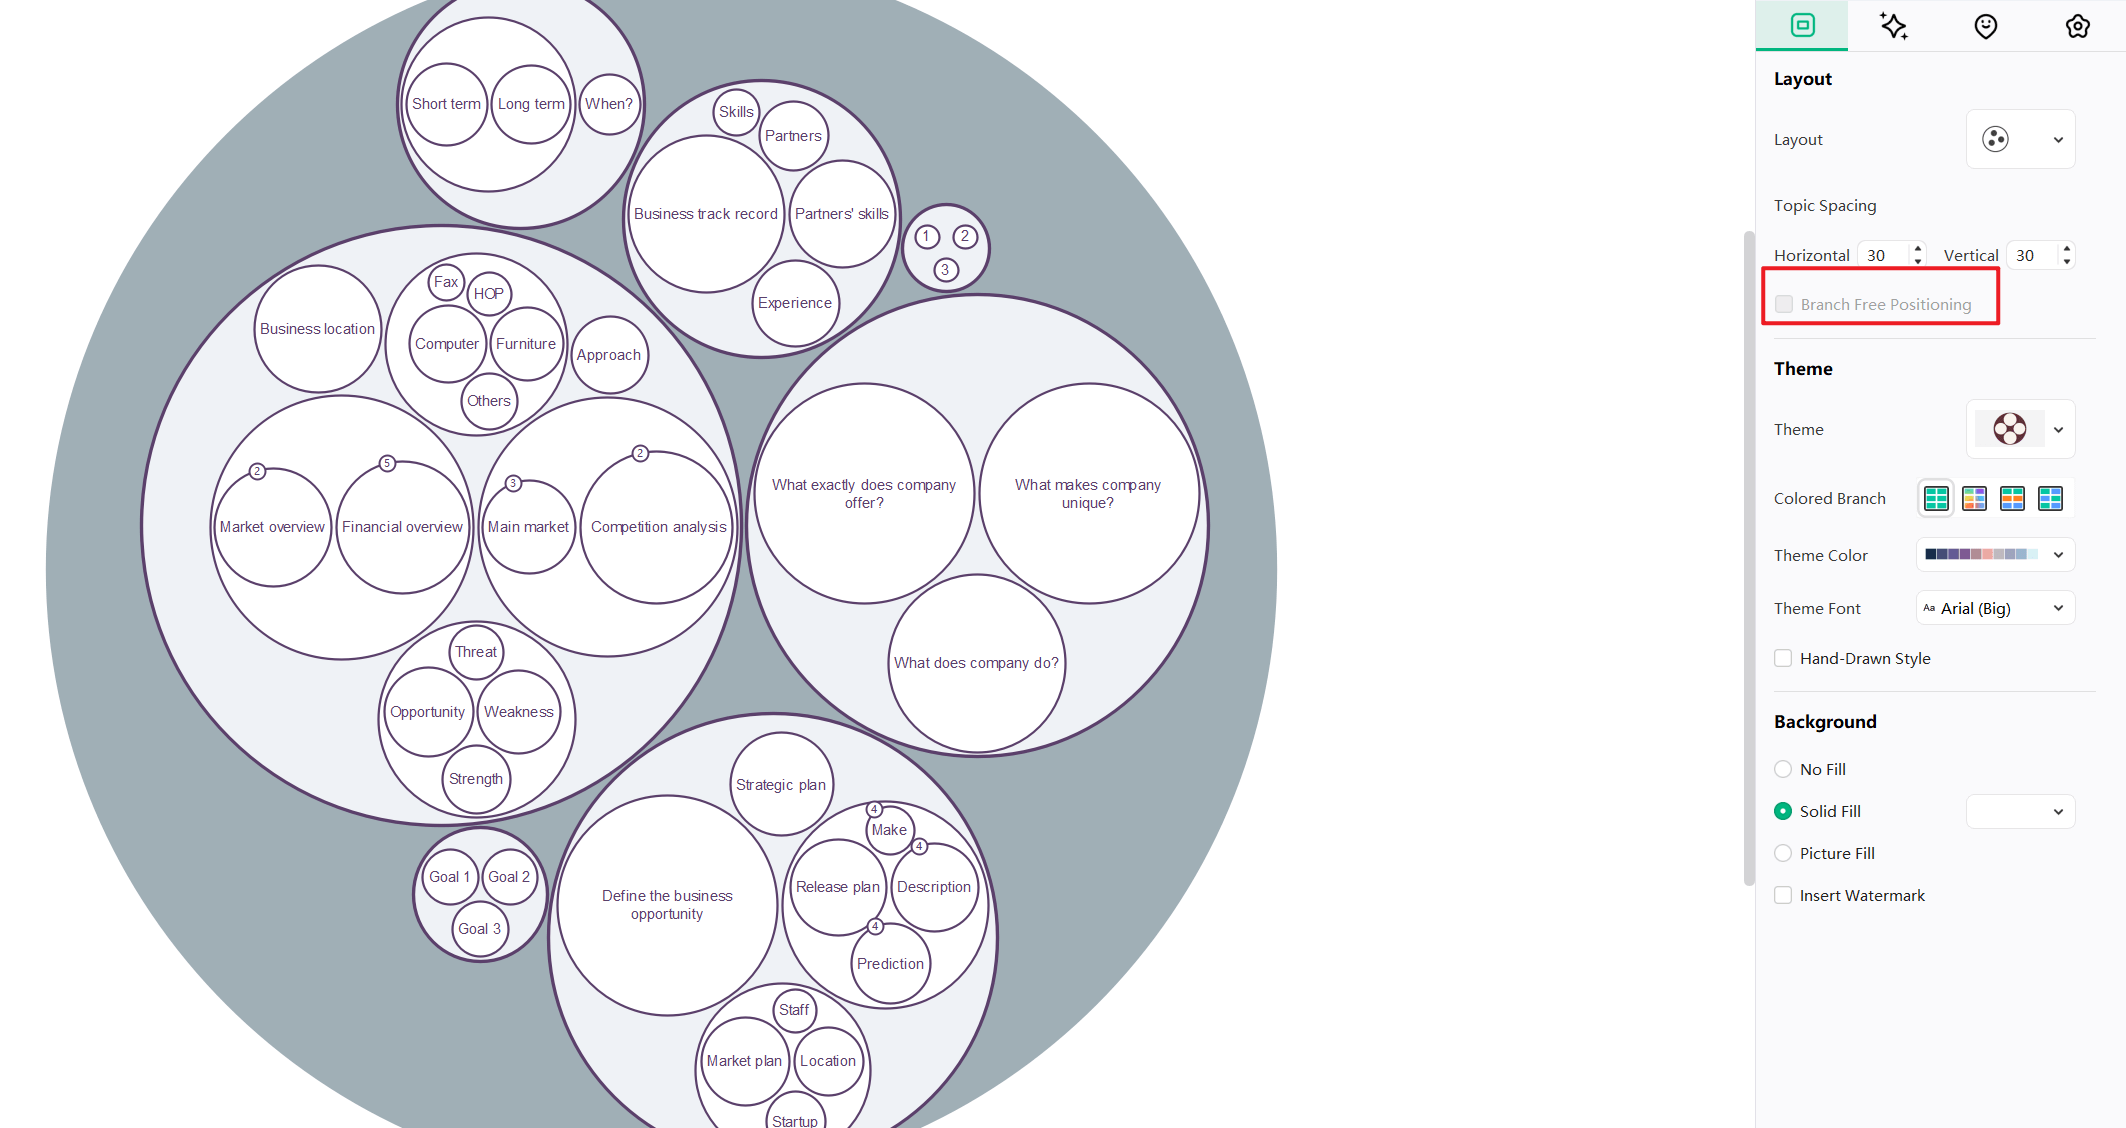
By clicking 'Branch Free Positioning', you can drag yo position your branches freely. However, only Classic,Reverse, Balanced, Left and Right layouts support this function.
Changing the Overall Layout of the Map
- Click on blank space or central topic.
- In the "Mind Map " column of the right panel, click " Layout Type" and select the appropriate page layout from the drop-down menu.
Changing Connector Styles
EdrawMind provides several different connector styles. Users can set these connector styles at the same time or choose to set them for certain topics or branches.
Changing All Connector Styles
Press "Ctrl + A" on the keyboard to select the entire map.
- Click on blank space or central topic.
- In the "Style” column of the right panel , click the "Connector Style" icon and select the appropriate style from the drop-down menu.

Changing the Connector Styles of Some Topics
- Select the target topic.
- In the “Style" column of the right panel, click the "Connector Style" icon and select the appropriate style from the drop-down menu.
Change the Connector Style of Some Branches
- Select the branch whose connector style needs to be changed.
- In the “Style" column of the right panel, click the "Connector Style" icon and select the appropriate style from the drop-down menu.
Numbering
Add a number to the beginning of the text in all subtopics to make the map content more concise. When topics are added, deleted or reorganized, the mind map will automatically renumber to match the corresponding topic.
Adding Numbers
- Select the parent topic to be numbered.
- In the "Style" column of the right panel, check "Numbering".
- Select the numbering level and numbering style from the drop-down menus.
Notice: Numbers are automatically added in clockwise order in the map and cannot be edited manually.
Deleting Numbers
- Select the parent topic whose numbering needs to be deleted.
- In the "Style" column of the right panel, uncheck "Numbering".
Numbering
The distance between subjects has a default value of 30 horizontally and vertically. The distance between subjects can be adjusted by following these steps:
- In the "Mind Map" column of the right panel, click the Up and Down arrows in the horizontal and vertical directions to increase or decrease the distance value, or directly enter the value in the small box to the right of the horizontal and vertical icons.
- After adjusting the value, press the "Enter" key or click on the blank space of the page to adjust the entire map.

Notice: The maximum distance is 100 horizontal and 100 verticals, and the minimum value is 20 horizontal and 20 verticals.
Themes
Applying Themes
The overall appearance or default "look" of the map is determined by the theme of the map. A map theme is a collection of default formatting settings for various types of elements on a map, including a set of theme colors, theme fonts, theme effects (line and fill), and more.
- Select "Central Topic" or click an empty space in the map.
- Click the “Theme” button from either the "Page Style" tab under “Menu”; or from the “Theme Style” icon in the right panel "Mind Map" column.
- Drag the scroll bar to browse all themes in the drop-down menu and click on the appropriate theme to apply to the entire map.


Changing Font Styles and Colors
After choosing a topic style, users can still change the font and color of some topic shapes.
- 1. Select the topic to be changed.
- 2. Adjust accordingly either under the menu bar "Page Style" - "Topic Font", or in the "Style" column on the right panel - "Font" and "Color".

Notice: Users can set a default font for the map and use the default font. In the "Options" menu, click "Format", select "Always use default font. Do not use theme font", and then select an appropriate font as the default font for the map.

Rainbow Colors
The rainbow colors should be used to choose how the topic colors are assigned. It is available in 4 colorways: Monochrome, Rainbow, Symmetrical and Alternate.
Applying Rainbow Colors
Users can set the “Rainbow Color” option under the “Menu” bar - "Page Style" or the right panel "Mind Map" column.

- Monochrome: Click the "Monochrome" button and all branches become a single color.
- Rainbow Colors: Click the "Rainbow Colors" button to display a different color for each branch.
- Symmetrical Colors: Click the "Symmetric Colors" button and the colors of all branches are symmetrical on the left and right sides.
- Alternating Colors: Click the "Alternate Colors" button and all branches will use two colors alternately.


Hand-Drawn Style
The default effect of a map is the preset style. A hand-drawn style turns the default lines and shape borders into natural wavy lines, giving the map a hand-drawn look.
Hand-Drawn Effect
- Click the blank area of the map.
- In the "Page Style" menu, click "Hand-drawn Effect ".
- Click "Default" to restore the default effect.
- Alternatively, in the "Mind Map" column of the right panel, check "Hand-drawn effect". (Uncheck to restore default effect).

Changing Backgrounds
Users can use a color or picture as the map background as well as add a watermark on the map background.

Background Colors
- In the menu bar "Page Style", click "Background Color" to select a color as the map background.
- In the "Mind Map " column of the right panel, click "Solid Color Fill" and select a color as the map background.


Background Pictures
EdrawMind has built-in rich background pictures to beautify the mind map. Users can use the software’s stock images or upload local pictures and set them as the map background.
Adding Background from the Software Gallery
- In the menu bar "Page Style", click the "Background Image" button
- Select an appropriate background image from the drop-down menu and click to apply to the map.
Add Background from Local Photos
- Click the "Background Image" button in the "Page Style" menu bar.
- Click "Browse File" and select the appropriate image from the local file. Click "Open" to use the application as the background image.

Notice: Click the "Fit to Page" option at the bottom of the "Background Image" drop-down menu, and the image will automatically resize as a single image to fit the entire page. If this option is not checked, the image will retain its original size, tiled on the background.
Adding Watermark to the Background
This function allows users to add a watermark to each page of the document to ensure document authenticity identification, copyright protection and other functions. The embedded watermark information is hidden in the host file and does not affect the readability and integrity of the original file.
- Click the "Watermark" button.
- Select the appropriate built-in watermark in the thumbnail of the drop-down menu.
- If there is no suitable option in the built-in watermark, users can click "Custom Watermark" to create an exclusive watermark.
- n the Customize Watermark dialog box, users can adjust the text content, font, size, color or layout of the watermark.
- Click "Remove Watermark" to remove the watermark.

Removing Background
Click the "Remove Background" button to remove the map background.
Changing Topic Shapes
Changing Fill Colors of Topic Shapes
Filling refers to filling the inside of a topic shape with color. Users can change the topic fill color by following these steps:
- Select the topic shape.
- In the right column, click "Fill Color" and choose an appropriate color to fill the selected shape.
- Quickly fill the selected shape with an appropriate color in the quick color bar below the image. (The color bar is not displayed at the bottom by default. Users can go to "Options" - "General" to check the display)


Removing Fill Colors
To remove the fill color from the topic shape, uncheck "Fill Color”.
More Colors
If users would like to use a color other than the main color or standard color, click "More Colors", in the "Select Color" dialog box, they can:
- Choose a color from the color block;
- Select a color in the palette;
- Click on the "Color Picker" to pick a color from the screen.


Opacity
Toggle the opacity of the topic by clicking More Options and moving across the Opacity slider. Alternatively, users can enter a number in the box next to the slider, which changes the percentage of the topic opacity from 0 (fully opaque, the default setting) to 100% (completely transparent).

Gradient Fill
Click "More Options" to set the topic fill color to "Gradient Fill”. (Gradient: Gradual rise in color and tone. Options range from: color from light to dark, dark to light, slow transition from one color to another, or other shades from one color to another).

Gradient Types
To specify the direction in which the color gradient fills, first select a gradient type from the Type drop-down list. The selected type determines the available directions.
Gradient Direction
To choose different gradient directions for colors and shadows, click Direction, and then click the appropriate direction effect. The available directions depend on the selected gradient type.
Gradient Angle
The angle of the gradient fill of the shape is rotatable. To specify the angle of the gradient fill in the shape, enter the appropriate value in degrees in the box to the right of "Angle". This option is only available when "Linear" is selected in "Type".
Gradient Aperture
Gradient aperture is used to describe the position and color of transition points in a gradient, and consist of position, color, shadow/tint, and opacity values.
Opacity values only apply to gradient stops, not overall fills; Gradient stops can also create non-linear gradients. For example, if users would like to create a gradient from red, green to blue, they will need to add three gradient stops - one for each color. If they would like to create a gradient that only appears at the corners of the shape, they will need to use a gradient stop to make the gradient non-linear.
Add a gradient stop: Click the green plus sign to add a gradient stop.
Remove gradient stop: Click on the red cross to delete the gradient stop.
Location:

To set the position of the color and opacity changes in the gradient fill, move the slider on the Gradient Stop or enter a number in the Position box below the slider. Alternatively, users can increase or decrease the numerical value with the Up and Down arrows.
Color:
To get or set the color of the gradient aperture point, click "Color". If the color selected is not in the topic color, click "More Colors".
Opacity:
The gradient fill of the topic shape has an opacity slider as well.

Texture Fill
Click "More Options" to set the topic fill color to "Texture Fill".
- Click "More Options " in the "Shape Fill" drop-down menu.
- In the Fill dialog box, select Texture Fill.
- Click the "Pattern Fill" button, and select the appropriate pattern in its drop-down list box.
- This option sets the foreground and background colors of the selected pattern.

Changing Subject Shapes
EdrawMind provides users with a choice of shape elements, and they can change different shapes for the central topic, topic and subtopic.
- Select the topic which shape needs to be changed.
- In the "Style" column of the right panel, click "Topic - Shape" and select the appropriate shape.

Changing the Shadow of Topic Shapes
Select the topic shape which shadow needs to be changed. In the "Style" panel on the right column, click to check "Topic Shadow", and select the appropriate predefined shadow effect.

If there is no suitable shadow effect in the drop-down menu, click "Shadow Parameter Settings" to customize the shadow effect. This function is used to set the custom shadow color, opacity, size, blur, and angle and offset.
Shadow Colors
In the "Shadow" dialog box, click "Color" and select the appropriate color from the drop-down color list. If the desired color is not in the topic color, click "More Colors" to set it.
Shadow Opacity
If users would like to set the opacity of the topic shape shadow, they can click and drag the "Opacity" slider with the mouse or enter a value representing the transparency in the box to the right of the slider. They can also use the up and down arrows to increase or decrease the opacity. The percentage of shadow opacity can be adjusted from 0 (fully opaque, the default setting) to 100 (fully transparent).

Shadow Size
If users would like to adjust the size of the shadow, they can click and drag the "Size" slider with the mouse or enter a value indicating the size of the shadow in the box to the right of the slider. They can also use the up and down arrows to increase or decrease the size of the shadow.
Shadow Blur
If users would like to set the shadow blur, they can click and drag the "Blur" slider with the mouse or enter a value indicating the degree of shadow blur in the box to the right of the slider. They can also use the up and down arrows to increase or decrease the shadow blur.
Shadow Angle
If users would like to adjust the angle of the shadow, they can click and drag the "Angle" slider with the mouse or enter a value representing the shadow angle in the box to the right of the slider, or they can increase or decrease the shadow angle by using the up and down arrows.
Shadow X Offset and Y Offset
If users would like to set the left and right offset of the shadow, they can click and drag the "Offset" slider with the mouse, or enter a value representing the offset in the boxes to the right of "X Offset" and "Y Offset”. The offset can be increased or decreased with the up and down arrows.
Shadow X Offset and Y Offset
- Select the topic.
- In the "Border" column of the "Style" panel on the right column, users can adjust the line color, width, and dash style of the topic shape.

Changing Topic Font
- Select the topic or multiple topics.
- In the “Style” panel on the right column, users can adjust the font type, font size, alignment, bold, italic, underline, strikethrough, and text color of the topic text.

Click the following buttons to apply the font effects described above:
 Bold the selected text.
  Italicize the selected text.
  Underline selected text.
 Add a horizontal line in the middle of the selected text.
 Set the alignment format for the selected text.
 Add shading to selected text.
 Change the font color of the selected text.
 Increase the size of the font of the selected text.
- After checking the box, users can modify the font style in all topics of the same type as the selected topic with one click.
Changing Branch Styles
Change the Style of All Branches
- Select "Central Topic".
- In the "Branch" column of the right column, users can adjust the style, fill color, line color, line style, connecting line style, arrow style and dotted line style of the branch.


Change the Style of Some Branches
- Select the parent topic of the target branch.
- In the "Branch" column of the right column, users can adjust the style, fill color, line color, line style, connecting line style, arrow style and dotted line style of the branch.
Notice: The line color of the branch changes the color of the connector lines and the line color of all themed shapes in the entire branch.
Subject Box Size
Subject Margins
- Select a target topic or multiple target topics.
- In the menu bar "Advanced" and "Topic Margins", users can uniformly adjust the margins of the selected topic.


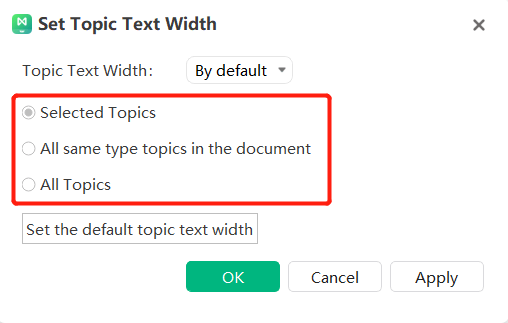
Topic Text Width
- Select a target topic or multiple target topics.
- In the menu bar "Advanced" and "Topic Text Width", users can uniformly adjust the text width of the selected topic.
Editing Slideshows
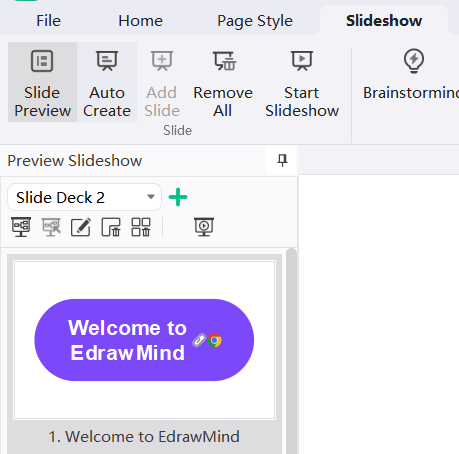
Users can create and manage slides for their mind map from the “Slideshow” menu. Each slide can display branches or sub-branches of the map, expanding or collapsing as needed. This feature helps users focus on a specific part of the map, or use a slideshow to present the map in sections. After creating a slideshow, they can play, print, or export the slideshow to Microsoft PowerPoint.
Automatically Creating Slideshows from Topics
EdrawMind can create a set of slides according to the branches of the mind map. With just one click, all slide pages will automatically generate content one by one according to the branches of the map.
- In the "Slideshow" menu, click the "Auto Create" button
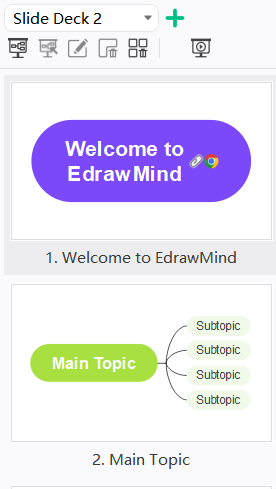
- After the slideshow is automatically created, users will be able to see a thumbnail of the slideshow on the slideshow preview panel. The first slide is the central topic and the remaining slides are branches.
Creating Slideshows Manually
Instead of creating slideshows automatically, users can opt to create the slideshow manually and select the necessary branch or topic to add to the slideshow.
- Under the "Slideshow" menu, click "+New Slideshow".
- The new slideshow is created.

Adding Slideshow Pages
After creating a slideshow, users can add any branch or topic as a new slideshow page.
- From the Slideshow Preview panel, select the slide that is to be added in the new page.
- Select a branch or topic on the mind map and click the “Add Slide” button under the “Slideshow” menu Users can also right-click a branch or topic and select the “Create Slideshow” option.
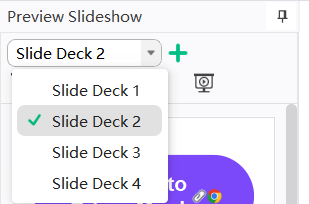
- After the new slideshow page is added successfully, users can preview it in the Slideshow Preview panel on the left.
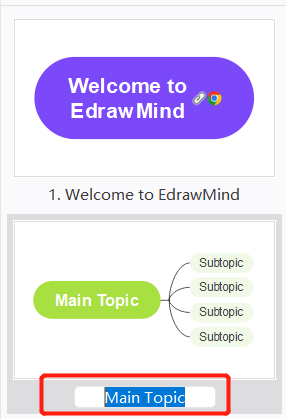
Naming Slideshow Pages
Slideshow pages can be named in the following ways:
- Select a slideshow page from the Slideshow Preview panel, click the “Rename” button, and enter a slideshow page name.
- Double-click the current name of the slideshow page to rename it.
- Right-click the slideshow page in the Slideshow Preview panel, then click “Rename”. Enter the new slideshow page name when the current name turns blue.
Previewing Slides
After the slideshow is created, the Slideshow Preview panel will automatically open.
Users can preview the slideshow by clicking on the Slideshow menu “View" button.
Click the slide thumbnail in the Slideshow Preview panel, and the full slide page preview can be seen in the main window.
Click the close button at the top to close the full slideshow preview
Adjusting Slideshow Page Order
The slideshow page order can be adjusted in two ways:
- From the Slideshow Preview panel, drag and drop slide preview thumbnails to rearrange the slide pages.
- Right-click the slide preview thumbnail and click Move Up or Move Down.
Previewing a Topic or Branch in Full Screen Mode
F5 , Shift + F5
Click the "Fit to Full Page" or "Fit to Page Width" button under the "View" menu.
Users can also click the button in the lower right corner of the status bar  to view maps and walkthrough all topics in full screen mode.

Displaying Slideshow
Click the “Slide Display” button on the Slideshow menu or the Slideshow Preview panel to start the slideshow from the beginning or from the selected topic.
Deleting Slideshow Page
Slideshow pages can be deleted in two ways:
- Select the slideshow page in the Slideshow Preview panel and click the "Remove Current" button

- Right-click a slideshow page in the Slideshow Preview panel, and then click “Delete Current Slideshow Page”.
Deleting the Entire Slideshow
An entire slideshow can be deleted in two ways:
- Click "Remove All"

- Right-click a slideshow page in the slideshow preview panel, and then click “Delete All Slideshow Pages”.
Browsing Slideshows
There are three ways to navigate slides in Slideshow View:
- Press the Down or Right arrow on the keyboard to jump to the next slide page, and press the Up or Left arrow to return to the previous slide page.
- Click once anywhere on the screen to jump to the next slide page.
- Move the cursor to the lower left of the canvas and a toolbar with seven buttons will appear. Click the Up and Down arrows to navigate the slides.

Click the following buttons to achieve the corresponding effect:
 Previous Page.
 Next Page.
 Zoom In.
 Zoom Out.
 Fit to Page View.
 Close Full Screen, Exit Slideshow Mode.
Exiting Slideshow Mode
The keyboard Esc key to end the slideshow, or click the Close button on the slideshow toolbar.
Exporting Slideshows
Click "Export PPT" button to export the slides as Microsoft PowerPoint format.
Click "Export PDF" button to export the slideshow as PDF format.
Notice: Exported pptx files are only available for PowerPoint 2013 and later.
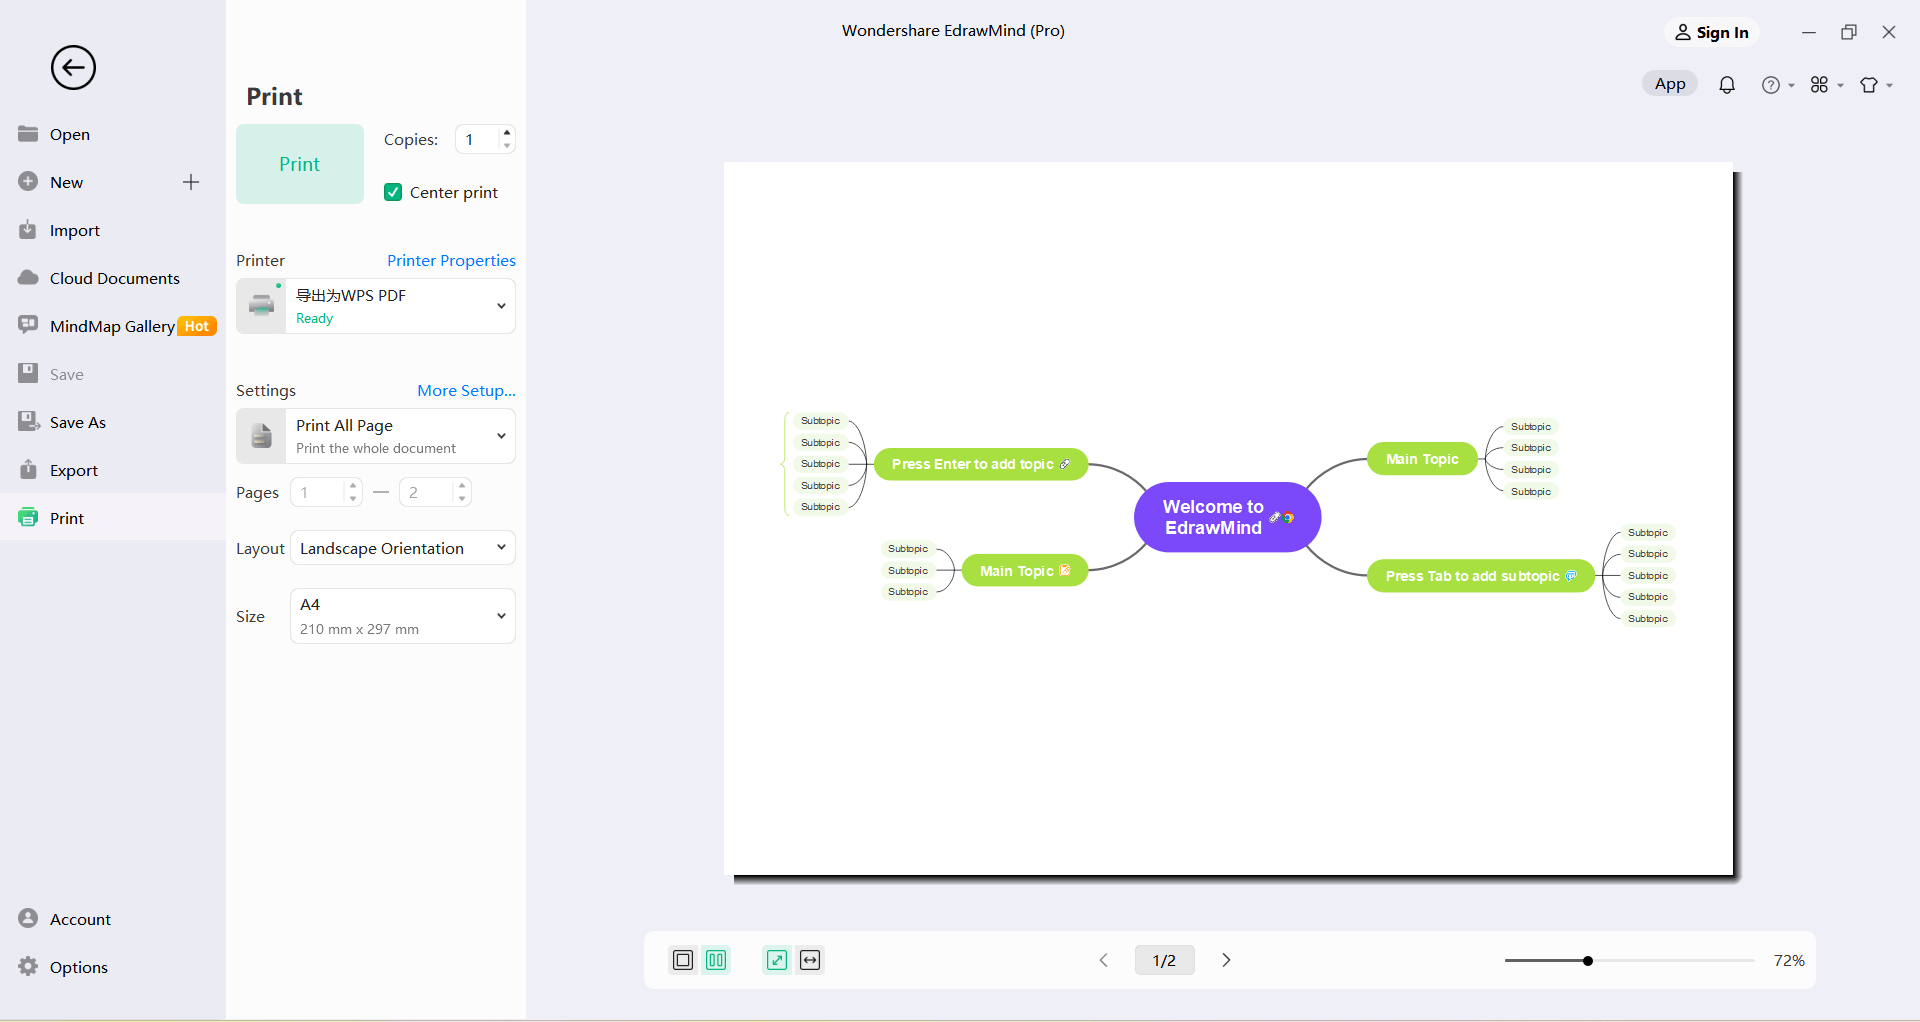
Printing Slideshows
- Click the "Print" button on the "Slideshow" menu to see the print settings and preview interface.
- Set print options, then click Print.
Traversal Map
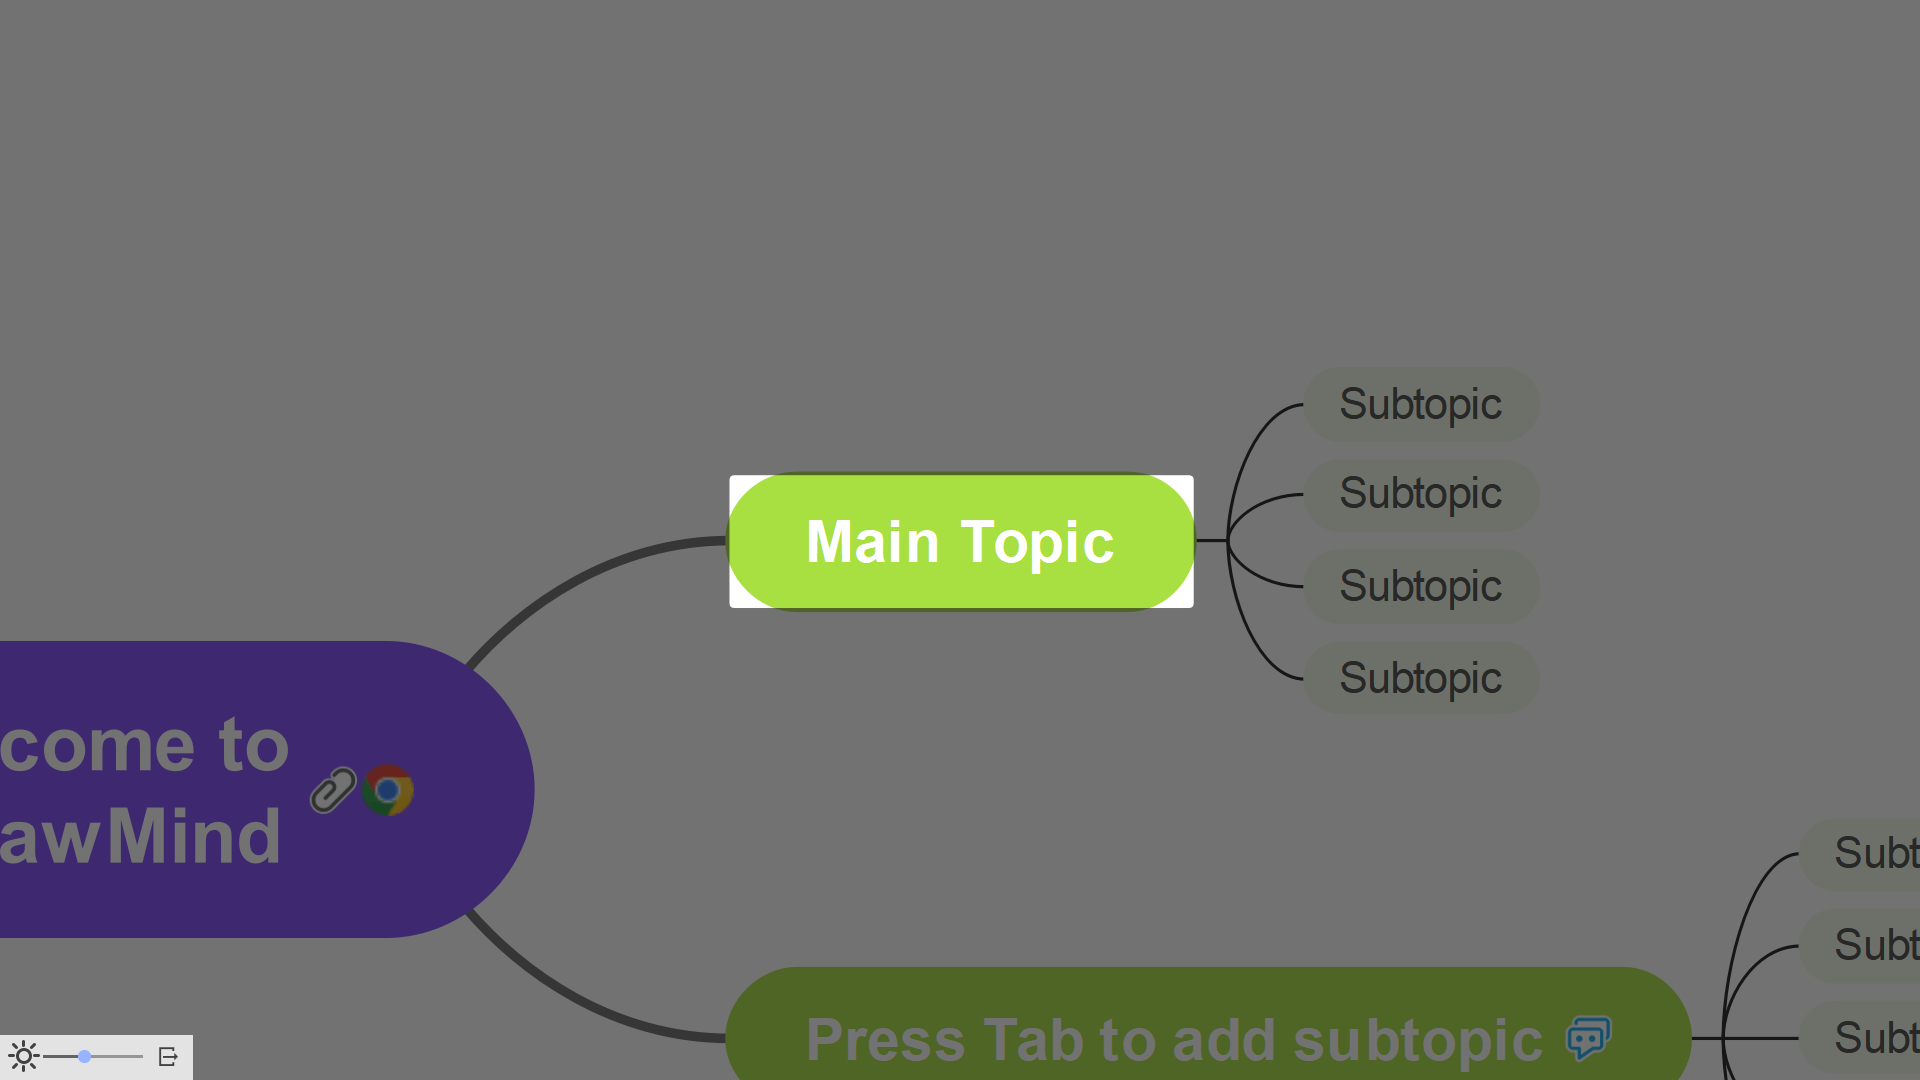
The traversal feature supports presentation of maps in a way that focuses on a topic or branch.
Click "Traverse Topic"/"Traverse Branch" under the "Slideshow" menu to traverse the map in full-screen mode. This feature supports traversal from the beginning or from the selected topic.

When traversing, press the arrow keys to display the map content by topic or branch.
Initiating Brainstorming Mode
- Create a mind map piece on canvas.
- Click "Brainstorm" under the "Slideshow" menu to enter the brainstorming mode.

Optimizing Brainstorming Mode
A variety of tools are available in the brainstorming interface.

Drawing Traces
Click the button at the bottom left of the brainstorming interface  to load the toolbar related to drawing traces.
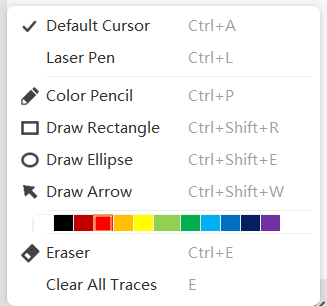
With different tools, different effects can be achieved.
- Default cursor: In the interface, the cursor is displayed as a mouse arrow.
- Laser pointer: In the interface, the cursor is displayed in the form of a laser pointer.
- Colored pencils: Press and hold the left mouse button to draw pencil-effect graphics on the interface.
- Draw a rectangle: Press and hold the left mouse button to drag a rectangle on the interface.
- Draw an ellipse: hold down the left mouse button to drag an ellipse on the interface.
- Draw an arrow: Hold down the left mouse button to mark the size and direction of the arrow on the interface.
- Color bar: Users can set the color of the graph in advance.
- Eraser: Press and hold the left mouse button to erase the graphics drawn on the interface.
- Clear all traces: After clicking, users can erase all drawn graphics on the interface with one click.
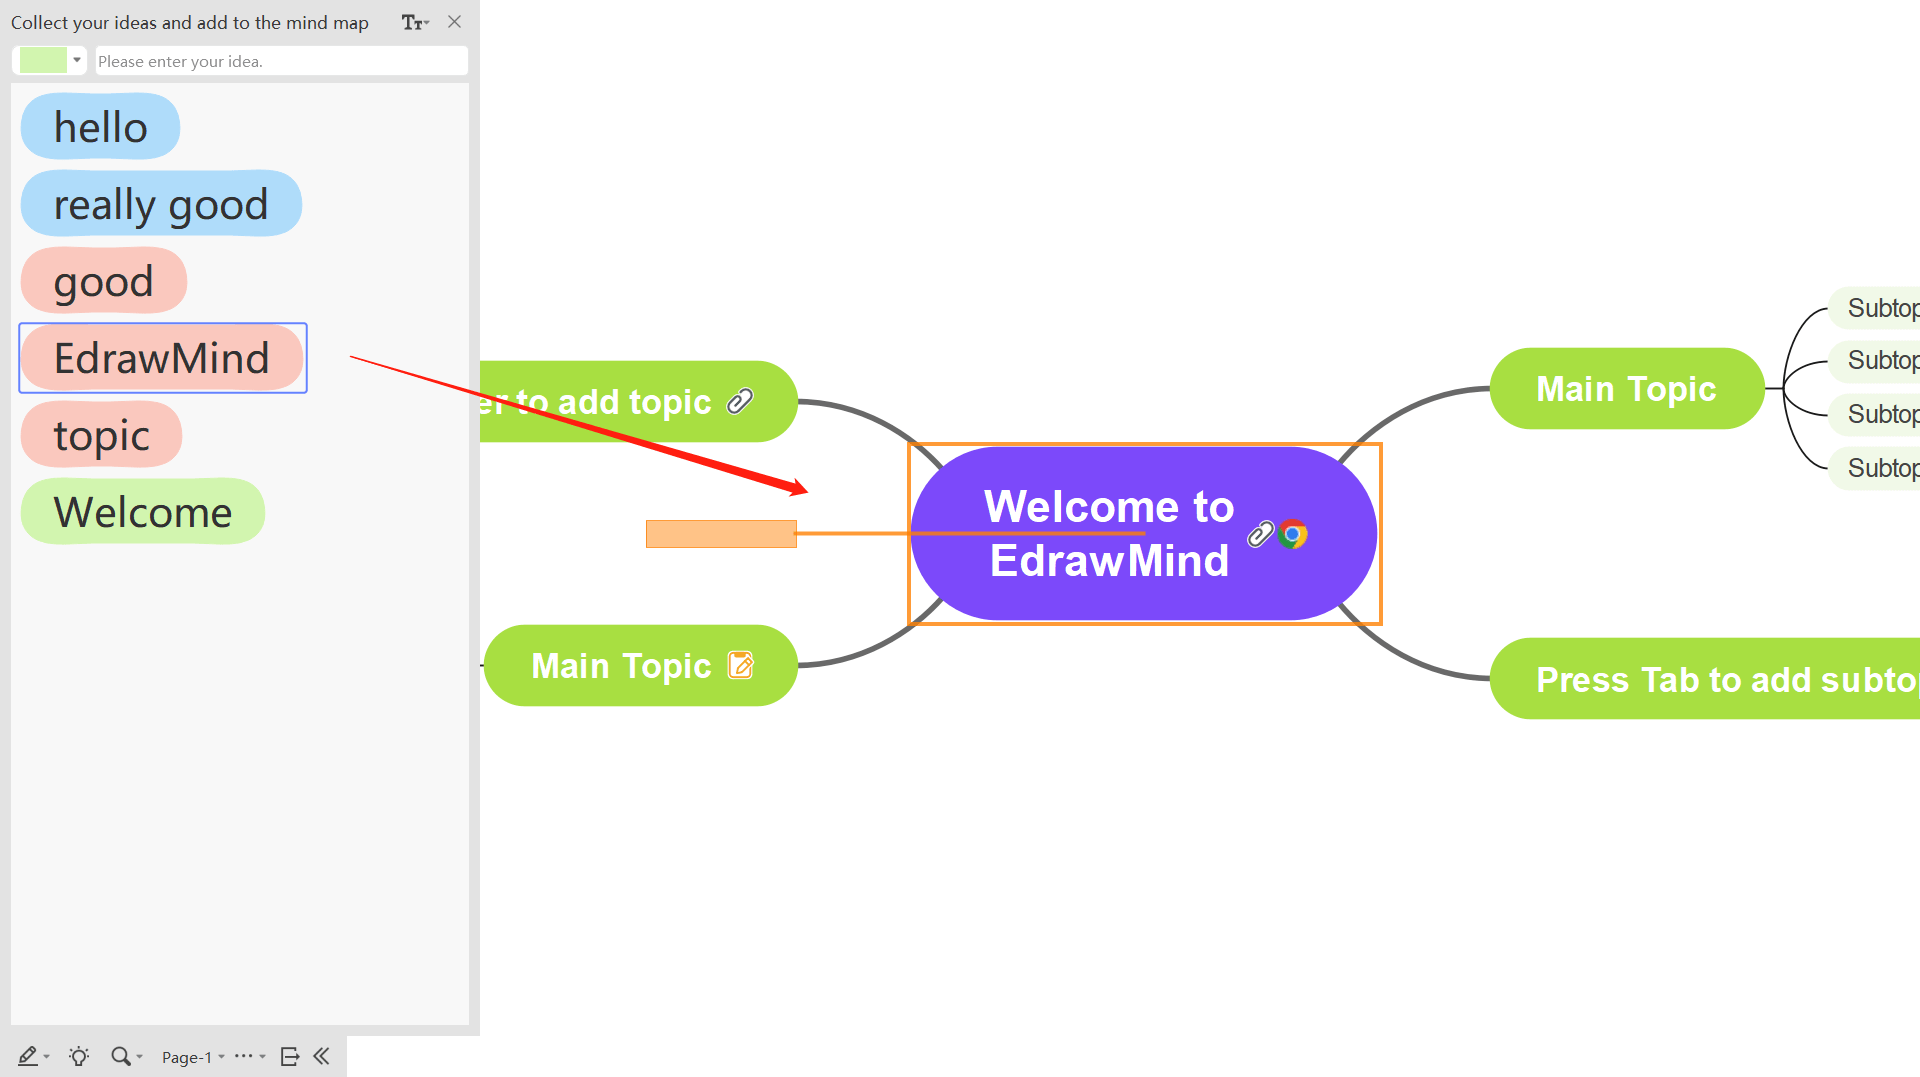
Collecting Ideas
Click the button at the bottom left of the brainstorming interface  to turn on the “Collect Ideas” feature.
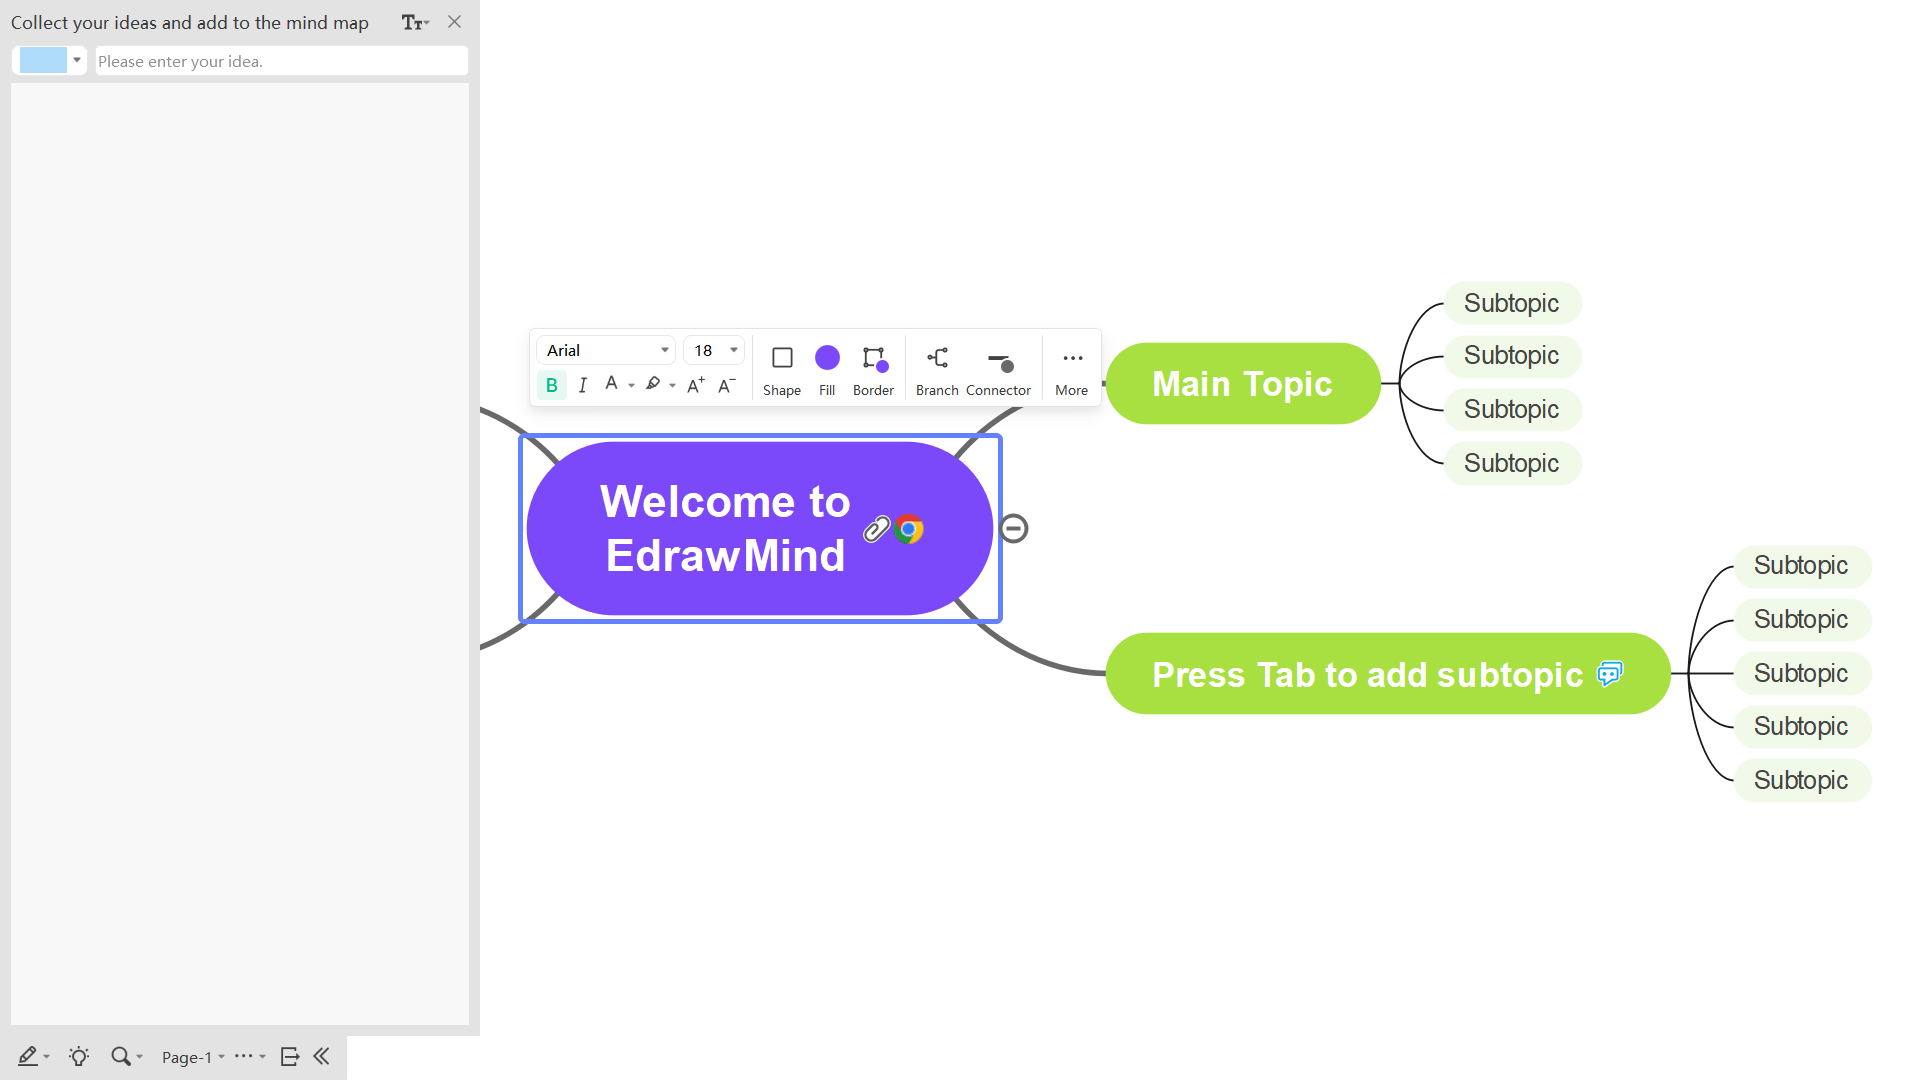
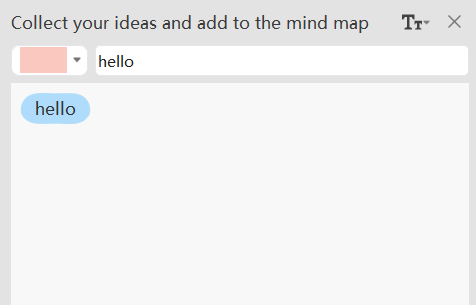
- Enter text content in the input box and press "Enter" to add content.
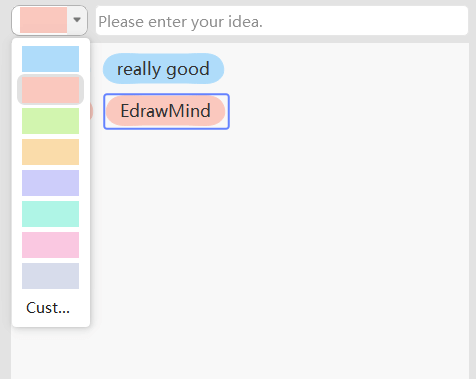
- Users can choose different colors from the left panel. Press “Enter” to add after keying the text content.
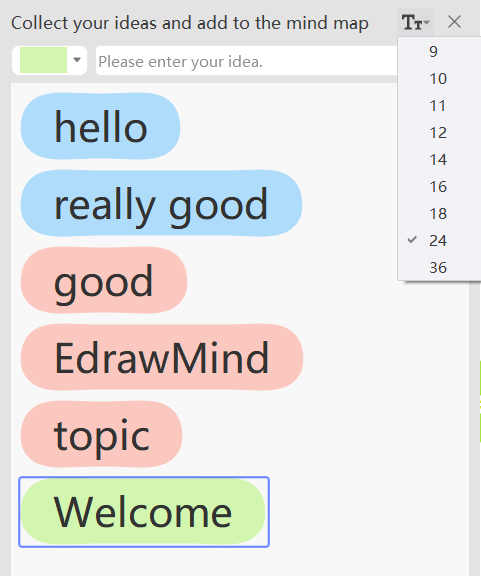
- Users can click the “Edit Font Size” button to modify the font size of the text
- Select a note and press "Delete" on the keyboard to delete it.
- Drag the sticky note to the canvas. When it is close to the subject, it will be automatically absorbed and become one of the subjects.
Zoom View
Click the button at the bottom left of the brainstorming interface to load the “Zoom View” feature.
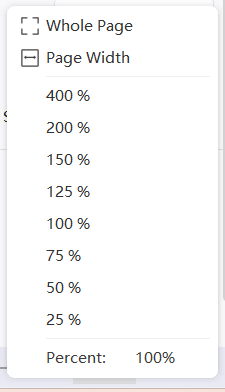
The mind map can be zoomed and displayed according to the display needs, and the zoom range is 25%-400%. It can also be displayed quickly in the ways of "fit to the whole page" and "fit to the page width".
More Features
Click the button at the bottom left of the brainstorming interface to load the display function.

Show timer: After clicking this function, a timer will be displayed at the upper right of the interface, indicating the duration of the current session and the total time of the sessions of the day whilst in the brainstorming feature.

Click the “Fold” button to display only one layer at a time: After checking this function, only one layer will be displayed each time the “Fold” button is clicked in the interface.
Hide floating buttons for adding sub-topics: After checking this function, the floating buttons of all sub-topics in the interface will be hidden.
Hide scroll bars: After checking this function, the vertical and horizontal scroll bars in the interface will be hidden.
Exiting Brainstorming Mode
Click the button at the bottom left of the brainstorming interface  to exit the brainstorming mode.
Hiding Toolbars
Click the button at the bottom left of the brainstorming interface  to hide the entire row of toolbars.
The EdrawMind Gallery is an open work community. Users can publish their works to the map community, or download them from the map community and use them. Click "File", and then click "Gallery" to enter the EdrawMind map community interface.
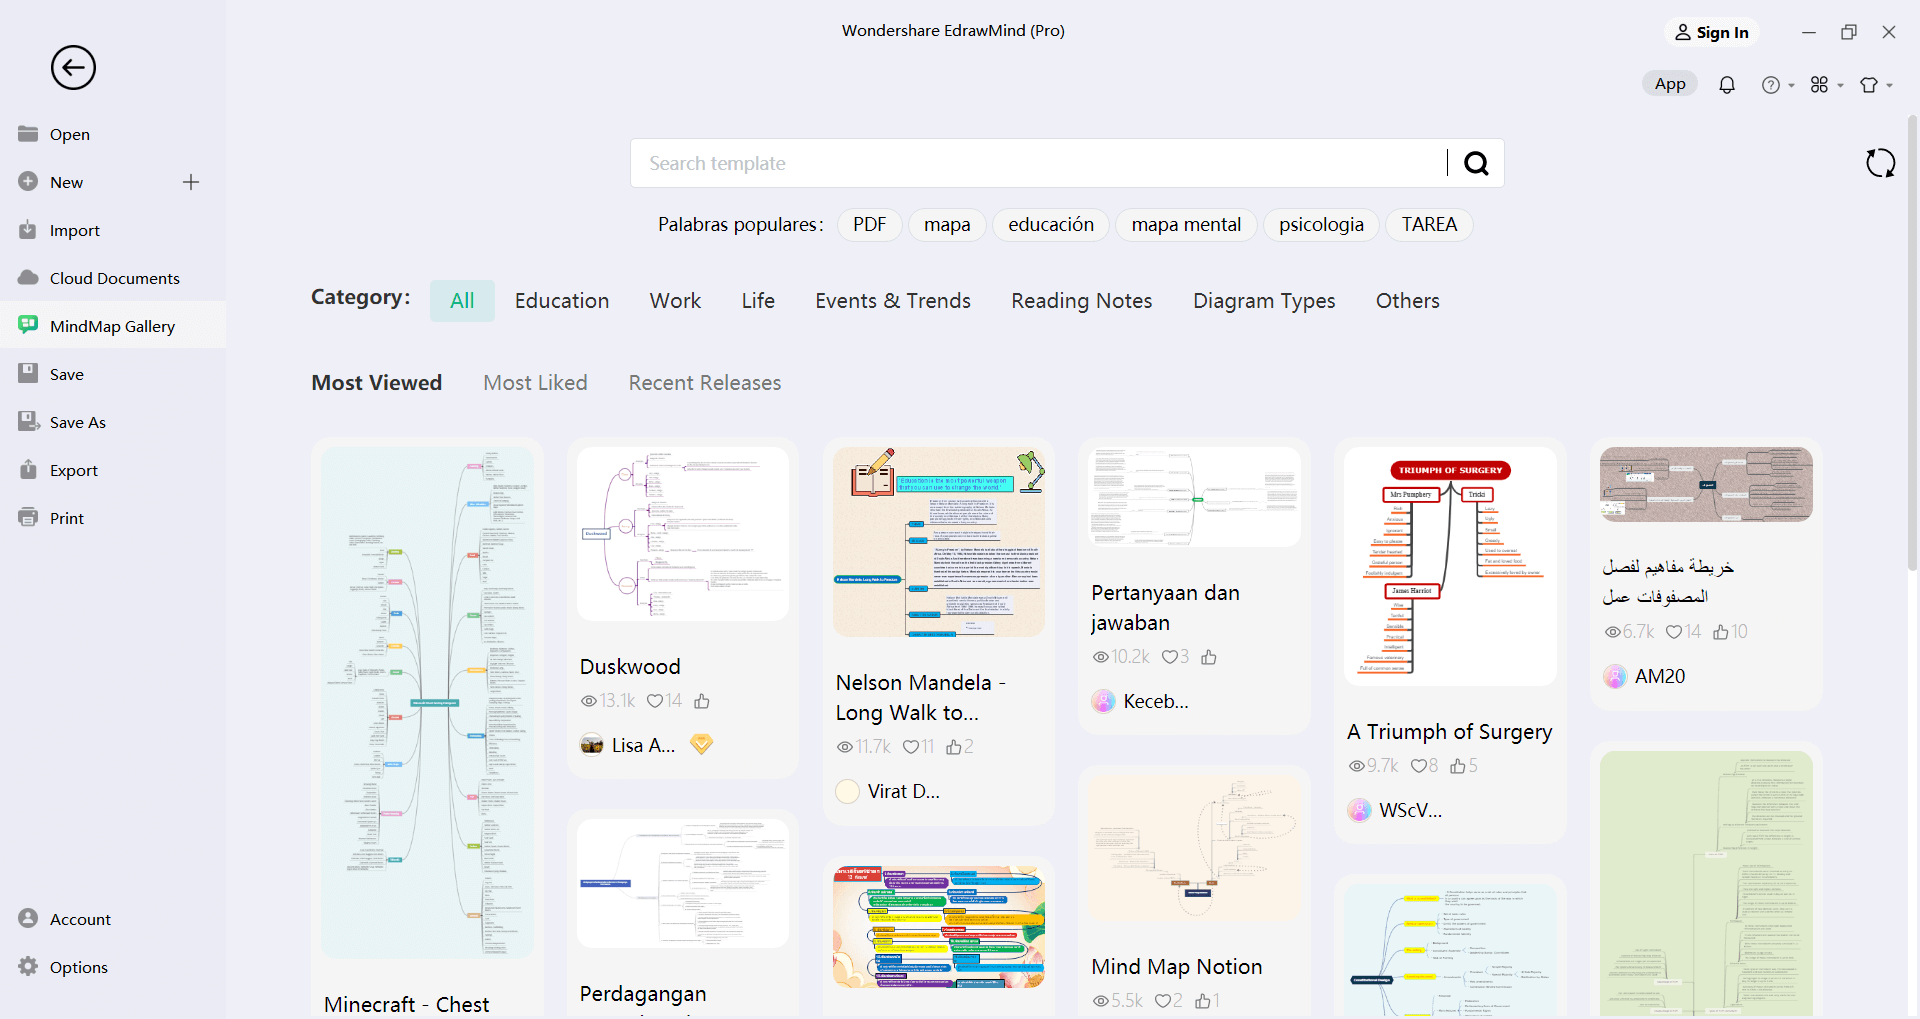
Searching for Works
Enter the keyword text in the search box and click the search symbol to search for related mind map works.

The map community provides popular tags and sorting to aid in the user’s search. Under the popular tags, click any tag to display the related mind map. In the sorting method, users can choose different sorting methods as below.
- Latest Release: Arrange in the order in which the works were released;
- Popular Browsing: Arrange according to the reading volume of the works;
- Most Popular: Arrange according to the number of points of the works;
Using Works
Click the picture of the work in the map community to preview the work. Use the toolbar on the right to operate the artwork.
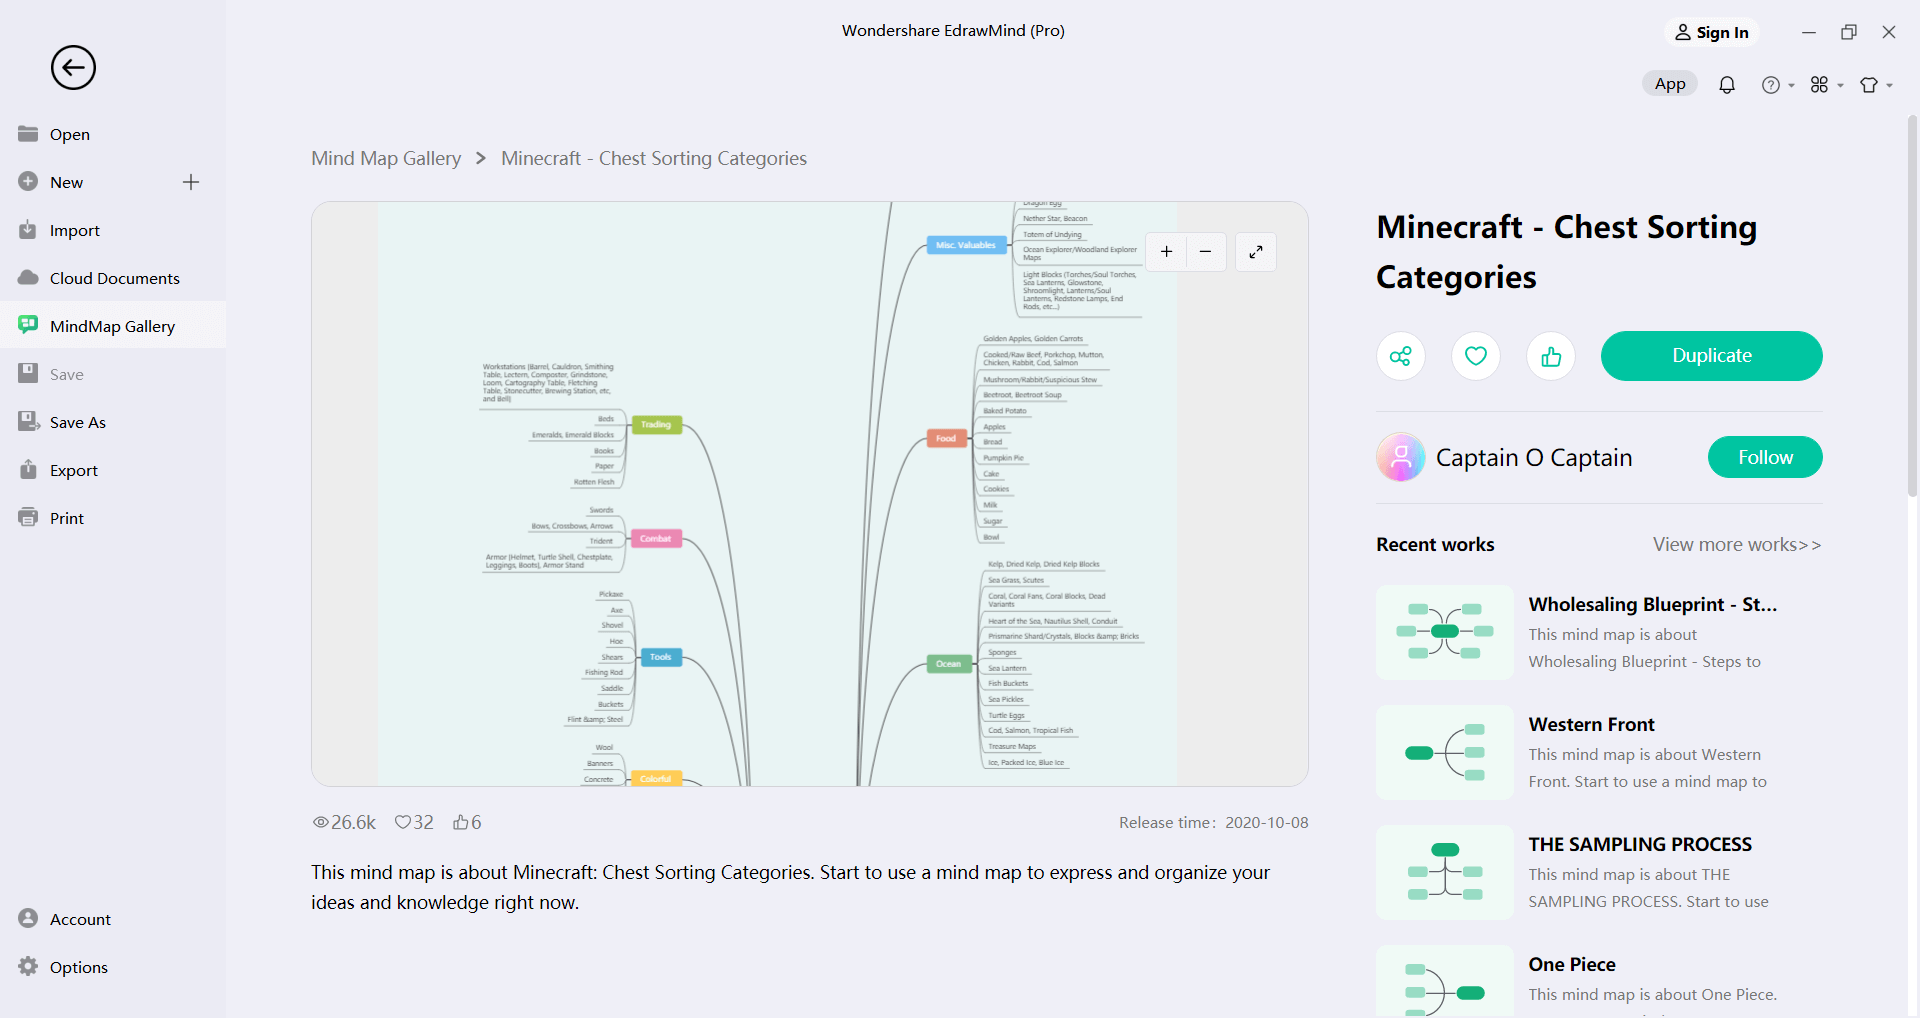
- Duplicate: Users can open the free work in the canvas for editing upon access. If it is a paid work, the user will need to pay for access first; if it is a publicly-accessible work, this button will not be displayed.
- Favorite: Users can favorite the work and view it in their personal homepage.
- Views: Displays the cumulative views of the work.
- Comment: Users can comment on the work and share their experience with others.
- Share: A link is generated, which can be shared to social platforms such as YouTube and Facebook.
- Collapse/Open the preview sidebar: Click the icon on the right to collapse/open the preview sidebar.
- Zoom in: Click to zoom in on the previewed mind map.
- Zoom out: Click to zoom out the previewed mind map.
Publishing Works
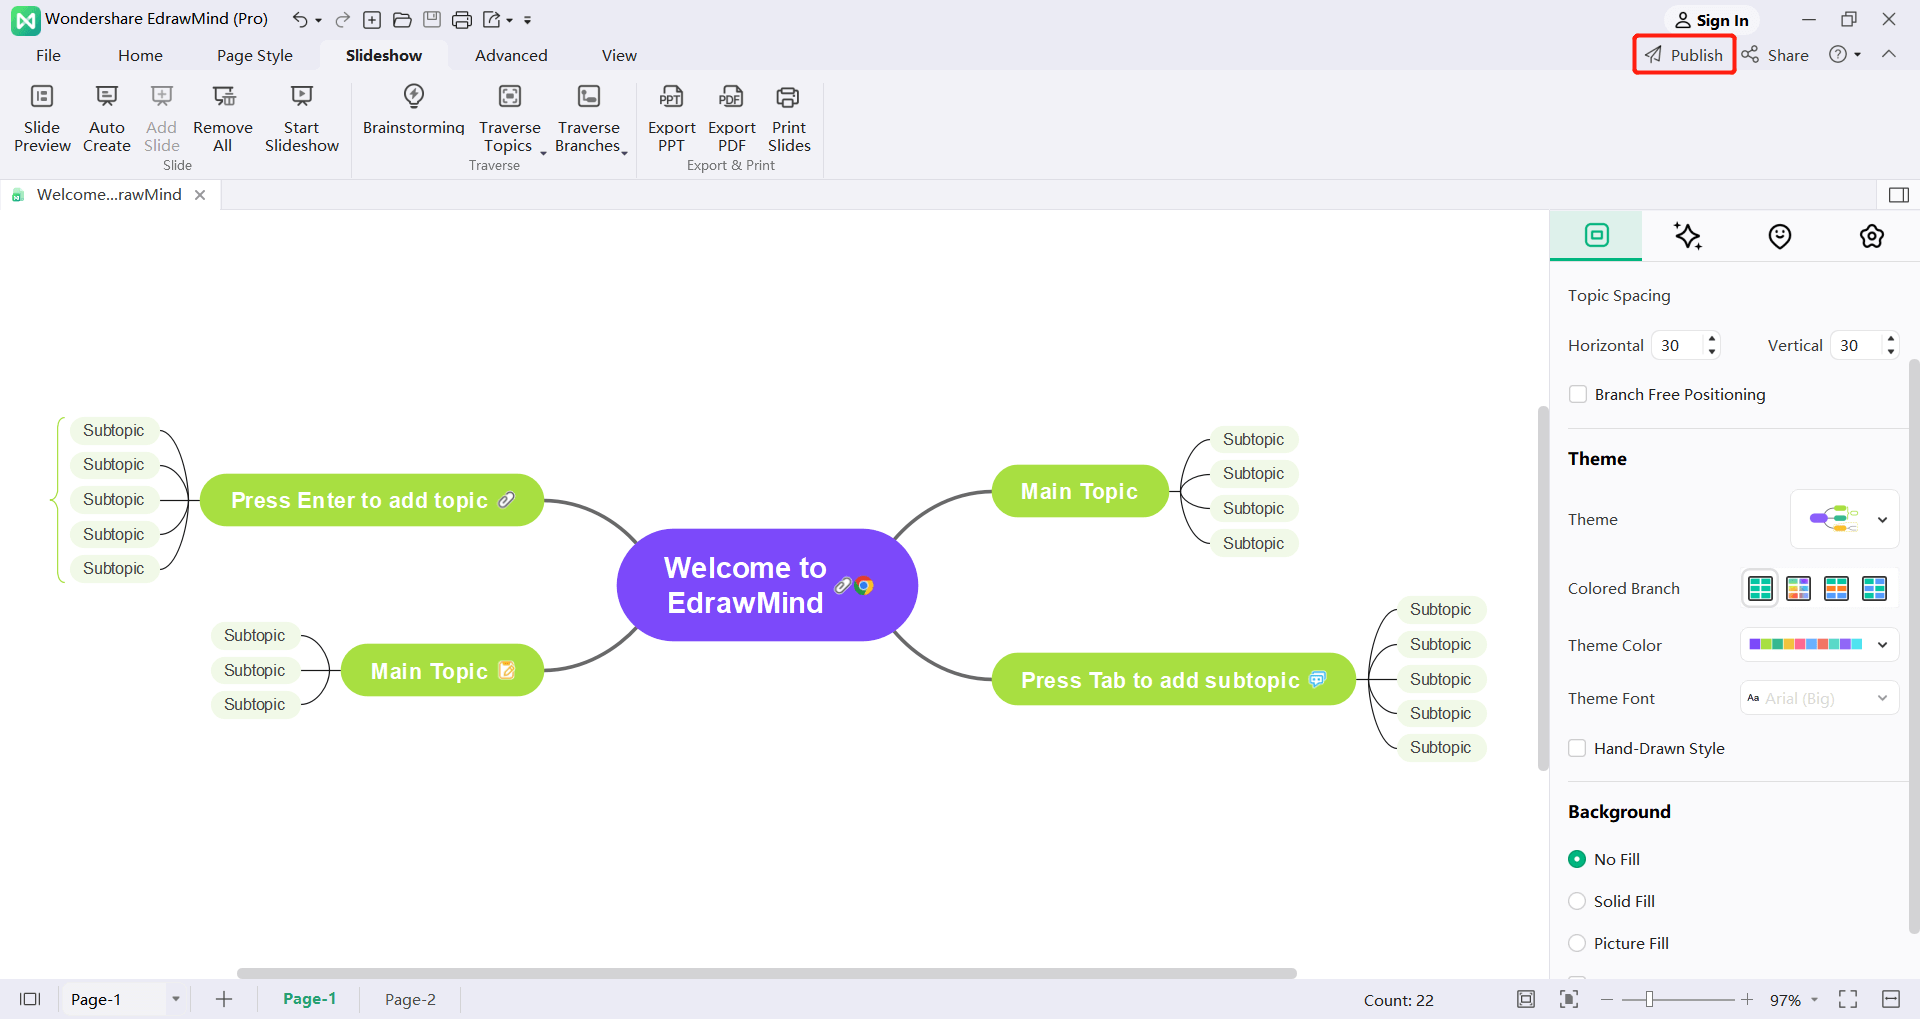
In EdrawMind, users can first create their work and then click the “Publish” button in the upper right to share it.
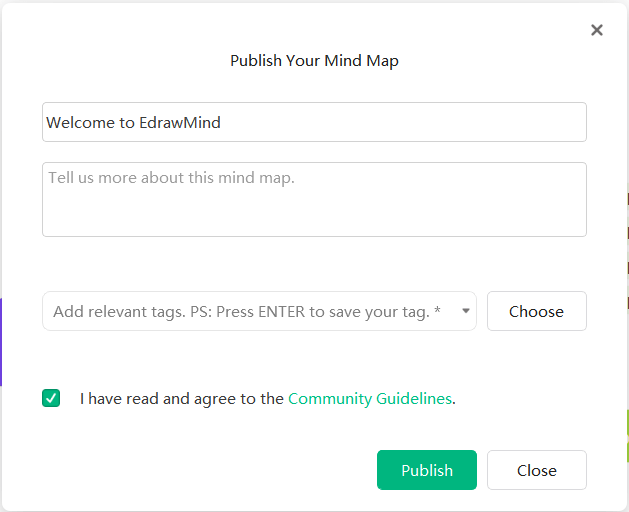
- Title: Users can name the title of the work.
- Description: Describe the content of the work in 15 words or more.
- Tags: Label the work appropriately so others can search for it easily.
- Publish: Users can set the access to "Public Only", "Free Clone”, "Paid Clone" or "Free for Members". After filling in the above work information, users can tick to agree to the terms of service, and finally publish the work.
Viewing Personal Homepage
Click the map community, and then the avatar on the right to jump to the user’s personal homepage.

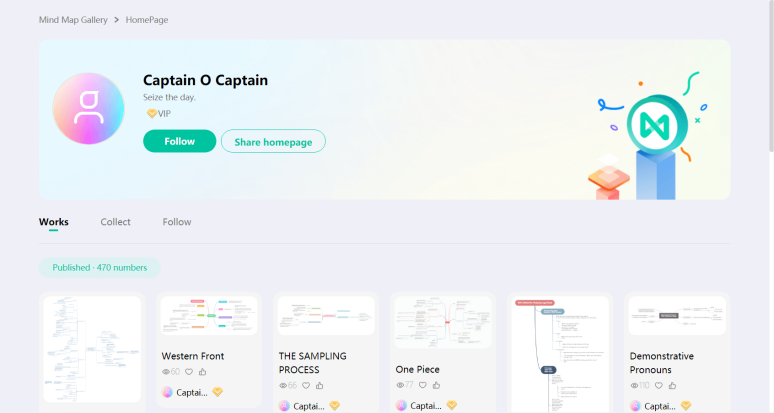
On the personal homepage, the user will be able to see all his works, as well as the number of views, likes, usage and collections of his works, as well as the author's fans and followers.
Resources
Ctrl + G
These are resources that can be used to create task assignments. In EdrawMind, "Resources" is a special label group. Users can click "More" under the "Start" menu and select "Labels".
Creating/Deleting Resources
All resource tags can be created first in the "Resources" group.
- Check the topics that require resources.
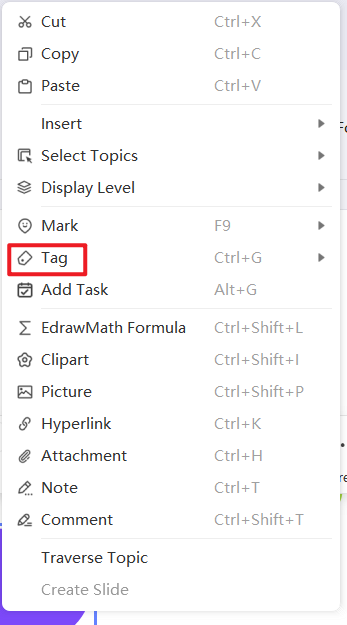
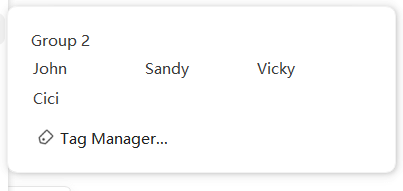
- Click "More" under the "Start" menu, and click "Tags - Tag Management" in the drop -down menu to enter the Tag Management window. Users can also right-click a topic and click "Tags - Tag Management " in the context menu.
- The "Resources" group can be seen in the "Tag Management" window as the default tag group.
- Click to select the Resource group (if there are no other tab groups, this resource group will be automatically selected).
- Enter the label text (ie the resource name) in the text box on the right and press "Enter" to display each new label.
- Click “Add”, then “OK” to finish adding the resource.
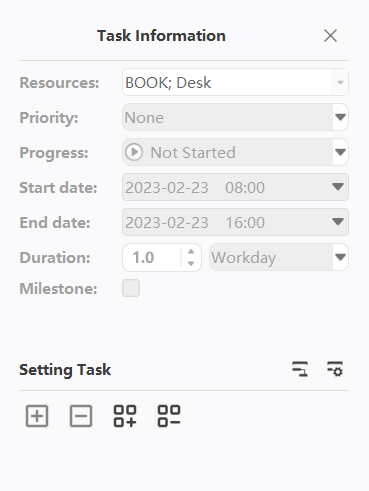
- The created resources will be displayed in the "Label" drop-down menu, the "Resources" list in the "Icon" column on the right column and in the "Resources" drop-down list in the "Task Info" column on the right column.
- To remove a resource from a resource group, open the Tag Management window, select a resource tag, click the “Remove” button, and click “OK”.
Adding Resources to Topics
Once the resources are created, it is convenient to add these resources to the topics as tags.
- Select the topic to add resource tags.
- Resource tags can be added from three places (please refer to the last section).
- "Insert Tag" drop-down menu.
- "Resources" list in the "Icon" column.
- The Resource drop-down list in the Task Info column.
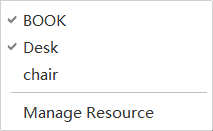
- Choose a resource tag from one of the sources above. When an asset is added to a topic, it has a blue background or a checkmark to distinguish unused asset tags.
- To remove a resource tag from a topic, simply deselect the tag name.
Adding/Removing Tasks
F10
Tasks can be assigned to each topic of the mind map. Task information, such as task start and end times, priority, progress, task resources, and tags, can be added to topics, and this information will appear below the topic shape.
- Select the topic that needs to be assigned tasks.
- Open "Tasks": Click "Tasks" under the "Advanced" menu.
- Choose a resource tag from one of the sources above. When an asset is added to a topic, it has a blue background or a checkmark to distinguish unused asset tags.
- Click the " Add Task Info" button to add new tasks to topics, or click the "Add All Task Info" button to add tasks to all topics.
- Click the "Delete Task" button to delete a task from a topic, or click the "Remove All Task Info" button to delete a task from all topics.
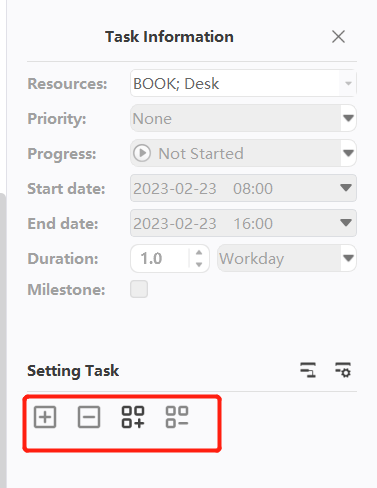
Editing Task Information
In the task panel, task information can be edited even after adding it to the topics.
- Click the Resource drop-down menu and select a resource.
- Select the task priority in the "Priority" drop-down menu.
- Select the progress icon from the "Progress" drop-down menu.
- Select dates from the drop-down calendar to set the project start and end dates.
- EdrawMind will automatically generate the duration of the task according to the start date and end date, and the time unit can be selected from the drop-down list of "Duration".
- Tick the checkbox in front of "Milestone" to mark a milestone task.
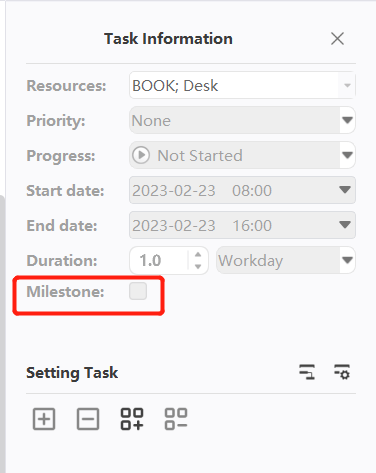
Working with Gantt Chart View
Gantt charts allow users to monitor project status and progress through the visual task bar, and task information can be managed directly in the Gantt Chart view. When users change task information in the Gantt Chart view, the related information will also change on the mind map.
Opening/Closing Gantt Chart View
- There are two ways to open a Gantt Chart view:
- Click the "Gantt Chart" button under the "Advanced" menu.
- In the "Advanced" menu, click "Tasks", and then click the "Create Gantt Chart from Mind Map" button on the right panel.

- Click the above button again to close the Gantt Chart view.
Setting Gantt Chart Options
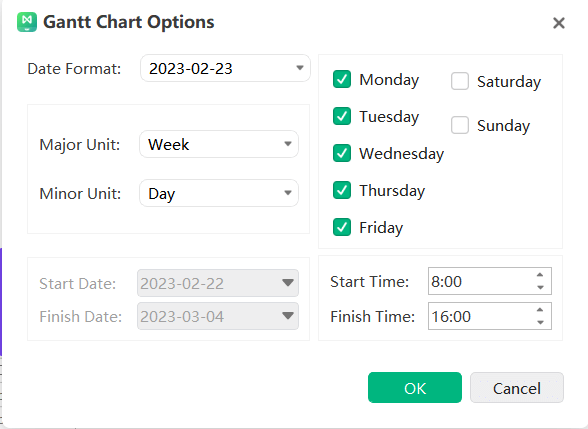
In the Gantt Chart Options menu, users can set the date format, major and minor units, its corresponding workdays, and the start and end times for the entire project.
- Open the Gantt Chart Settings dialog in one of the following ways:
- Click the "Gantt Chart Options" button under the "Advanced" menu.
- Click the "Gantt Chart Options" button in the task pane on the right sidebar.

- Edit Gantt Chart options from the “Gantt Chart Options” dialog box.
- Set the date format in the "Date" drop-down menu.
- Select working hours (days of the week are working days).
- Set "main unit" and "secondary unit".
- Set the start time and end time of the task.
Editing Task Information in Gantt Chart View
Gantt Charts display tasks in a timeline, and users can move or drag task blocks on the timeline to change the start and end dates of tasks. Task dependencies can also be built in the Gantt Chart view.
- Renaming tasks: Double-click a cell in the Task Name column to rename the task.
- Changing start and end dates: Drag the right border of the taskbar to change the bar length. Select and move the taskbar to change its position on the calendar.
- Changing task completion progress: Place the cursor on the left border of the taskbar, hold down the mouse and drag in the correct direction. A green area will be displayed, which indicates the progress of the task.
- Creating task dependencies: Click the taskbar, hold down the mouse and drag it to another taskbar. When the arrow points from one taskbar to another, it indicates that the dependency is created successfully.
- Changing date unit: Click the "+" and "-" buttons in the upper right corner to change the date unit.


Exporting Gantt Charts
The “Export Gantt Chart” feature allows Gantt charts to be saved in PDF format for printing or sharing Gantt charts with others.
- Click the "Export Gantt Chart" button under the "Advanced" menu.
- Enter a name for the Gantt Chart in the Save window.
- Click "Save".
Find and Replace
Ctrl + F
Find and replace commands help to search specific text throughout the map, including text in topics, notes, comments, and labels.
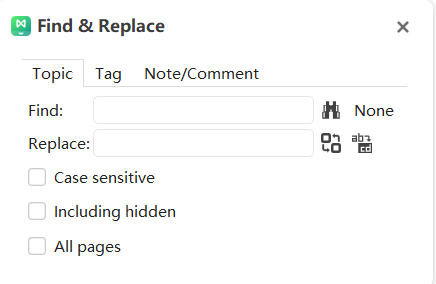
- Click the "Find and Replace" button under the "Start" menu, and the "Find and Replace" dialog box will pop up.
- Enter the corresponding text in the "Find" box and click the "Find" button .
- Enter the text that needs to be replaced in the "Replace" box, and click the "Replace" button to replace a single entry, or select “Replace All” to replace all entries.
Notice:
- To filter uppercase words, check the "Case Sensitive" box to make the search result more precise.
- Check "Include hidden content" to expand the search scope to the collapsed part.
- Check "All pages " to expand the search scope to all pages.
Spell Check
F7
EdrawMind can help diagnose spelling mistakes and provide suggestions for correct spelling.
- 1. Click the "Spell Check" button under the "Advanced" menu.
- 2. If there are spelling mistakes in the document, the “Spell Check" dialog will pop up and show all correct spelling suggestions.
- 3. Select one of the suggestions and click "Accept". If the word is correct, users may choose to ignore the suggestions.
- 4. Once "Accept" or "Ignore" is clicked, it will automatically jump to the next spelling error until no spelling errors are displayed in the document.
- 5. For words that are spelled correctly but are not in the EdrawMind dictionary, users may choose to click “Add to Dictionary” so that it will not be flagged as an incorrect word next time.
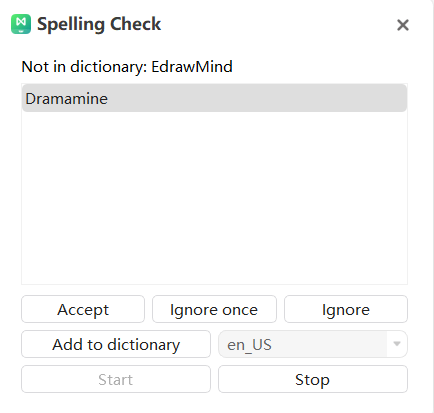
Notice:
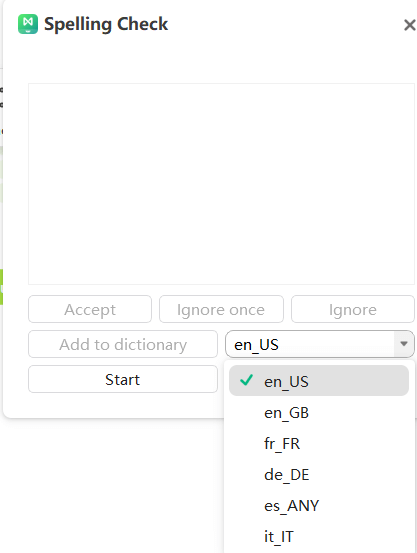
EdrawMind can run spell checks for 5 languages, including English (GB and US version), German, French, Italian and Spanish. Users will need to change the language setting of the dictionary before starting the spell check.
Undo and Redo
Ctrl+Z / Ctrl+Y
EdrawMind provides undo and redo operations for users.
Undo (Ctrl+Z)
Undo is used to cancel the previous operation. Click the “Undo” button on the Quick Access Toolbar, or press “Ctrl + Z" on the keyboard.
Redo (Ctrl + Y)
Redo is used to perform a previously undone operation again. Click the "Redo" button on the Quick Access Toolbar, or press "Ctrl + Y" on the keyboard.
File Encryption
The file encryption function can protect the security of the file, and users will need to enter the password accurately to open the mind map file.
Encryption
- Click the "File Encryption" button under the "Advanced" menu, and the "File Encryption" dialog box will pop up.
- Enter a custom password in the "Enter Password" box, and re-enter the custom password in the "Confirm Password" box.
- Click "OK" to complete the file encryption.
- Save or save the file as. emmx format.
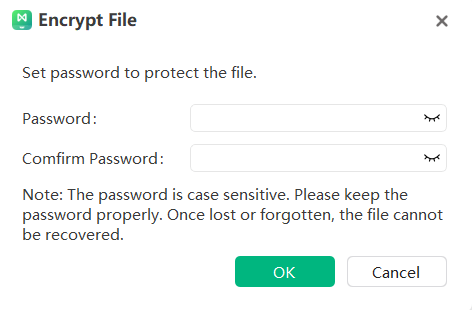
Notice:
Passwords need to be case-sensitive, and passwords need to be kept in a safe place. Once lost or forgotten, files cannot be recovered.
Decryption
Passwords need to be case-sensitive, and passwords need to be kept in a safe place. Once lost or forgotten, files cannot be recovered.
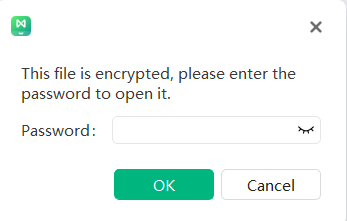
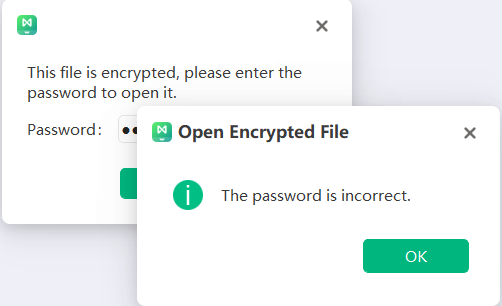
2. Enter password in the "Enter Password" box and click "Confirm".
3. Once the file is open, it can be viewed and edited as normal.
Note: If the password is wrong, the file cannot be opened normally.
File Recovery
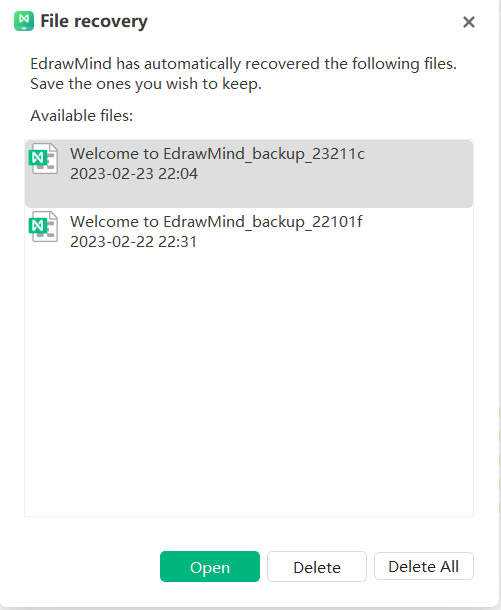
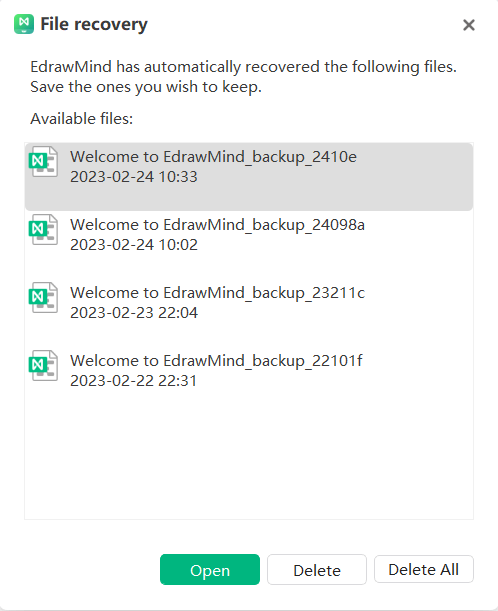
The File Recovery feature can automatically recover files, saving the files that users wish to keep. Click the "File Recovery" button under the "Advanced" menu, and the "File Recovery " dialog box will pop up.
Version History
Creating Version History Files
To create a new file, click “Create Version History” on the right menu to obtain a manually saved file.
After modifying the content of the original file, users may choose to save the version history file automatically or manually.
Saving Files Automatically
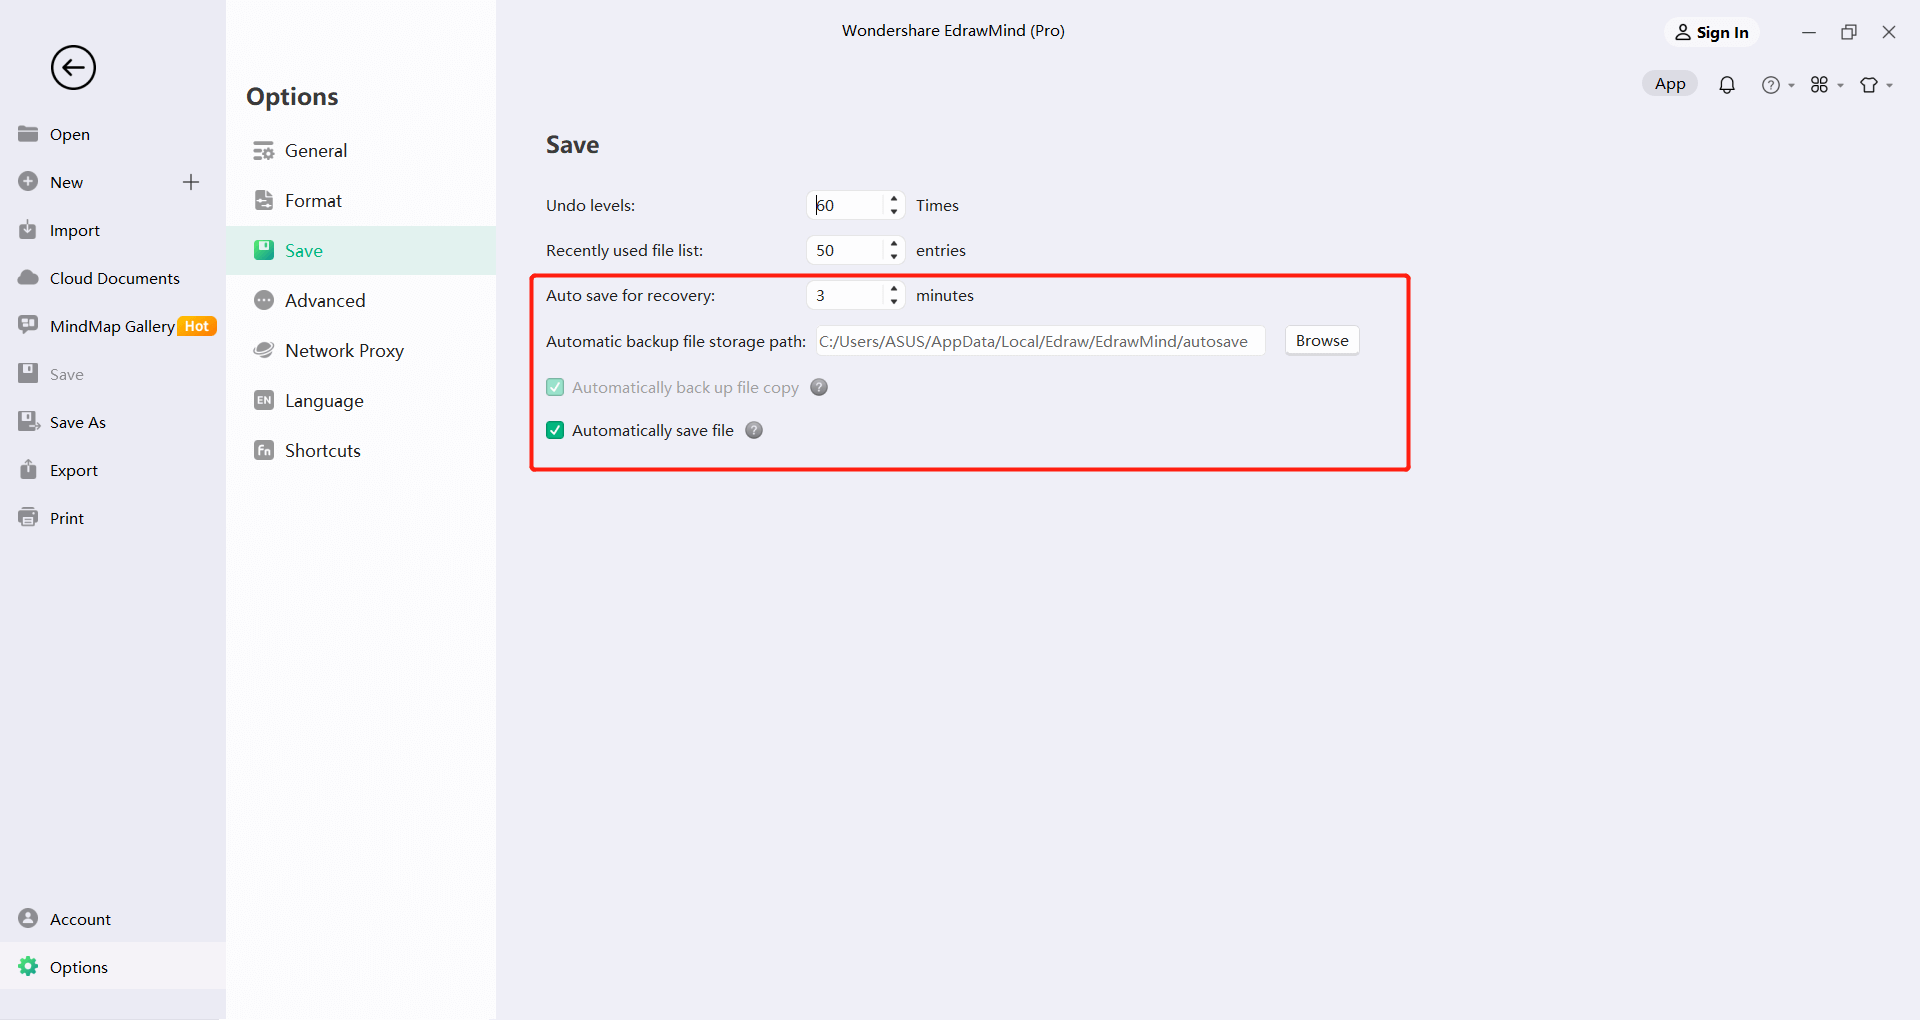
In the EdrawMind Map client, click Options - General and set “Automatic Saving Time”, and the file will be saved automatically at the set timing.
Saving Files Manually
After modifying the original file, click “Create Version History File”, and save the file at the corresponding time below.
To manually save the file, hold down the left mouse button and click the three dots on the upper right to choose to delete this version, restore this version, or preview this version.
Topic Count
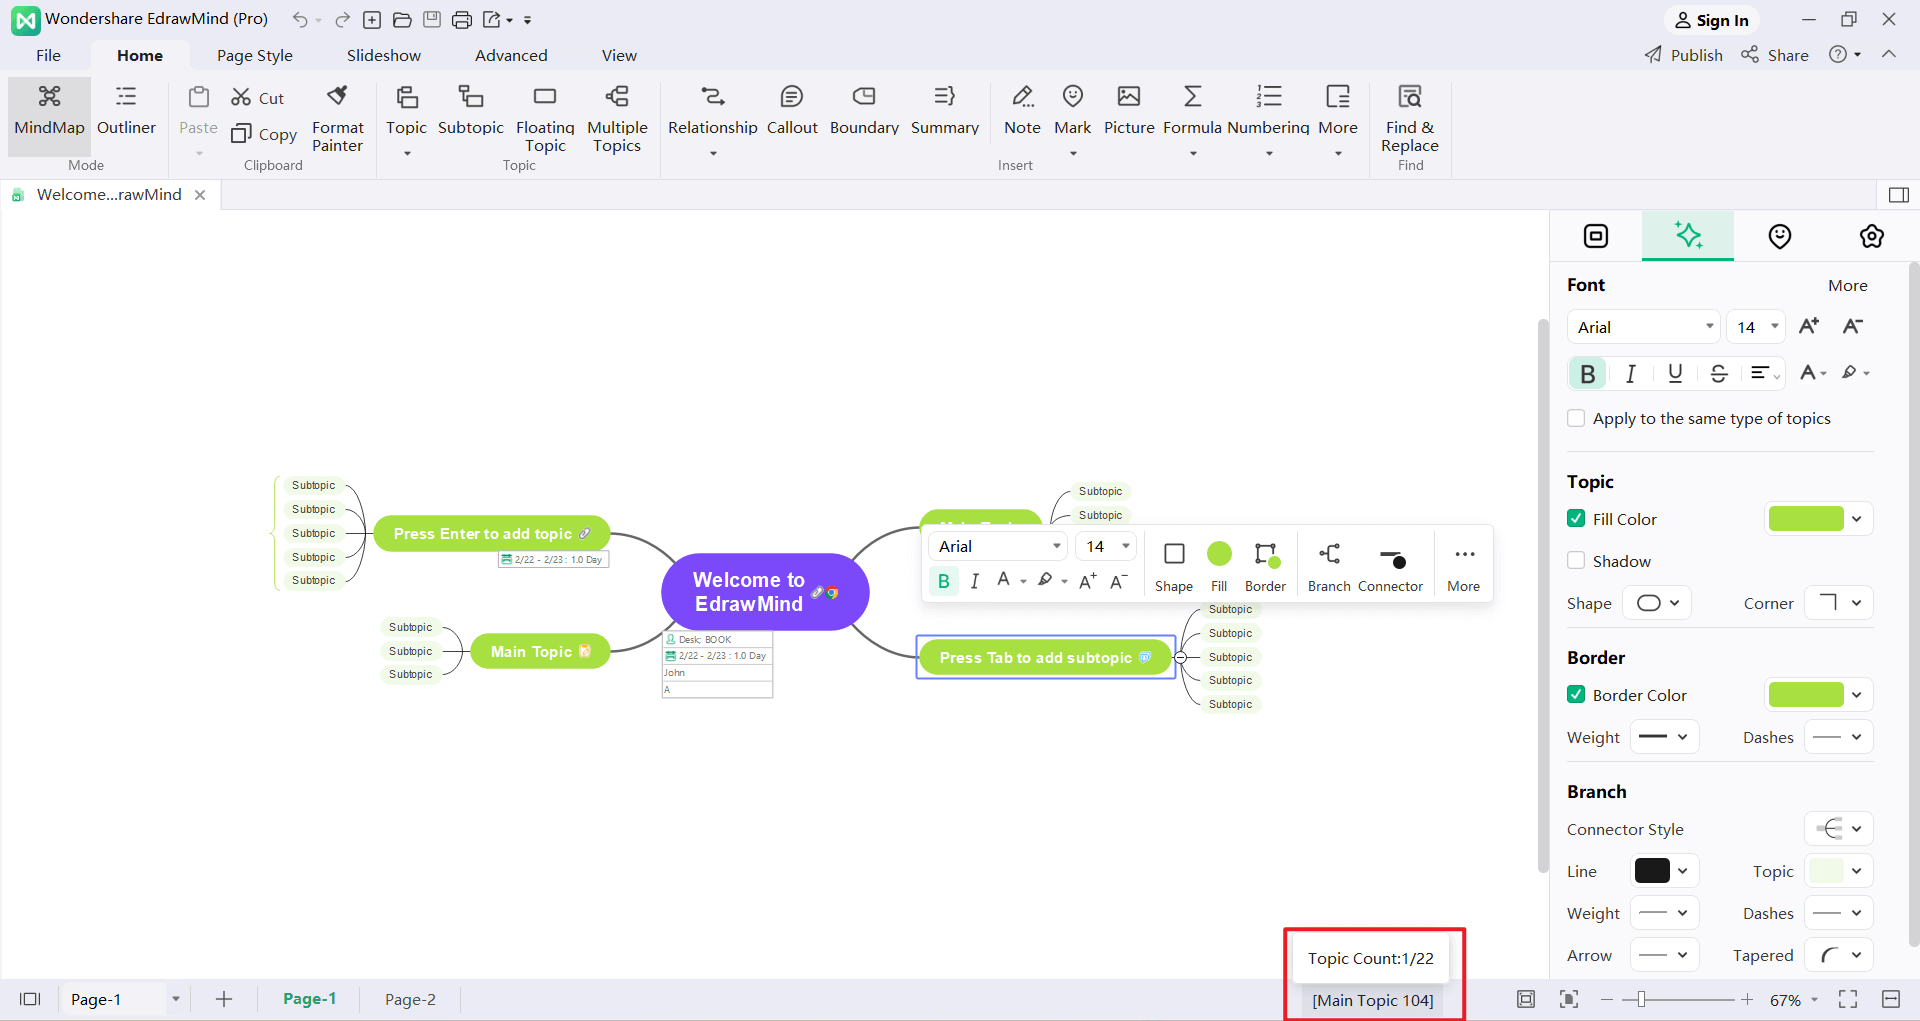
Click the “Topic Count” button at the bottom of the canvas to display the topic count and word count.
Opening Mind Maps
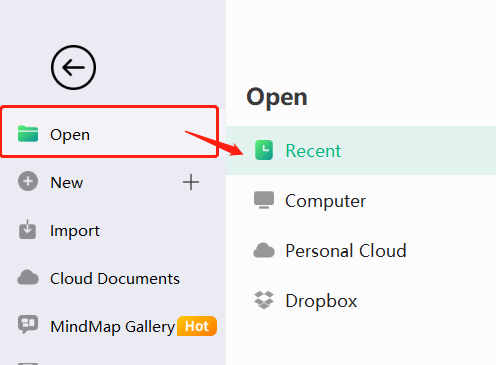
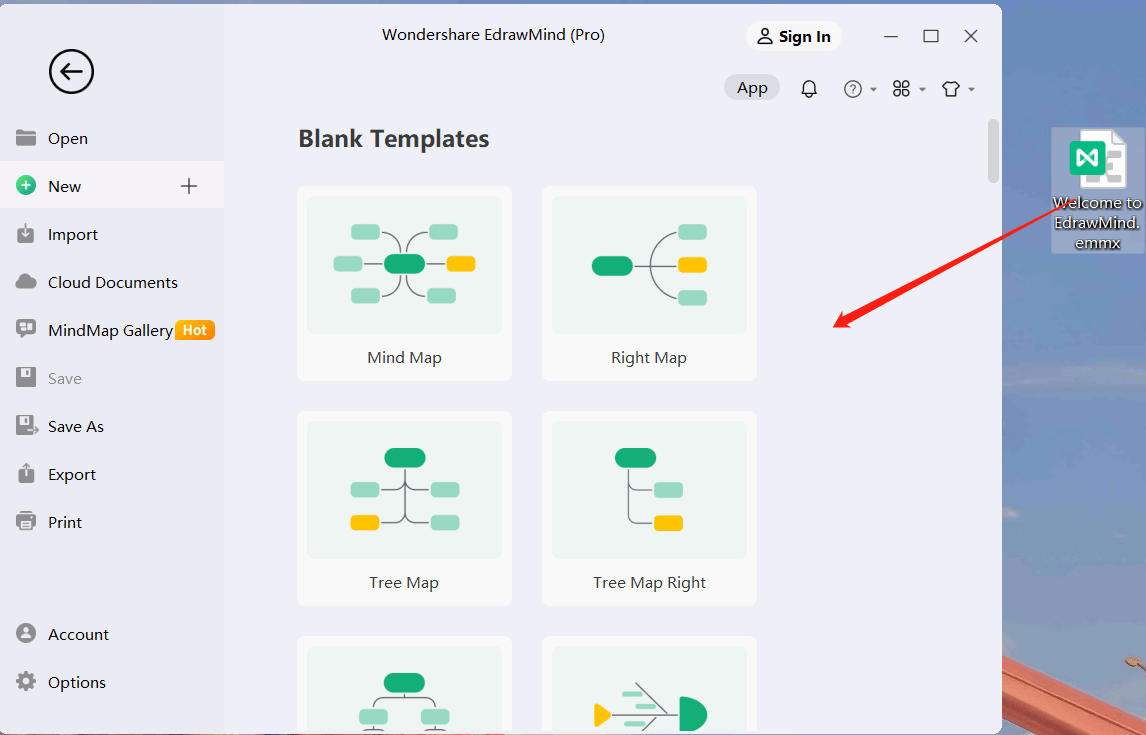
Users can open the mind maps in EdrawMind in the following two ways:
- Click "Open" in the "File" menu, and choose to open the mind map file from "Recent", "Computer" or "Personal Cloud".
- Drag and drop the mind map directly from the local file into the map window.
Importing Files
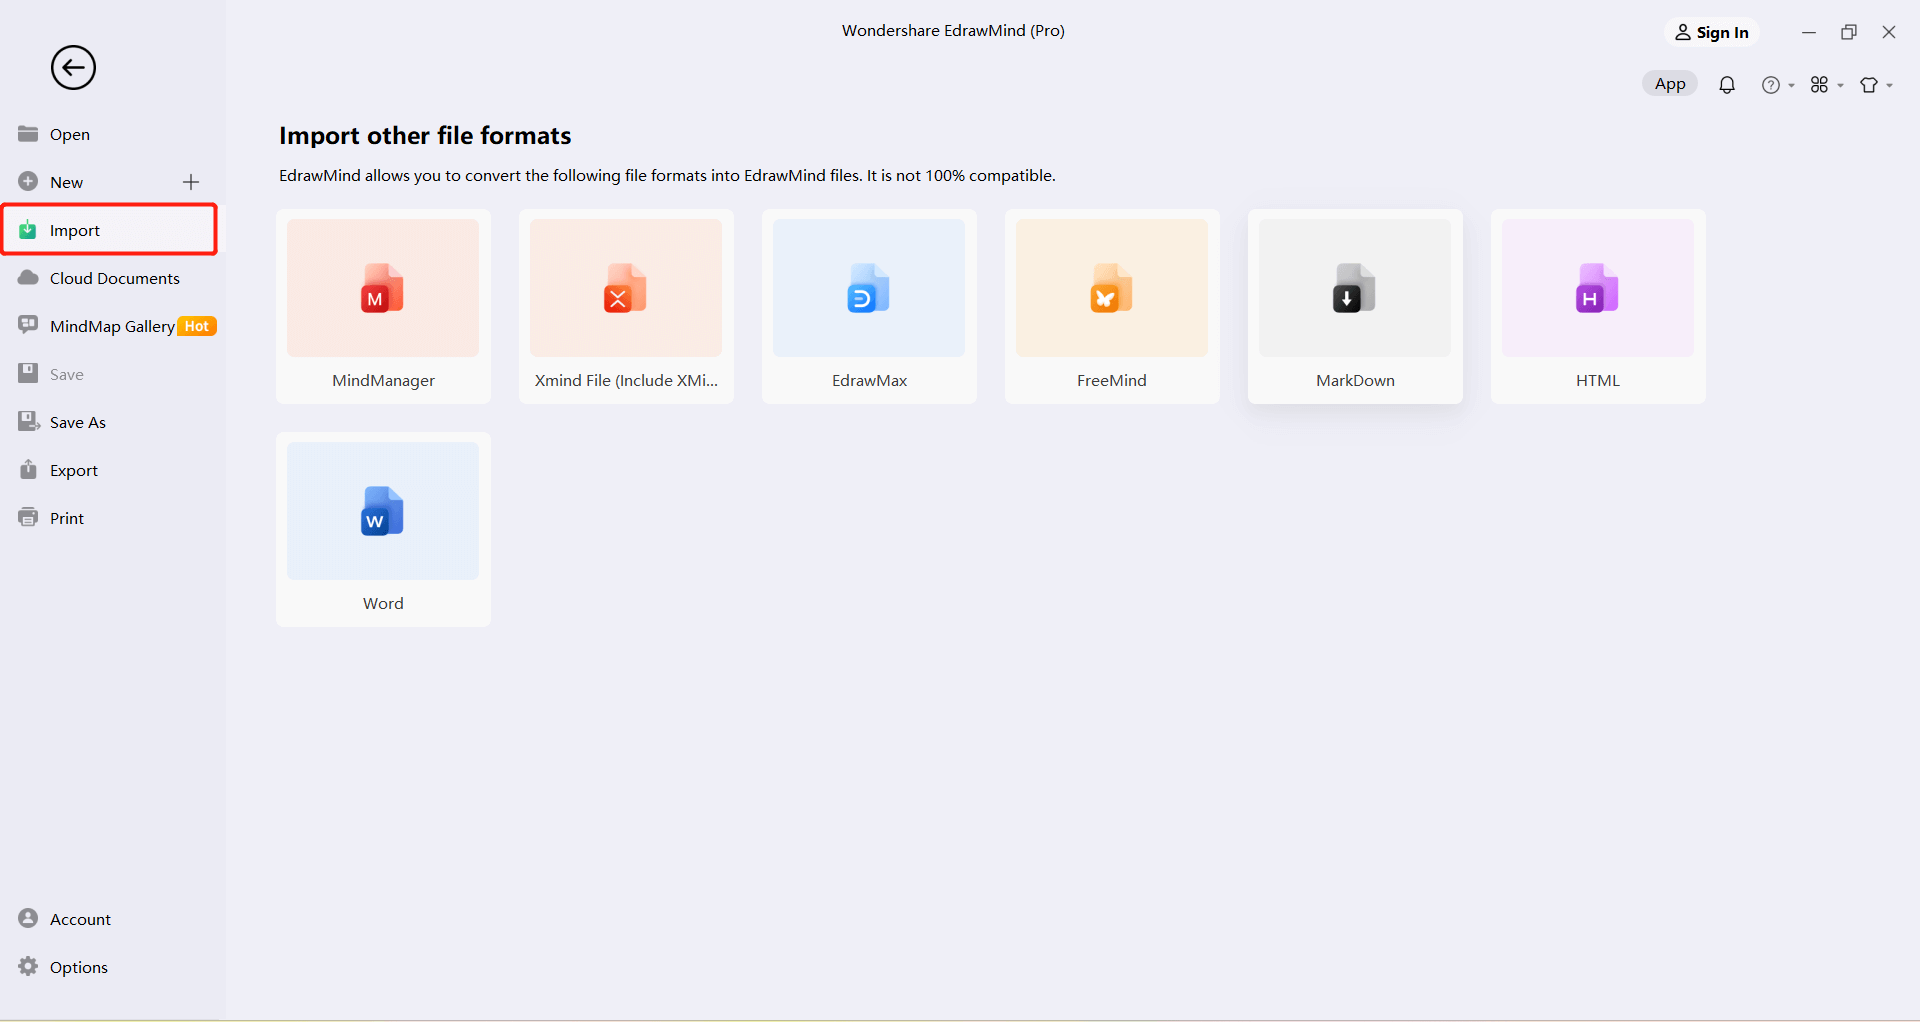
EdrawMind supports importing files from Mind Manager, Edraw Max, FreeMind, Markdown, HTML and Word:
- In the "File" menu, click "Import".
- Select the file format to be imported.
- Choose whether to import from the local file or cloud disk.
- Click "Open" to import the file.
Notice:
- The imported file may not be 100% identical to the original file.
- Importing can take several minutes if the file is too large.
Saving Mind Maps
Ctrl + S, Ctrl + Shift + S
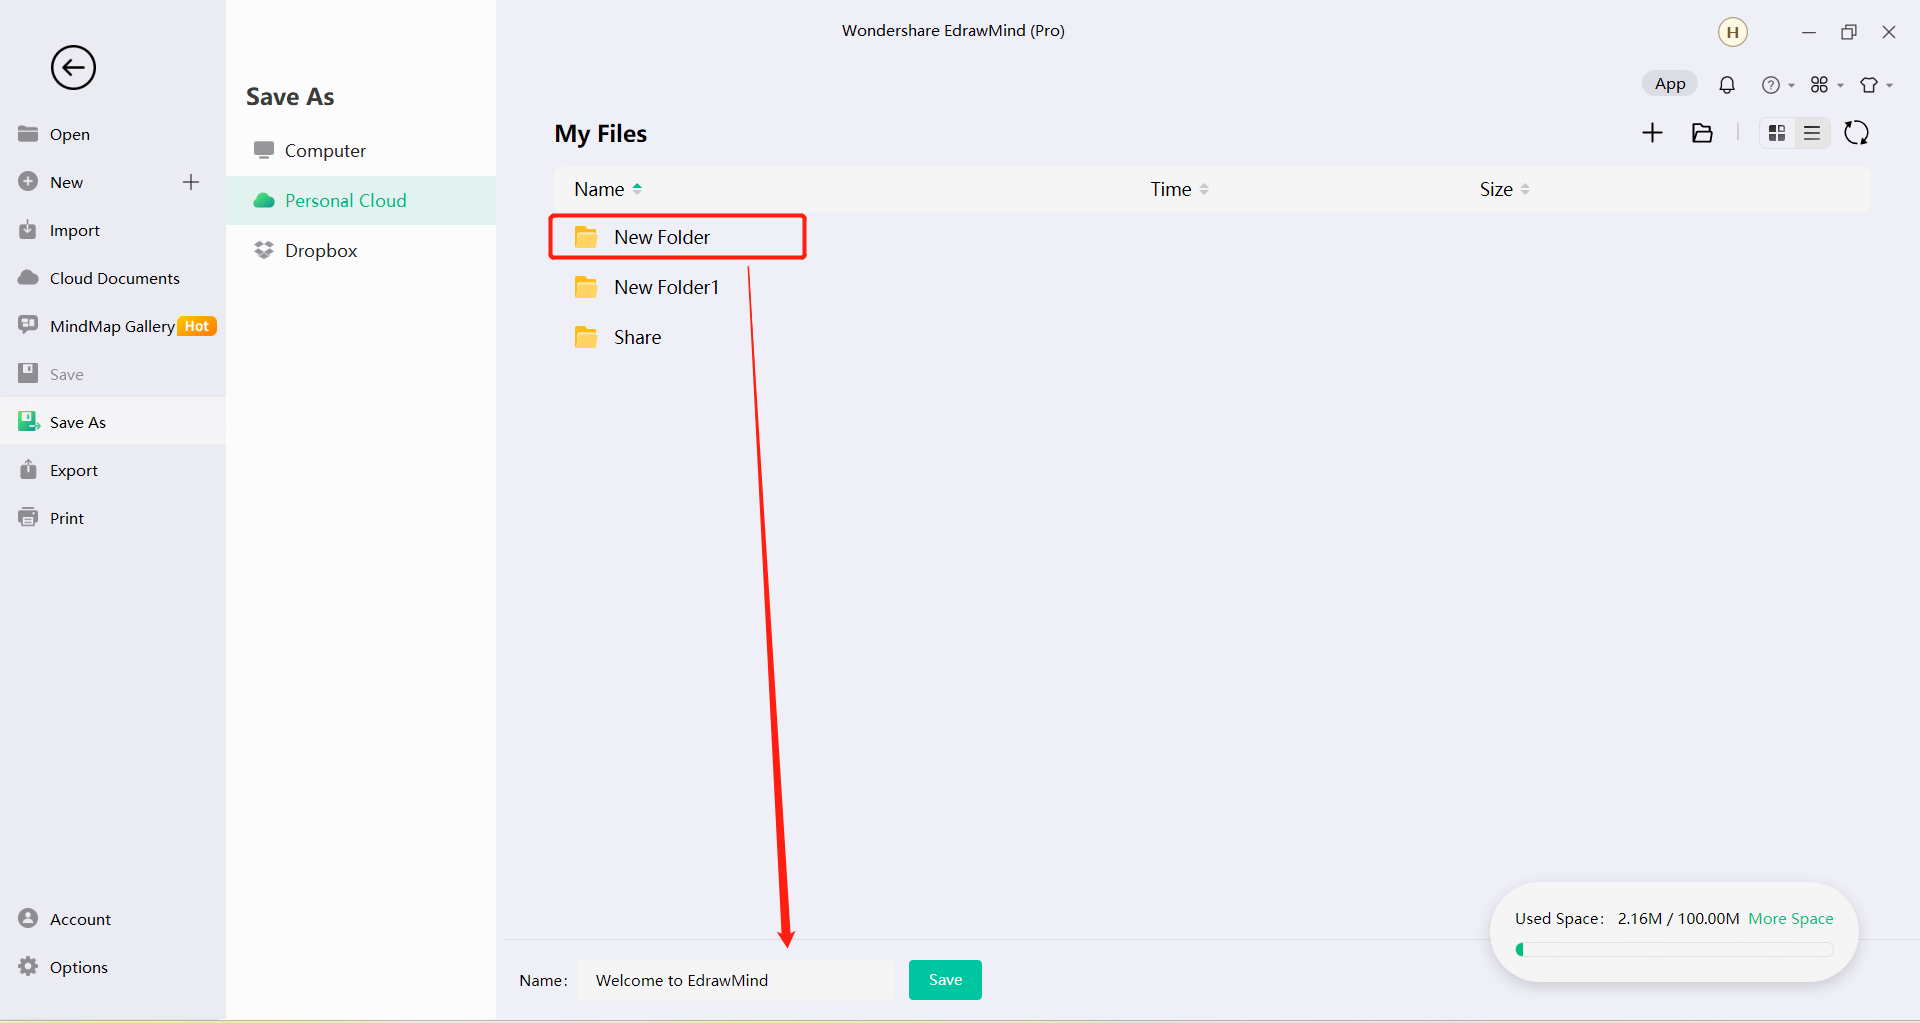
Use the "Save" or "Save As" command to save the mind map.
- Click the "File" menu, then click "Save" or "Save As".
- To save the file in the computer, select a local disk location and enter a map file name and click Save.
- To save the file in the user’s personal cloud, select the rough storage location of a personal cloud disk, enter the map name, and click Save.
Finding and Restoring Autosaved Files
EdrawMind creates automatically-saved temporary files for users in case of file loss due to unexpected computer shutdown or software crash. The user can set the interval time for automatic saving. The default setting is to automatically save every 3 minutes.
Setting Autosave Intervals
- In the "File" menu, click "Options", then "General".
- Enter a time value in the box to the right of "Auto Backup Interval".

Finding Autosaved Files
- Click the "File Recovery" button under the "Advanced" menu.
- Find autosaved files from the file recovery list.
Printing Mind Maps
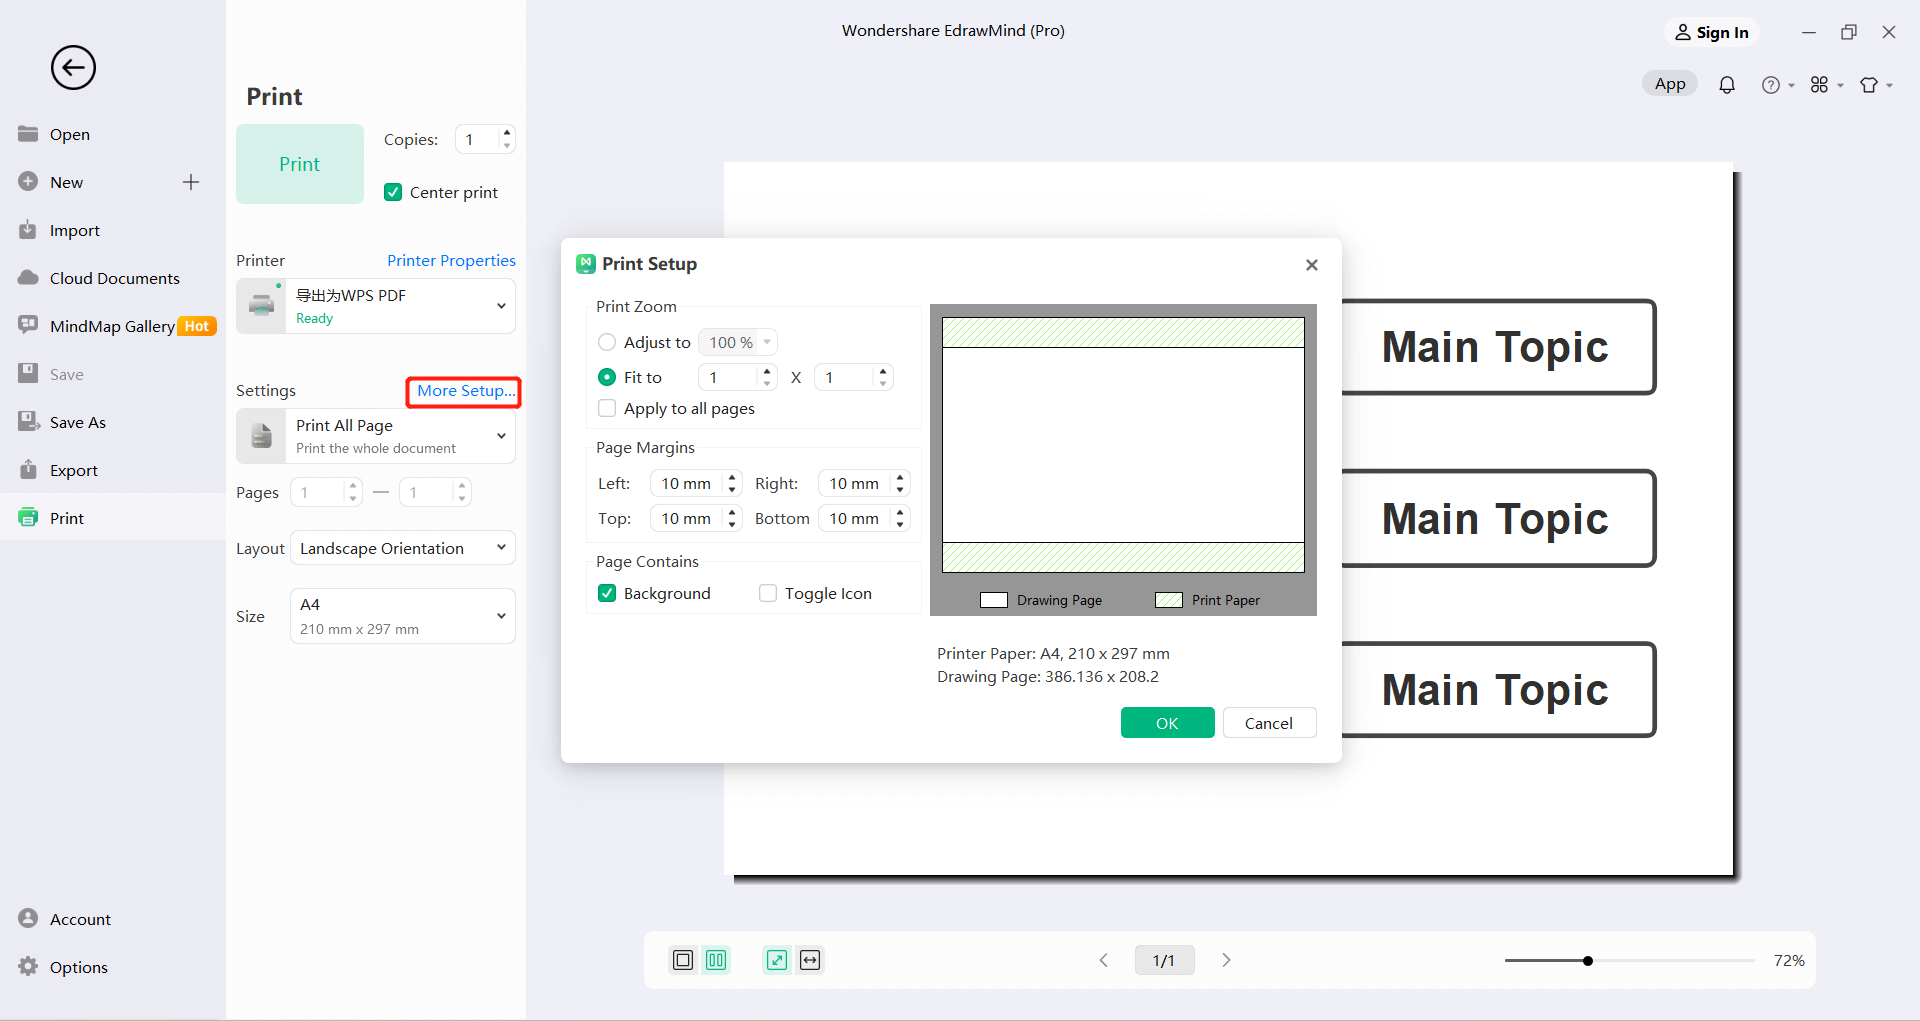
Click the "Print" button under the "File" menu to print the map.
Printing Orientation
Specify the paper orientation as “Portrait” or “Landscape”.
Paper Size
The list shows the paper sizes supported by the current printer as well as industry standard sizes.
Printing Settings
Click "Print" under the "File" menu, and then click "More Print Settings".
Adjustments
Reduces or enlarges the map page to a specified percentage of the actual size of the print. If the map page is larger than one paper size, the chart will be printed on multiple sheets.
Fit
Fit the map to the window size or width of the window.
Exporting Mind Maps
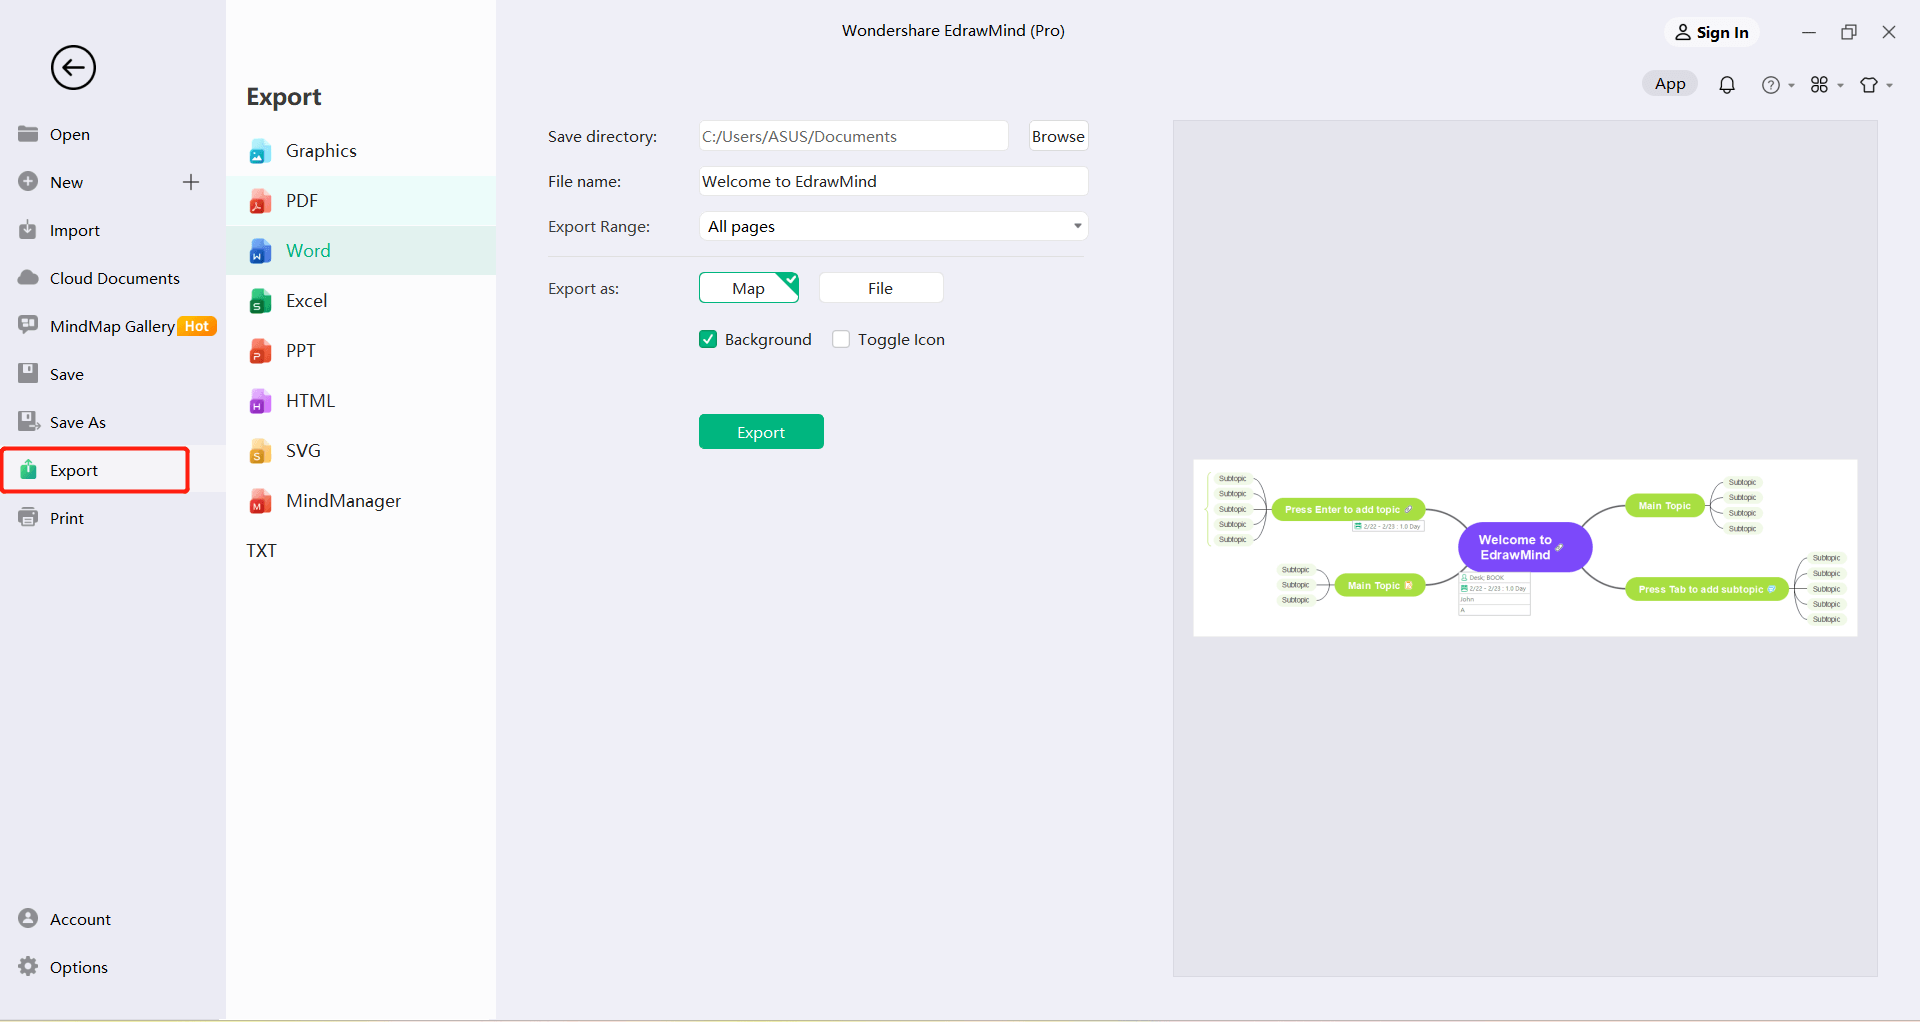
Mind maps can be exported in different formats, including image formats, PDF, Office, HTML, SVG, Mind Manger and Youdao Notes, etc.
Exporting to Image Formats
Mind maps can be exported to various image formats such as jpg, png, bmp, ico and pbm, tiff, etc.
- Under the "File" menu, click "Export".
- Click on the "image" format.
- In the "Save as type" drop - down list, select the appropriate image format, then click "Save".
Exporting to editable PDF format
- Under the "File" menu, click "Export".
- Click the "PDF" option; then click "Save".
Exporting to editable MS Office file
EdrawMind Map supports exporting mind maps as editable MS Office files, including Word, PowerPoint, and Excel files.
- Under the "File" menu, click "Export".
- Click the "Office " option.
- Select "Word", "PowerPoint" or " Excel" and click "Save".
Note: Users can choose "Export All Pages" or "Export Current Page".
Exporting to HTML file
- Under the "File" menu, click "Export".
- Click the "HTML" option, then click "Save".
Note: If necessary, check the boxes in front of "Export Title", "Embed Image in File" and "Export Current Page".
Exporting to SVG format
Save to SVG vector graphics format:
- Under the "File" menu, click "Export".
- Click the "SVG " option, then click "Save".
Note: Users can choose "Export Selected Branch", "Export All Pages" or "Export Current Page".
Exporting to MindManager file
Mind maps can be exported to MindManager format files so that MindManager users can open and edit them.
- Under the "File" menu, click "Export".
- Click the "MindManager" option, then click "Save".
Sharing Mind Maps
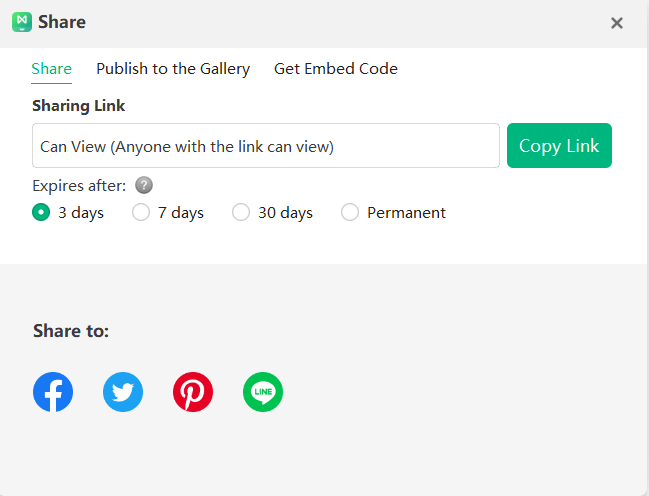
After completing the map, click "Share" in the upper right corner of the software to share the map. EdrawMind supports link and code sharing, as well as publishing to the community and major social platforms.
Cloud Files
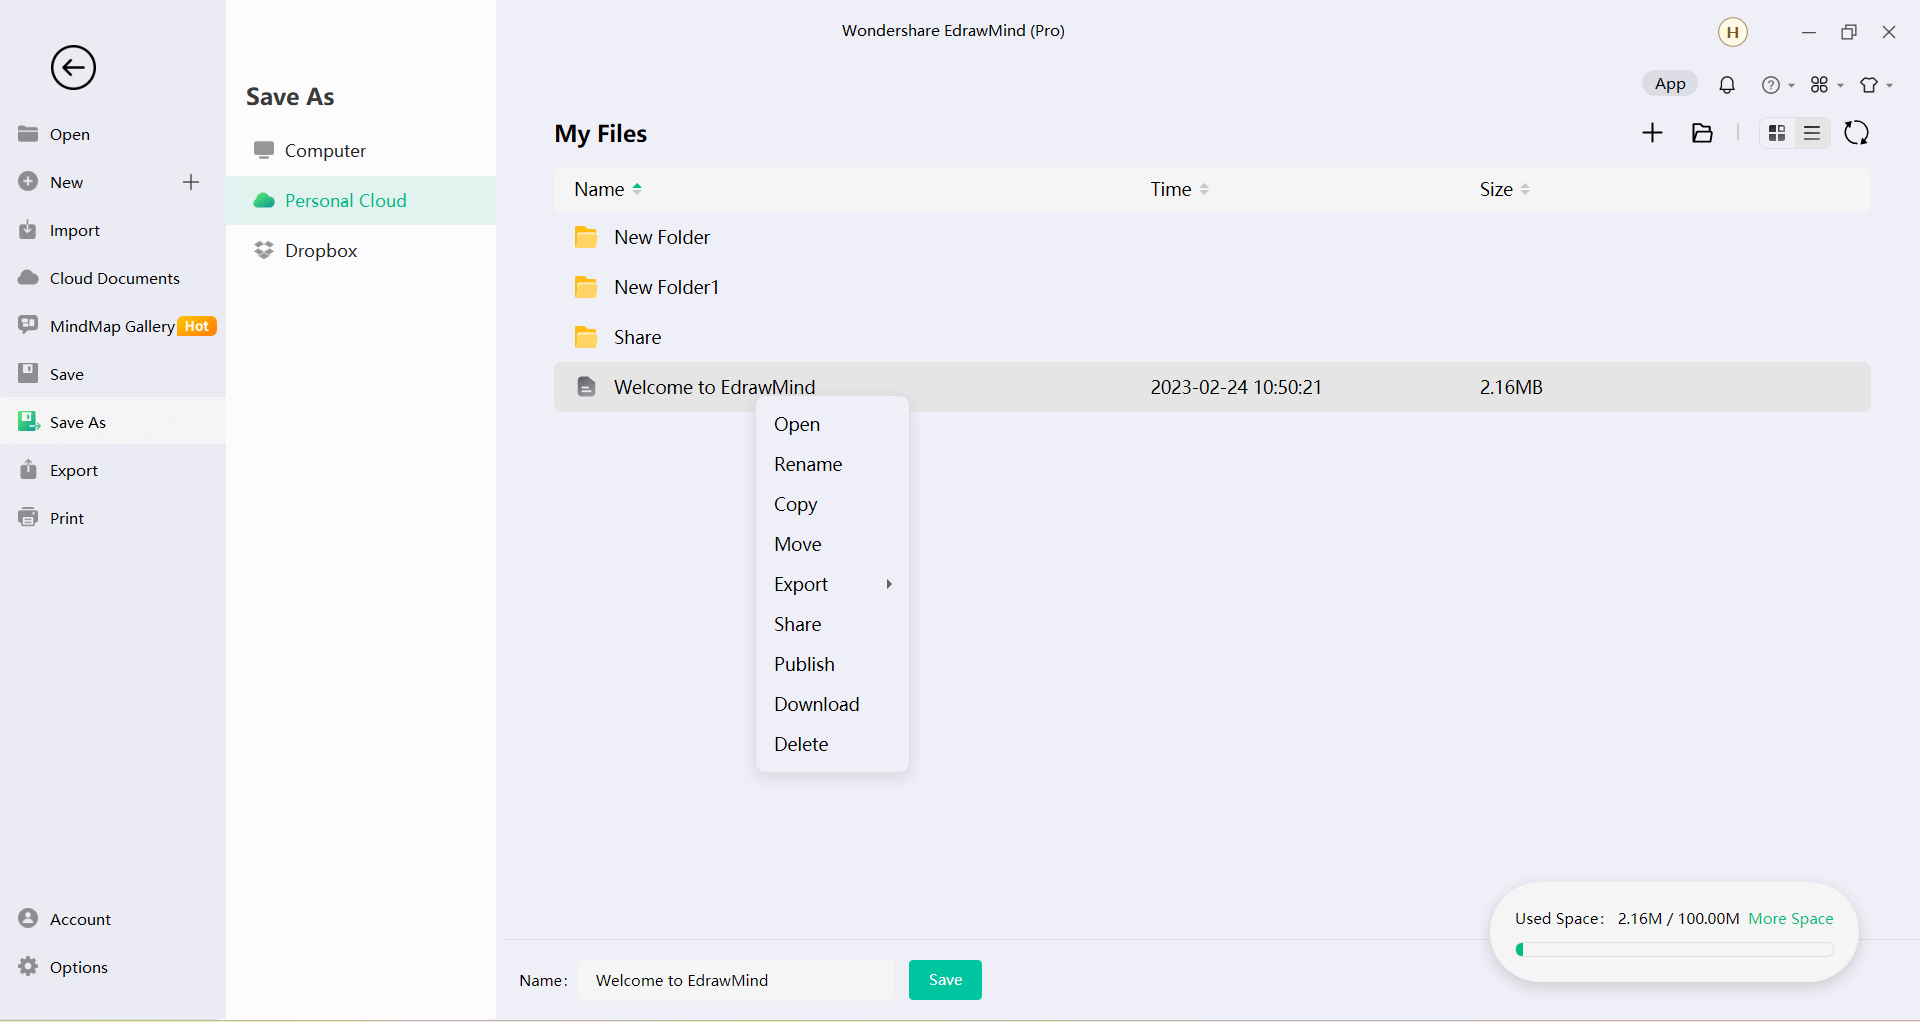
EdrawMind has a cloud network, and the completed mind map can be "Saved As" a cloud file (personal cloud). Users can also add folders, rename, open or delete the "cloud file" as well as perform a wide array of operations.
Cloud files can be accessed synchronously on other devices (other computers, mobile phones, tablets, web pages) through the user’s account. Users only need to log in to the same account to access cloud files under this account on any device, anytime, anywhere.
=
Creating Cloud File Folder
Click Cloud File → New → Folder → Enter the folder name → Click OK to create a new folder.
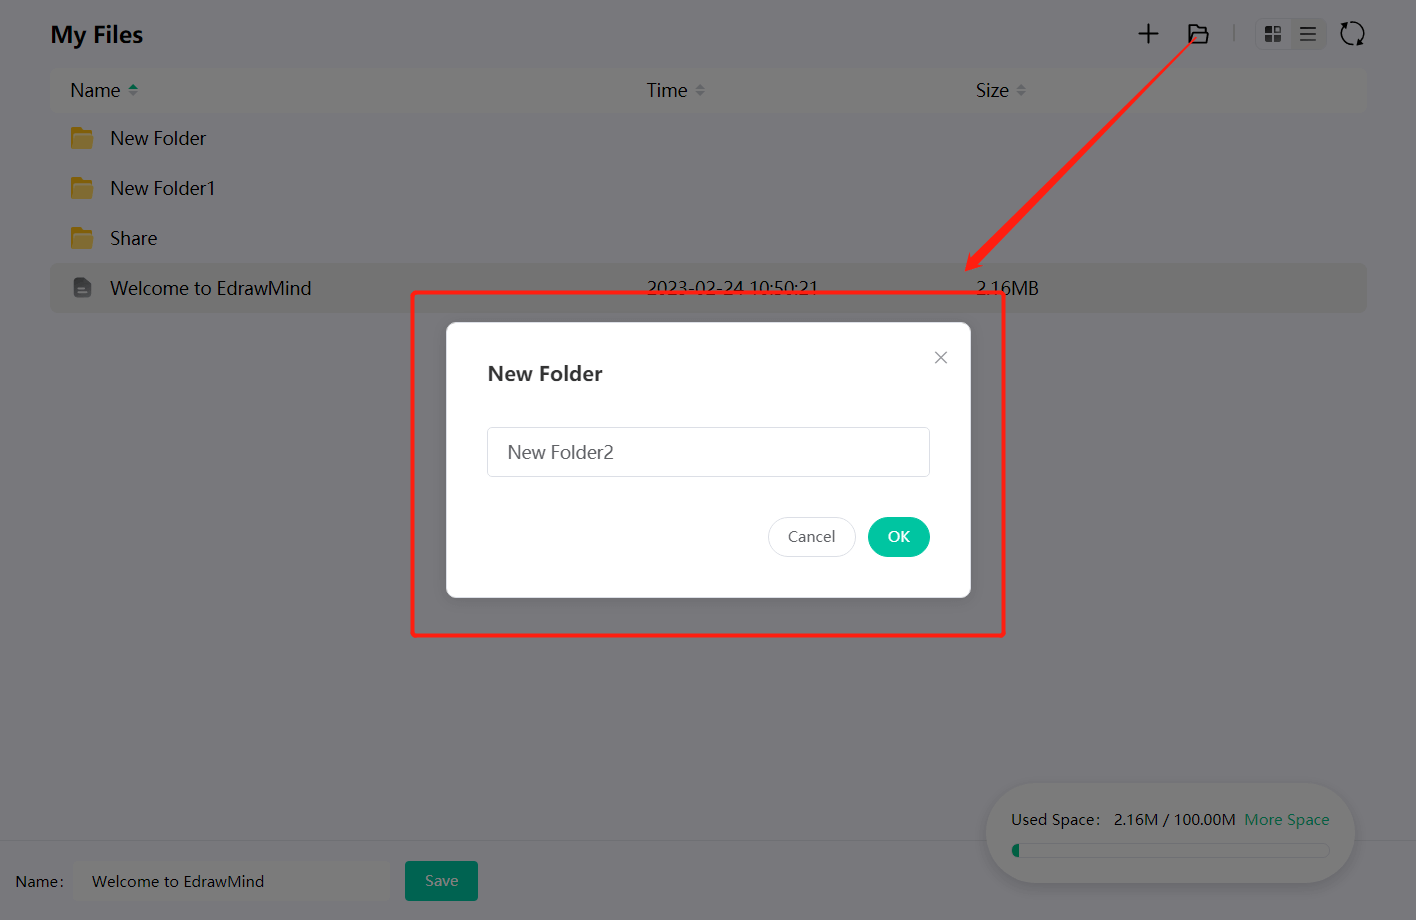
Renaming Cloud File
Right-click the file or folder to be renamed → modify the name → click anywhere except the edit box to save the modified name.

Copying Cloud Files
Right-click the file (folder) to be copied → Copy to → click to select the saved folder to complete the file (folder) copy.
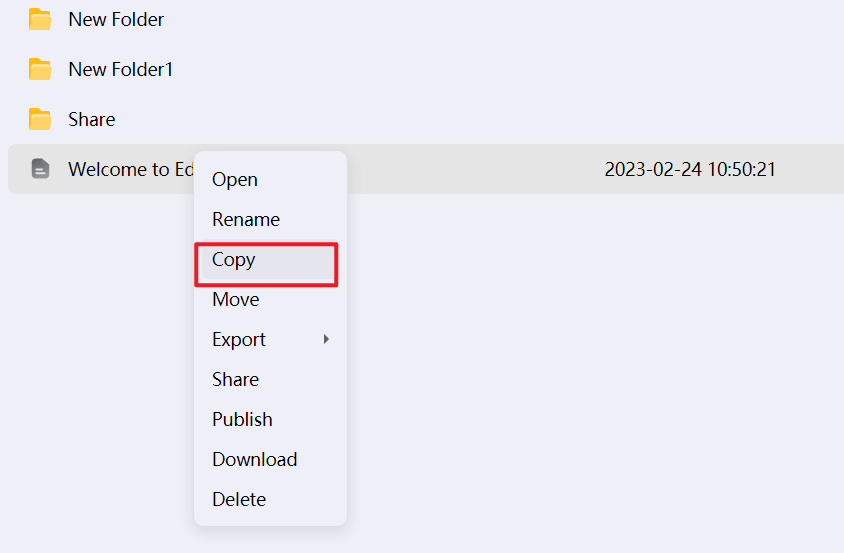
Deleting Cloud Files
Right-click the file (folder) to be deleted → Delete to complete the deletion.
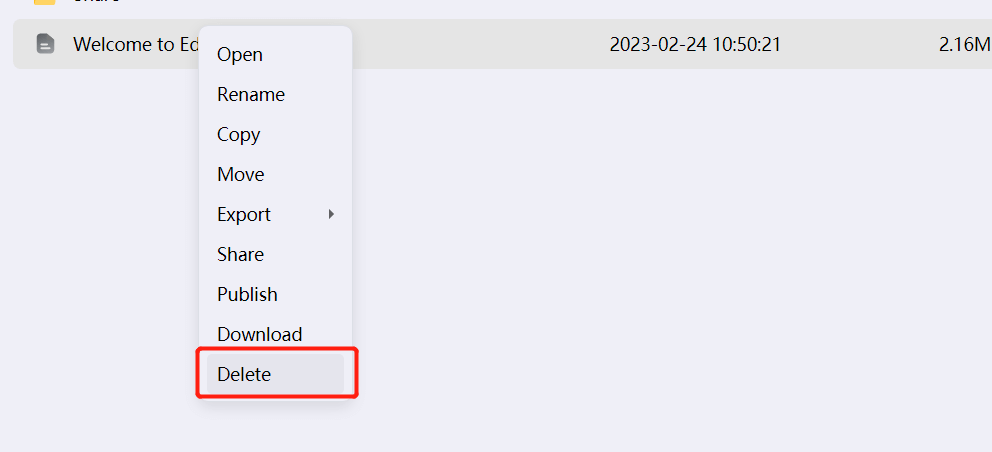
Collapsing and Expanding Branches
Move the cursor to the right side of the topic box until appears. Then, click the icon to collapse the branch of the topic.
In its collapsed state, click the circled number on the right side of the topic box (the number indicates the number of branches), such as:  , to expand the branch of the topic.
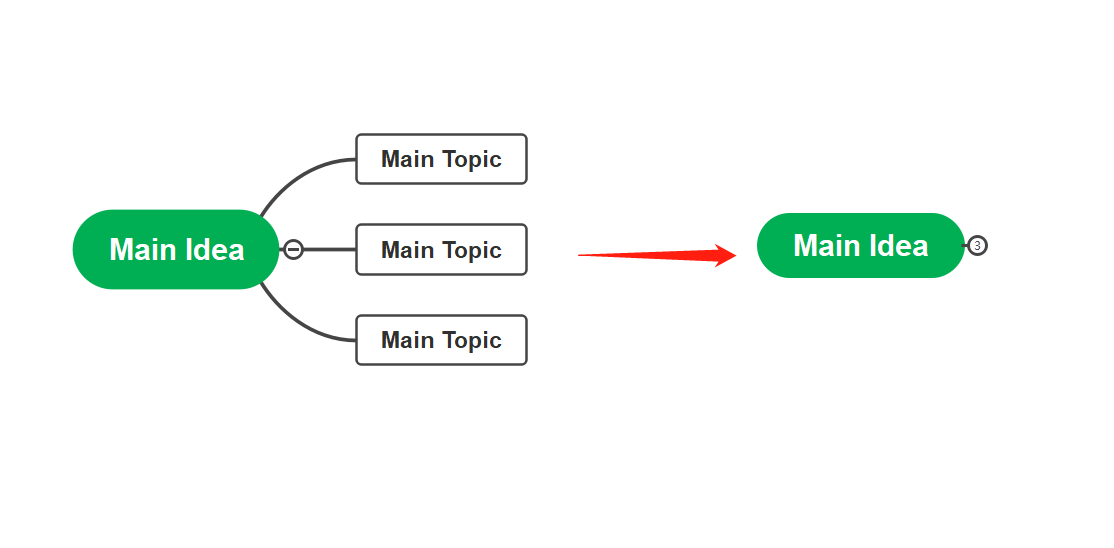
Notice: Press "Ctrl + F3" on the keyboard to collapse all subtopics (leaving only the central topic and its subtopics).
Displaying Map Hierarchy
Users can choose which map level to display by doing two things:
- Under the "View" menu, click the "Show Hierarchy " button and select the level to be displayed.
- Click "Show Branches" under the "View" menu. Each click will display the next level of branches until all of them are displayed.
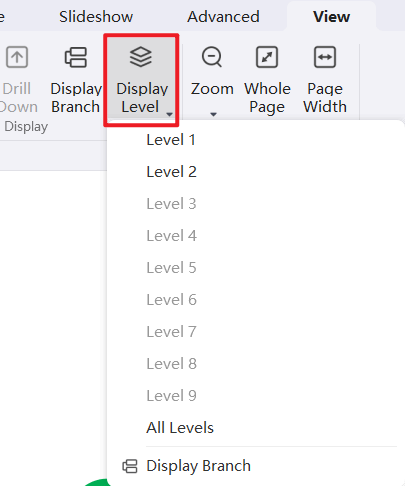

Drill Up/Drill Down
F4
When presenting a mind map, users can use the "drill down" feature to focus on a specific topic and avoid being distracted by other branches of the mind map.
Drill Down
- Click to select the topic that needs to be displayed separately, and click the "Drill Down" button under the "View" menu.
- Alternatively, right-click the selected topic, and then click "Drill Down" in the menu.
- Only the topic and its branches can be displayed through the above operation.
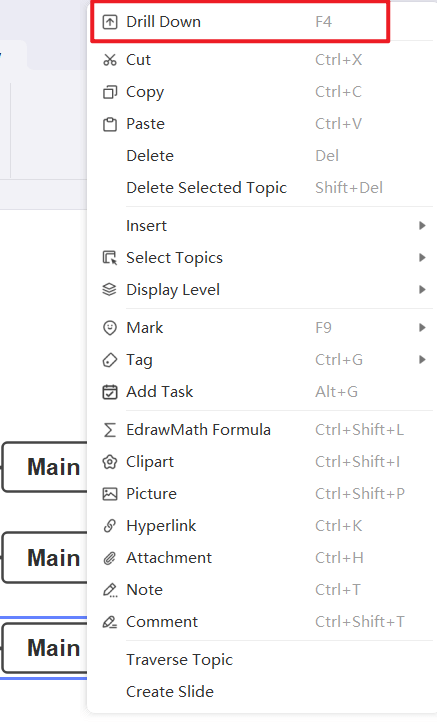
Drill Up
After the "drill down" operation on the topic, an  icon will appear in the upper right corner of the topic shape. Users can either click the icon or right-click on the topic that is being "drilled down" and click "Drill down" in the context menu.
Alternatively, users can click on the largest topic on the current interface, and click the "Drill Up" button under the "View" menu.
All of the above operations can display a full-page map.
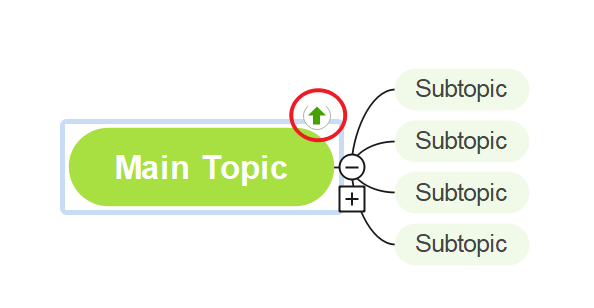
Focusing on Selected Topics
F3
This feature centers the selected topic.
- Click to select the target topic.
- Click the "Focus" button under the "View" menu.

Zooming
Zoom Level
Ctrl + +/- OR Ctrl + mouse scroll
Users can specify the zoom level of the document in the "Zoom" drop-down list, and zoom the document in the following three ways:
- Under the "View" menu, click the "Zoom" button and select the zoom ratio from the drop-down list.
- On the status bar in the lower right corner of the interface, drag the zoom control to quickly zoom the document.
- Press "Ctrl + +" on the keyboard to zoom in the document and "Ctrl - -" to zoom out. Notice: To zoom using the mouse wheel, hold down the "Ctrl" key on the keyboard.
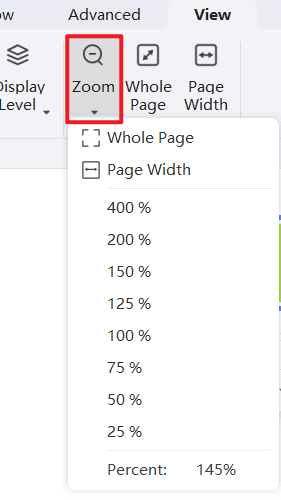

Notice: To zoom using the mouse wheel, hold down the "Ctrl" key on the keyboard.
Full Page
Ctrl + F5
The "Full Page" function scales the page so that the width of the page matches the width of the window.
- Click "Full Page" under the "View" menu.
- Alternatively, click the "Full Page" button in the status bar.

Page Width
Alt+F3
The “Page Width” feature is used to scale the page so that the width of the entire shape in the document is the same as the width of the window.
- Fit to page width" under the "View" menu.
- Alternatively, click the "Full Page" button in the status bar.
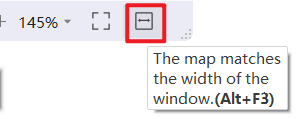
Select Topic
Selecting the same type of topic
Alt+A
This feature allows quick selection of the same type of topic.
- Click on any topic.
- Click "Select Same Type" under the "View" menu.
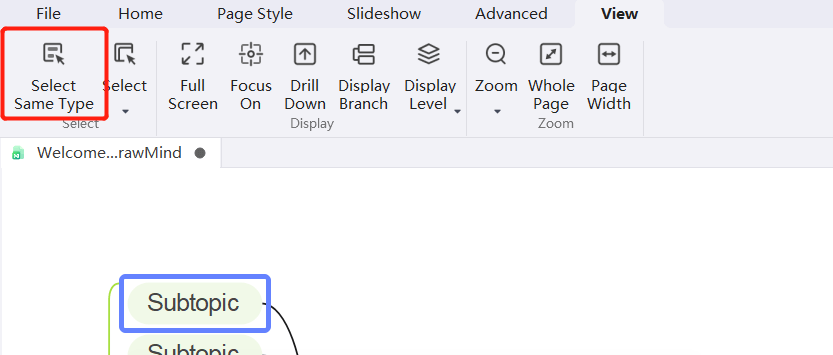
Choosing More Topics
This function can choose different topics according to different needs.
Select all topics on the page (Ctrl + A): Click the upper half of the "Select All" button in the "View" menu;
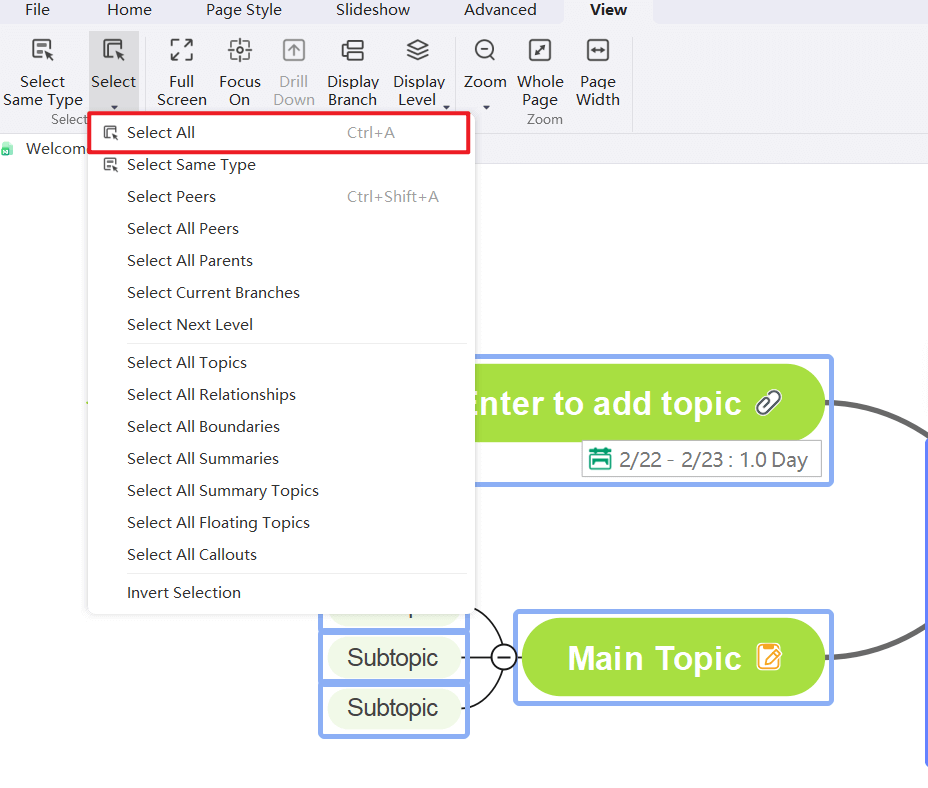
To select a topic (one of the same type of topics to be selected), click the arrow below the “Select All” button in the "View" menu, and more options will appear (see below):
- Select All
- Select The Same Type
- Select The Same Level
- Select All Sibling Topics
- Select All Parent Topics
- Select The Current Branch
- Select The Next Level
- Select All Topics
- Select All Relationship Lines
- Select All Frames
- Select All Profiles
- Select Topics On All Profiles
- Select All Floating Themes
- Select All Annotations
- Reverse Selection
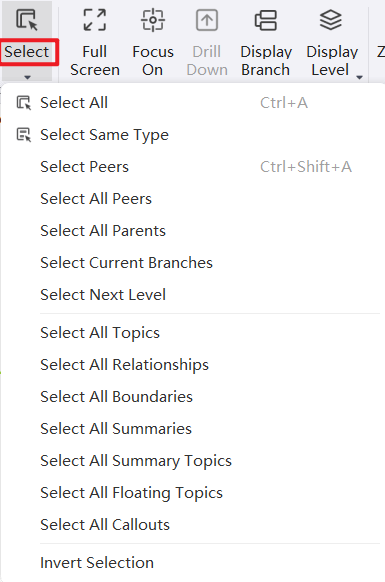
Toggling Outline View in Mind Maps
F11
In Outline View, the topic content is listed first in outline text format from top to bottom, so users can easily read and browse topics.
Basic Editing
Adding A Topic
Select any topic and press “Enter” to add a topic at the same level. Press “Tab” to indent the level of the selected topic, or click "Indent/Unindent" at the top to change the level.
Moving and Collapsing Topics
Select the black dot on the left side of the text and drag it to the target position until a green guide line appears. Release the mouse to move the subject to the target position. Click the black triangle to the left of the text to collapse and expand the branch.
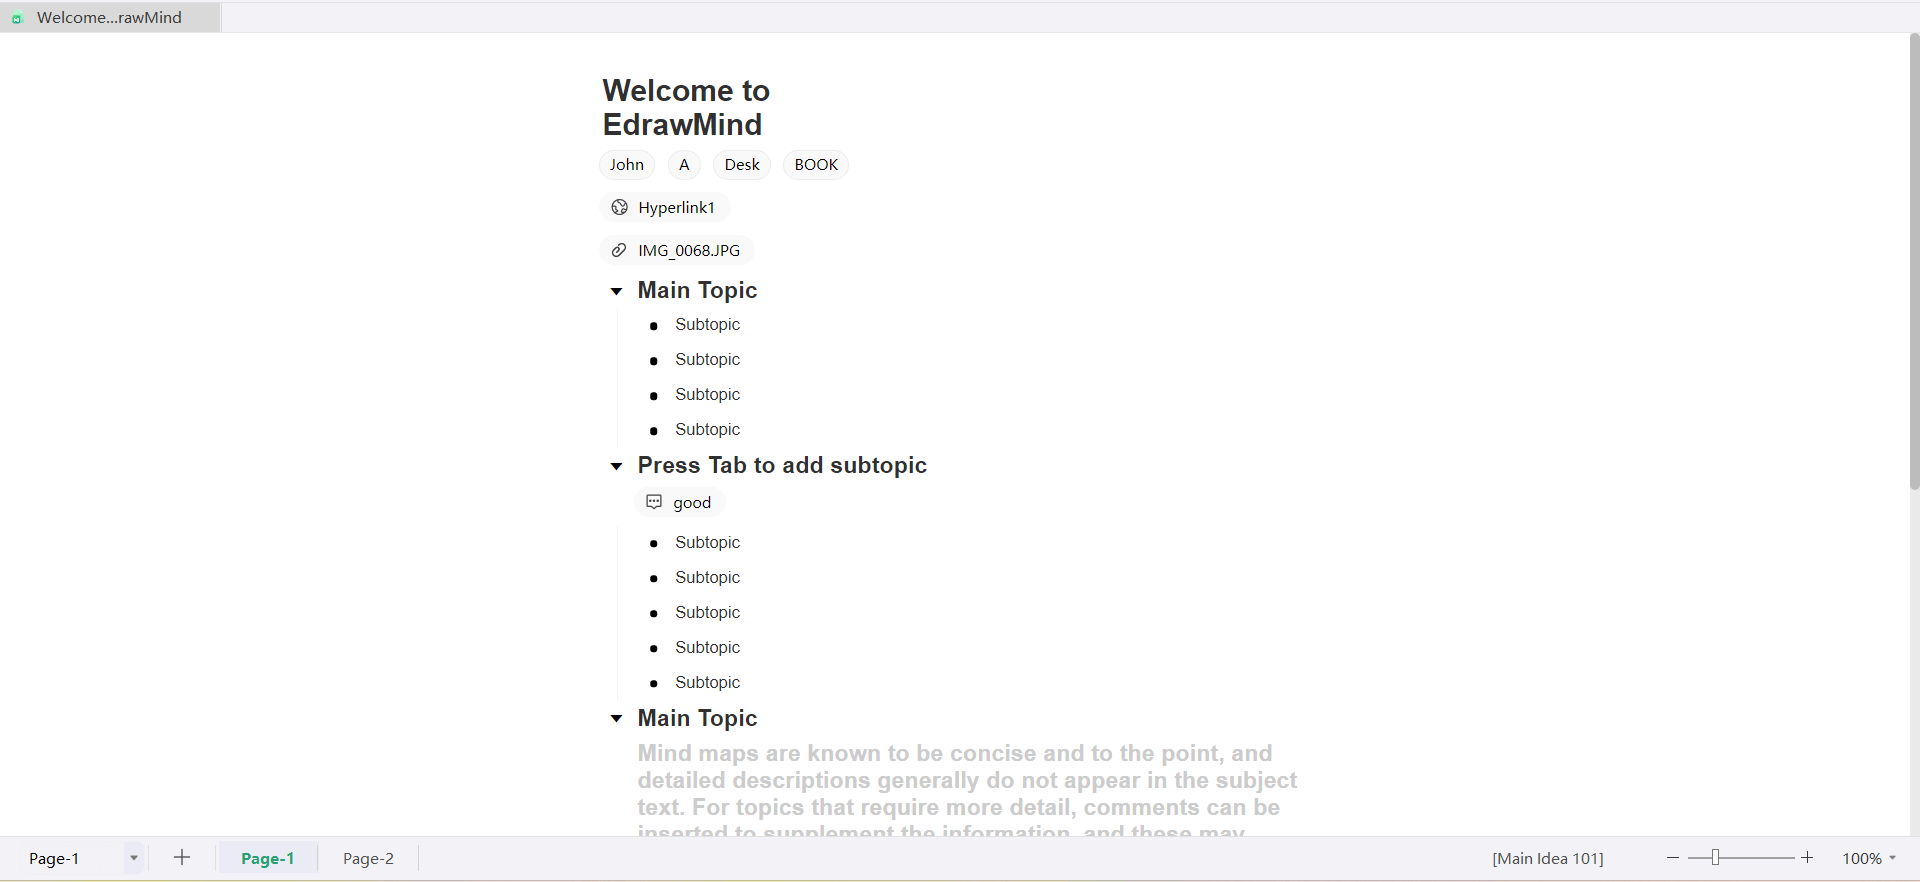
Editing Topic Texts
Select any topic to start editing the text. Select text on the outline editing page to perform basic operations such as "bold", "italic", "underline", and "font color".
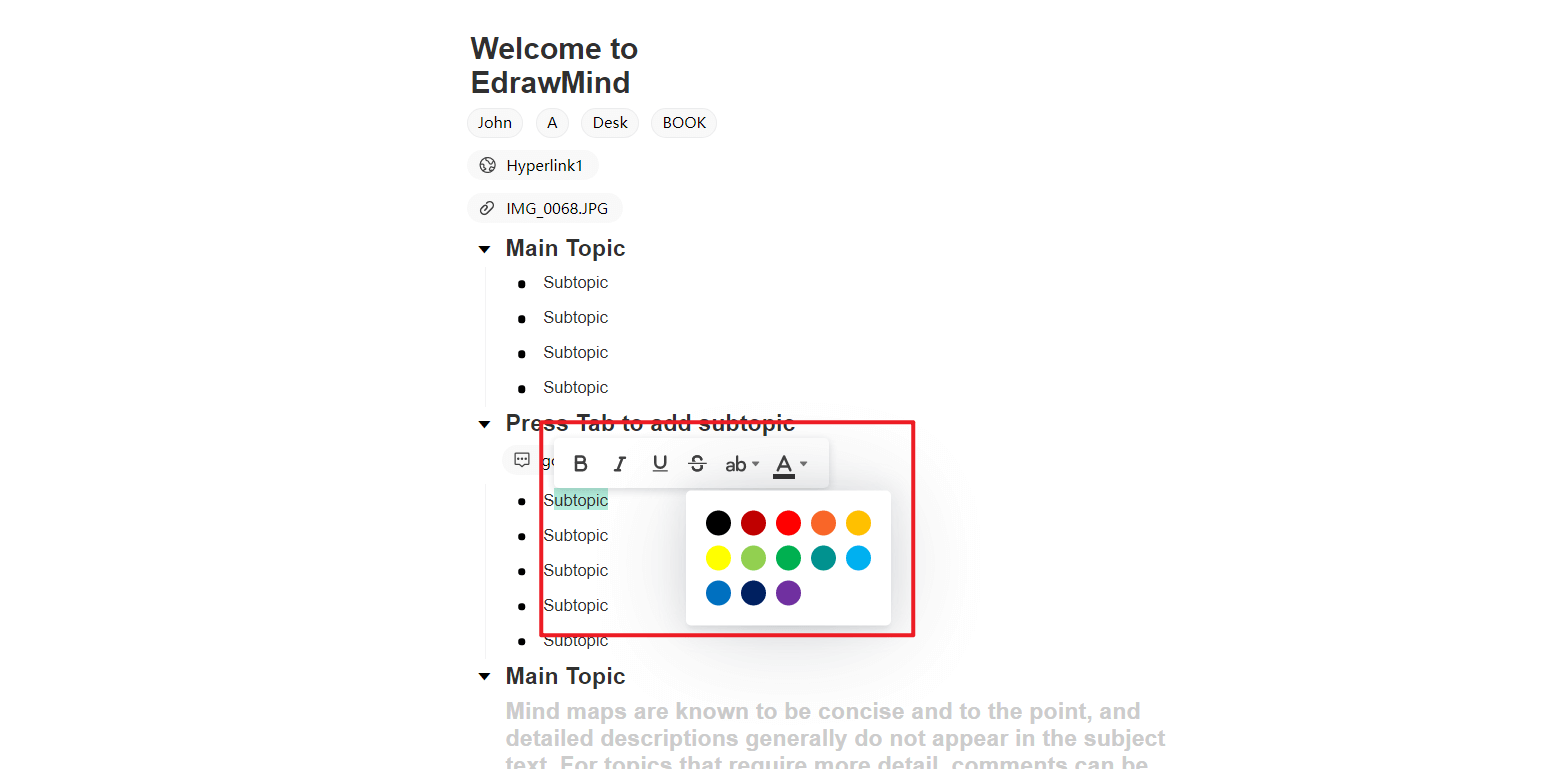
Inserting Elements
Click on the topic and select "Picture" in the upper toolbar to insert a picture.
Tips: Copy the picture to be inserted, select the topic and Ctrl+V to quickly insert the picture.
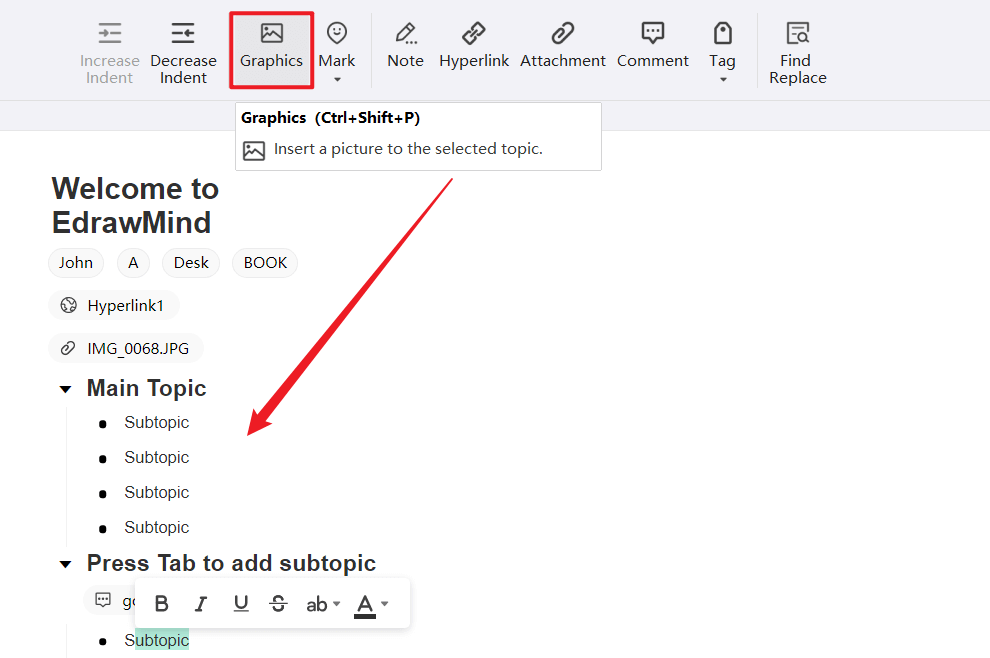

Select a topic and select "Icon" in the upper toolbar to insert an icon.
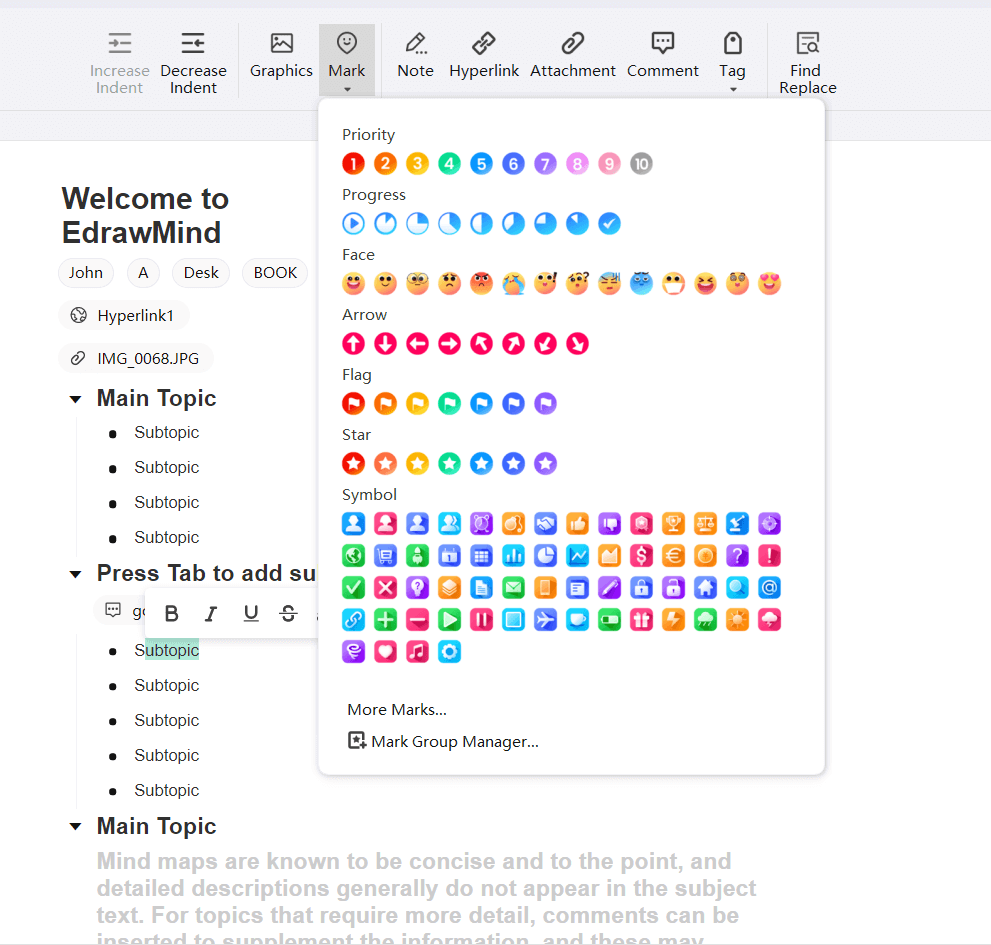
Select a topic and select "Comment" in the upper toolbar to insert a comment.
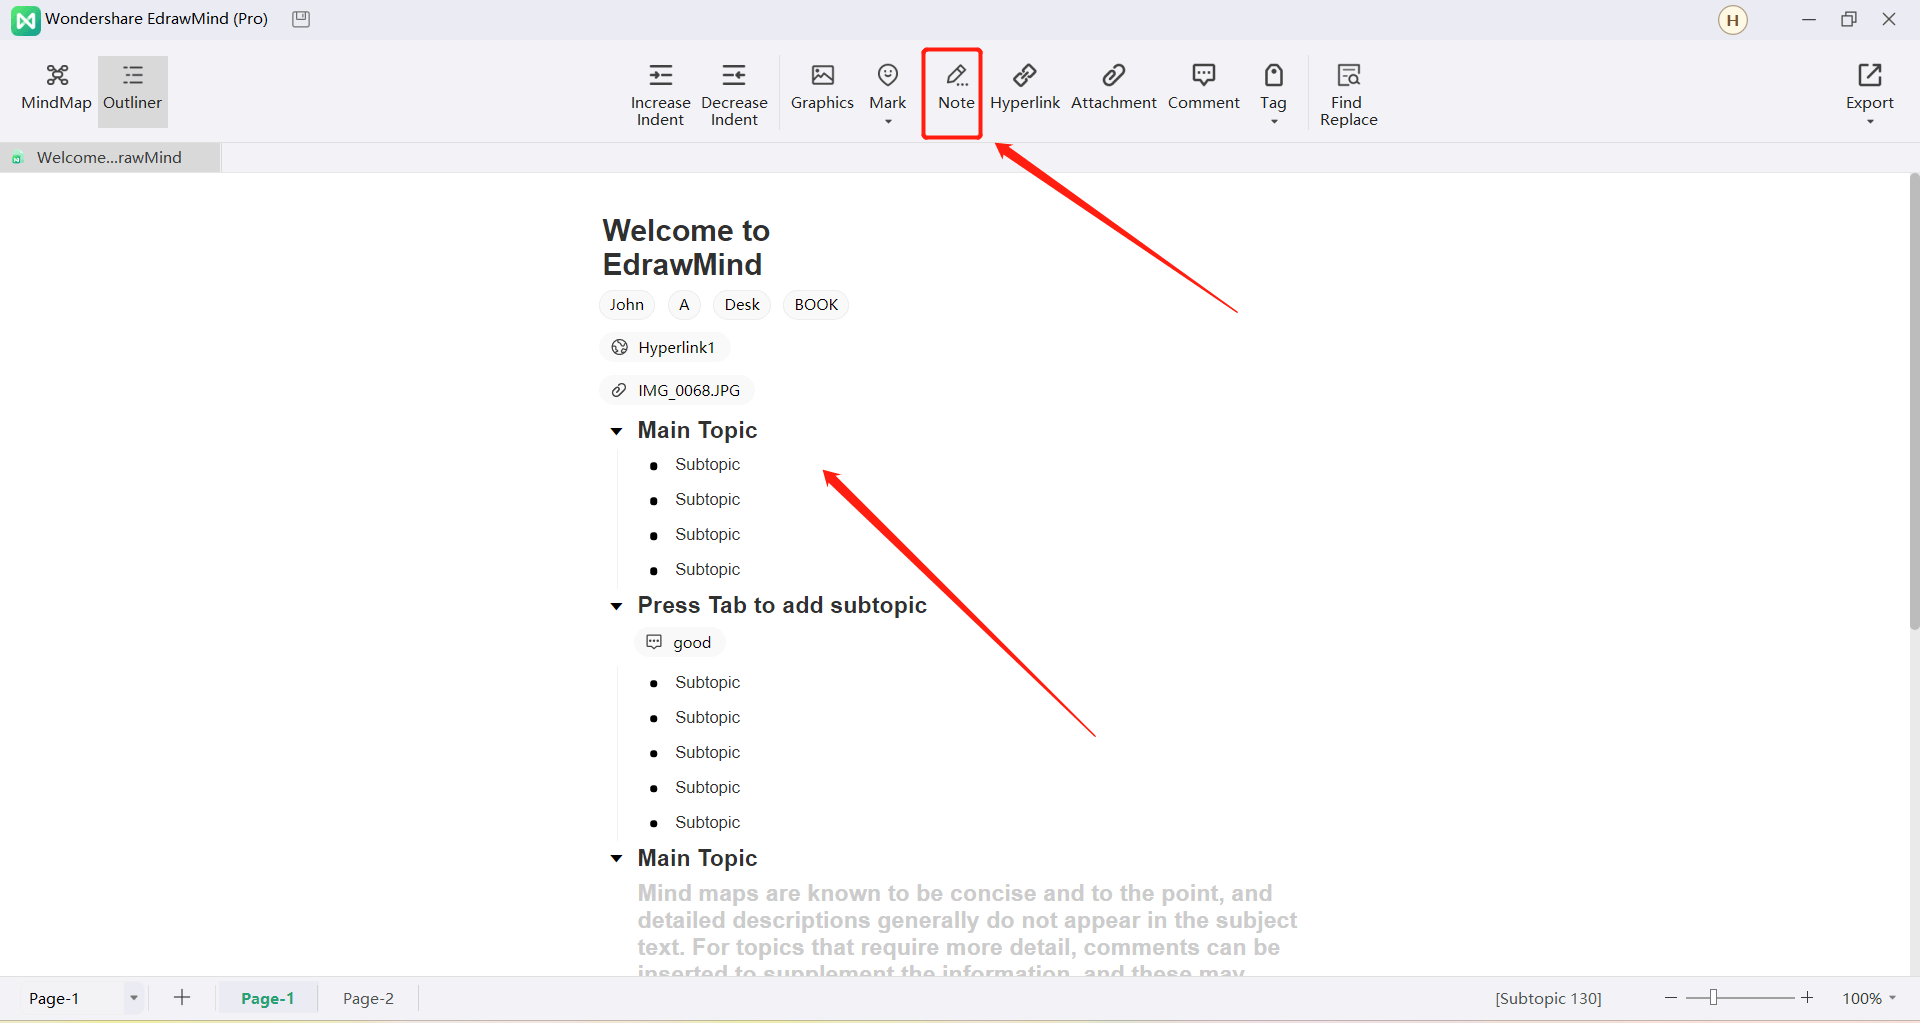
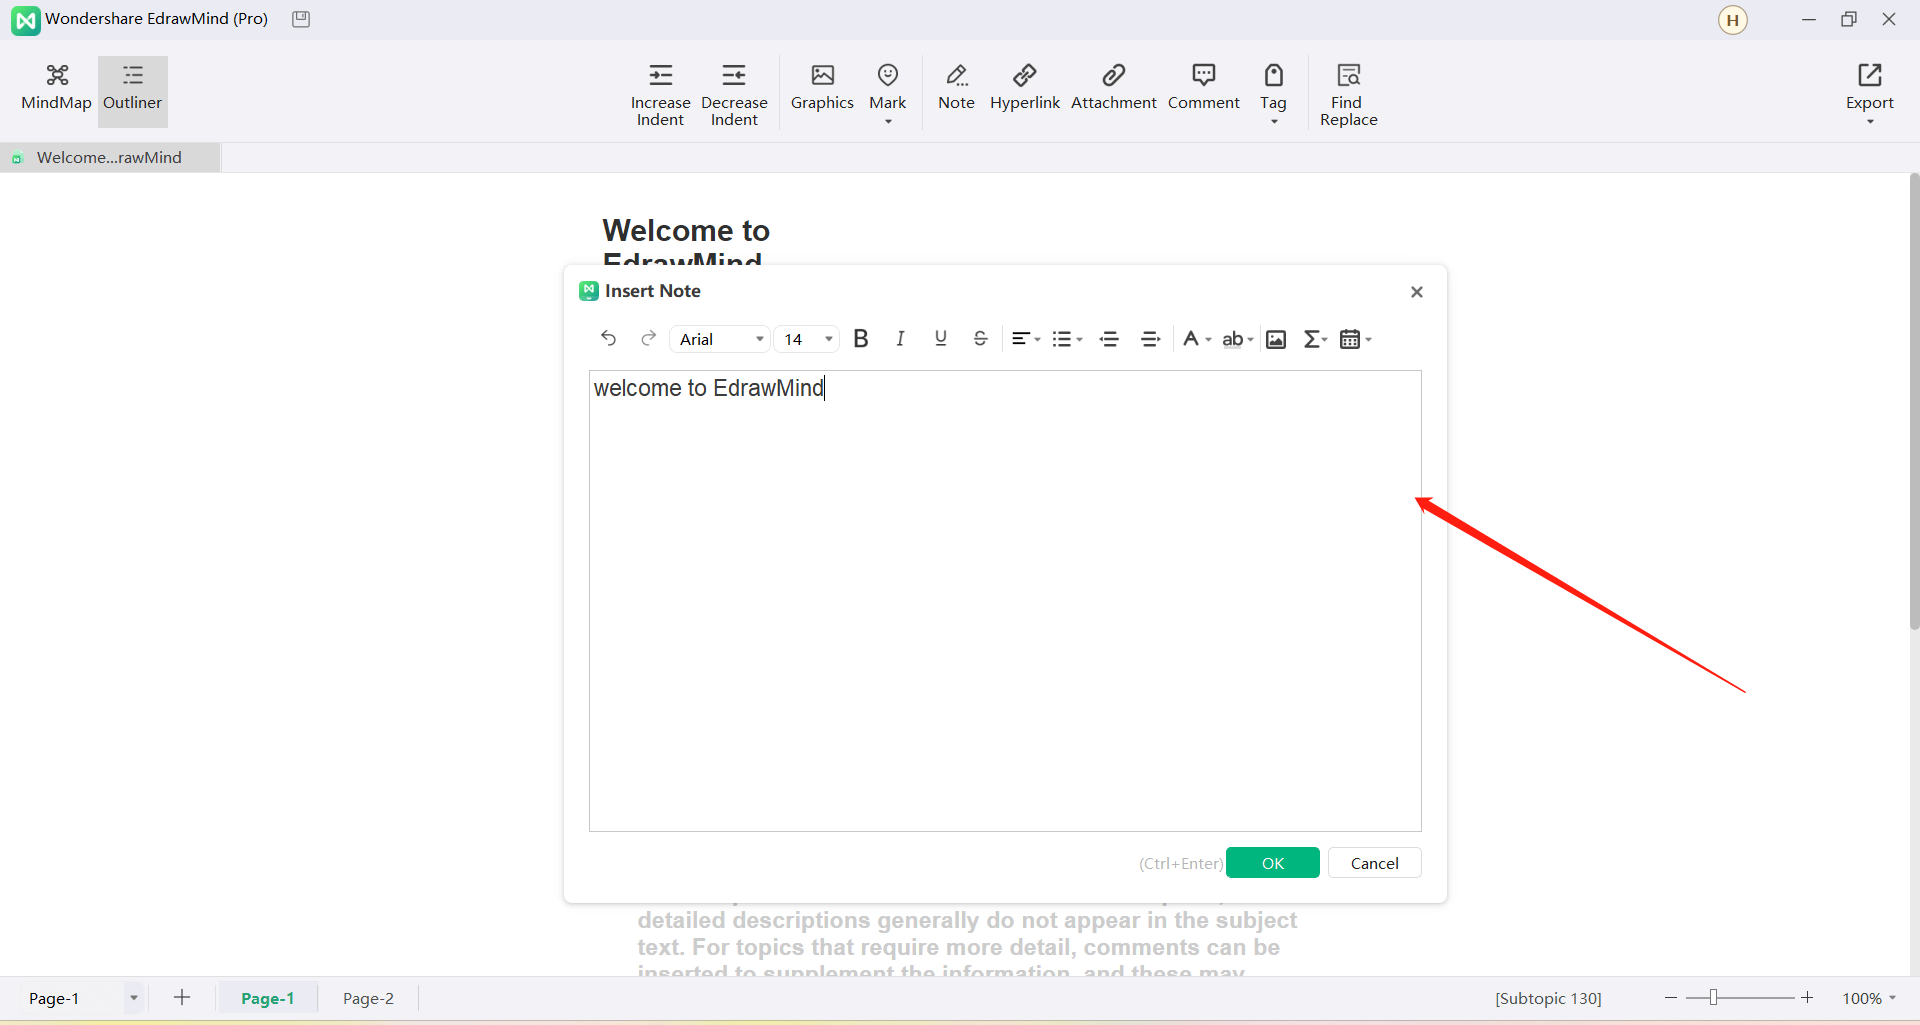
Select a topic and select "Hyperlink" in the upper toolbar to insert a hyperlink.
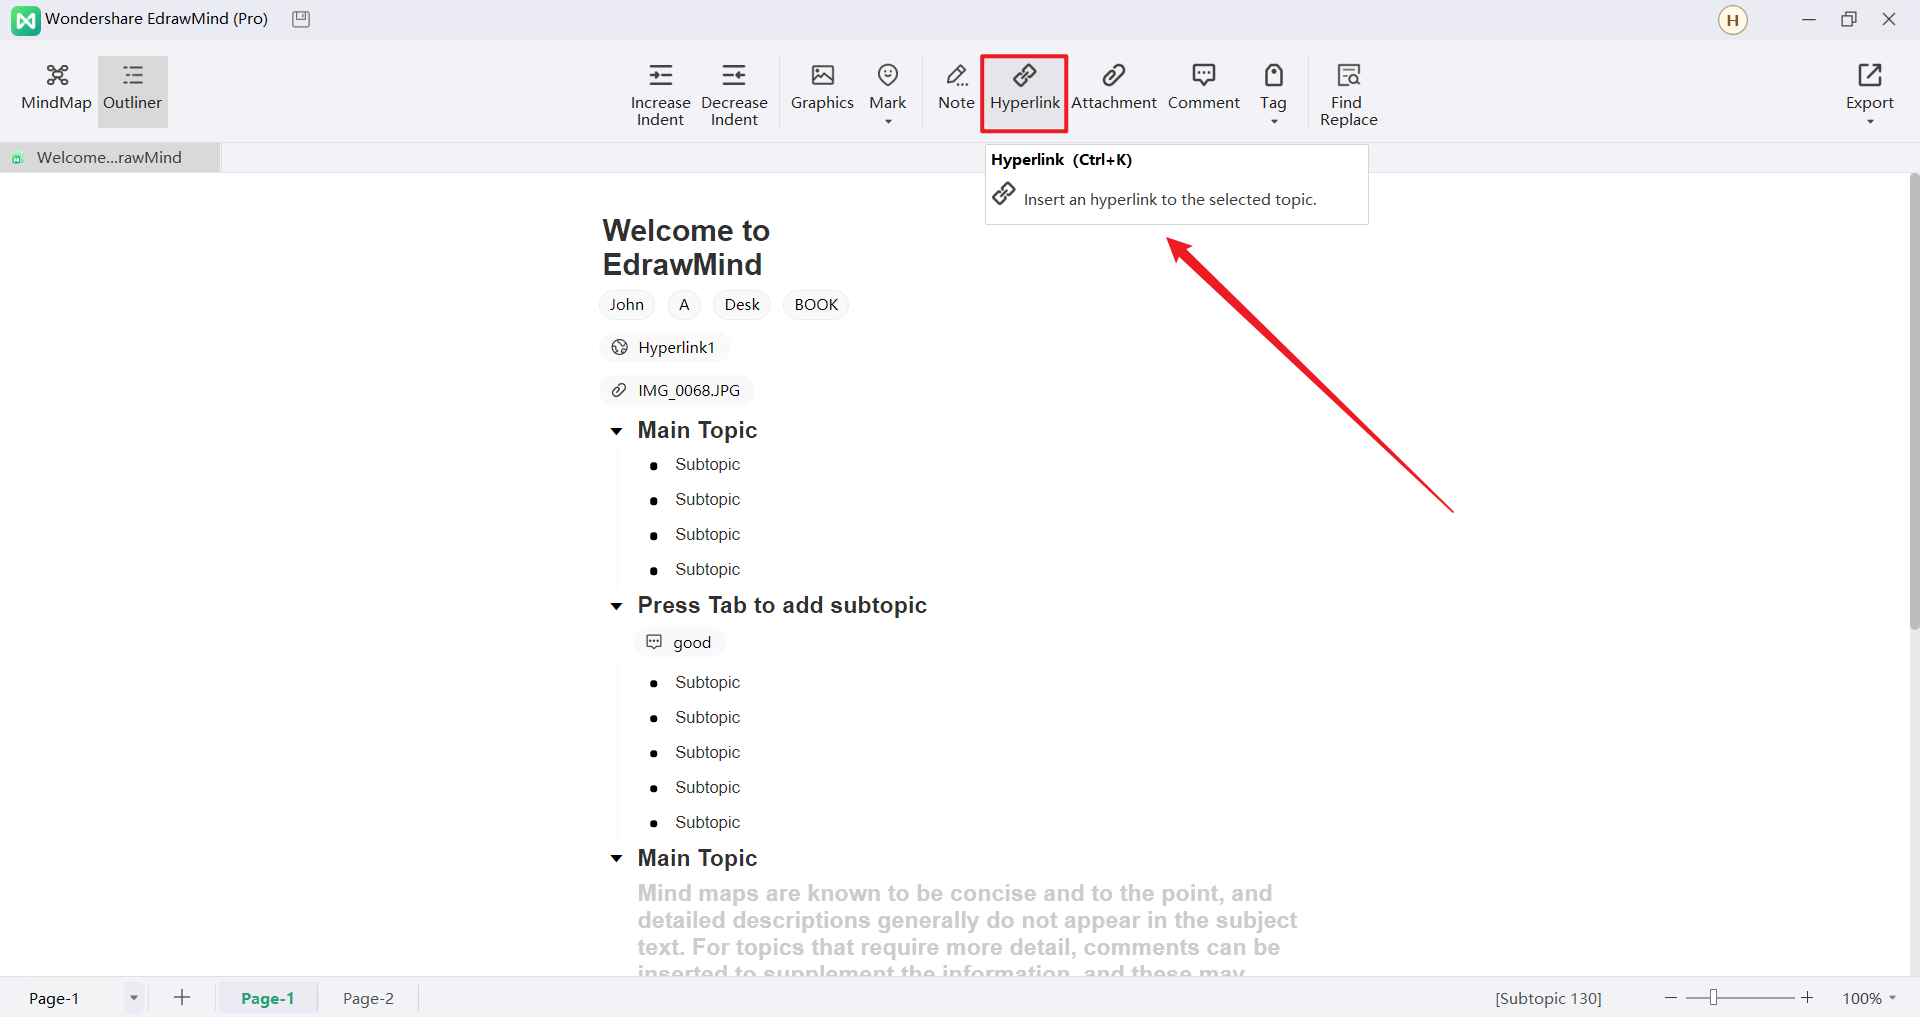
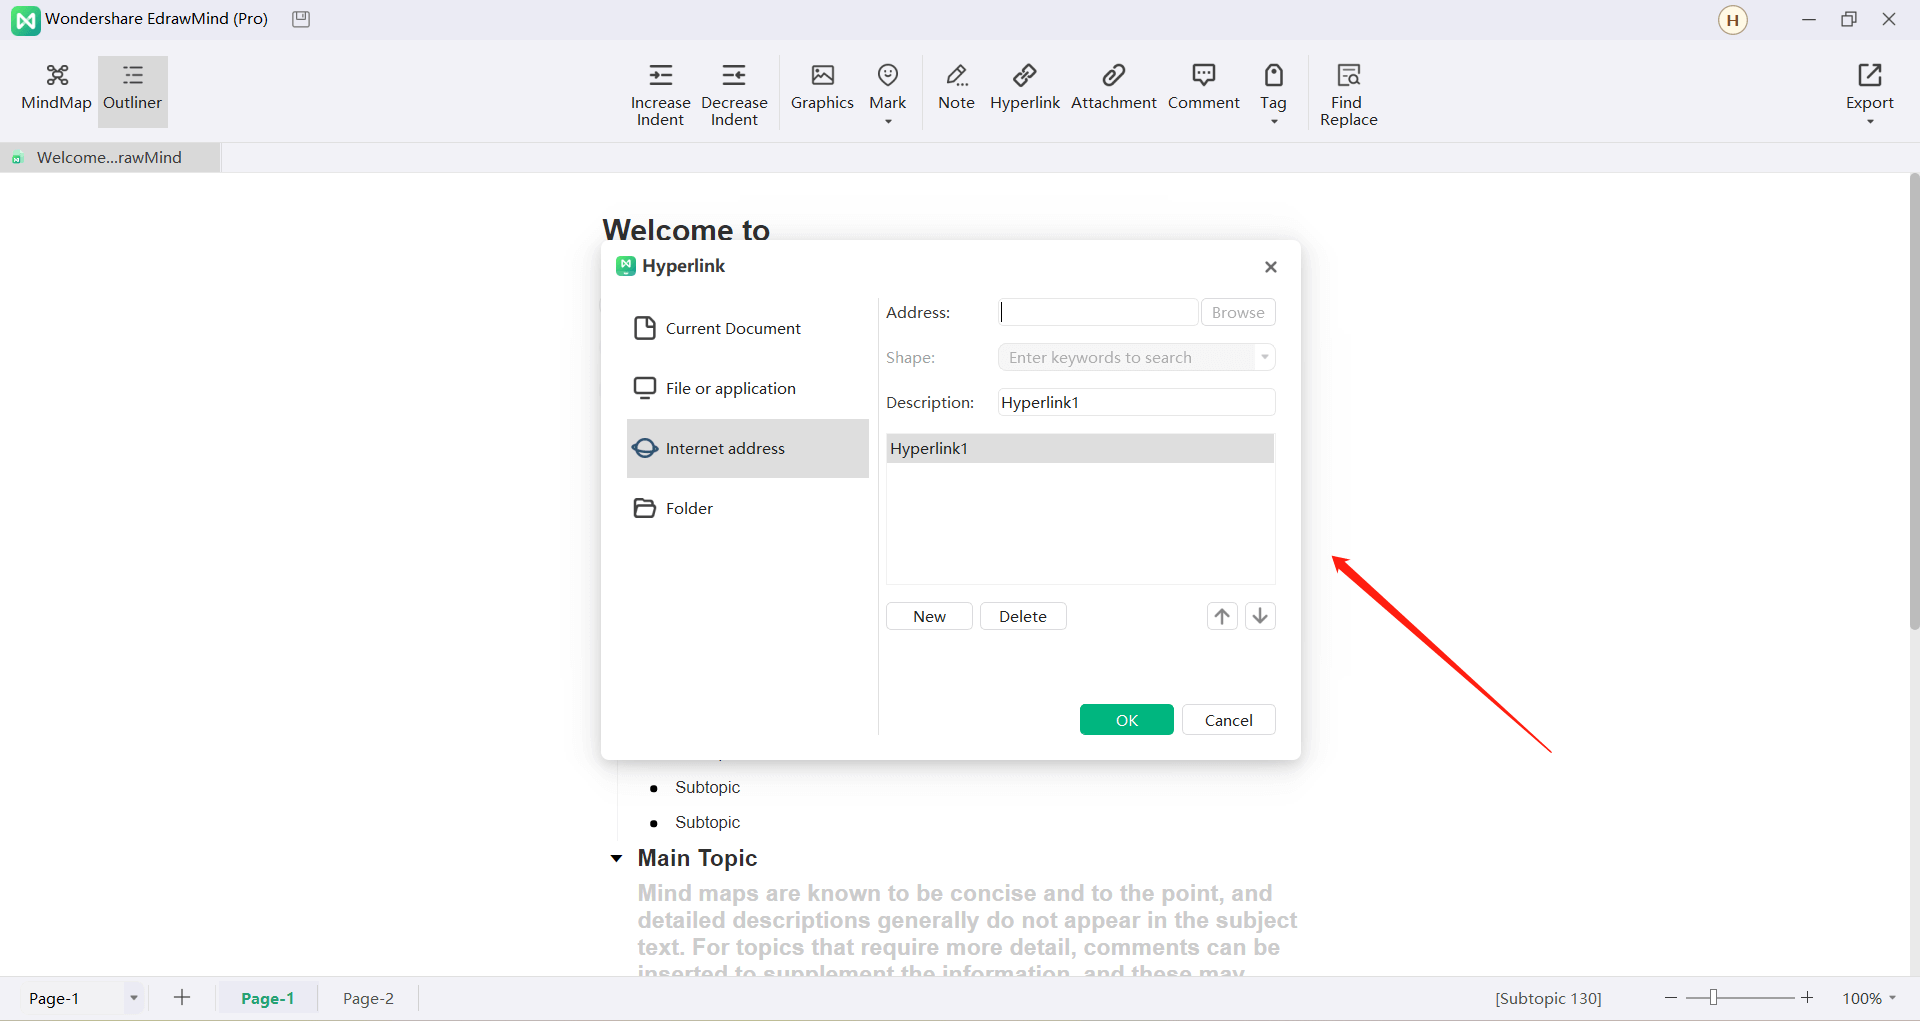
Select a topic and select "Attachment" in the upper toolbar to insert an attachment.
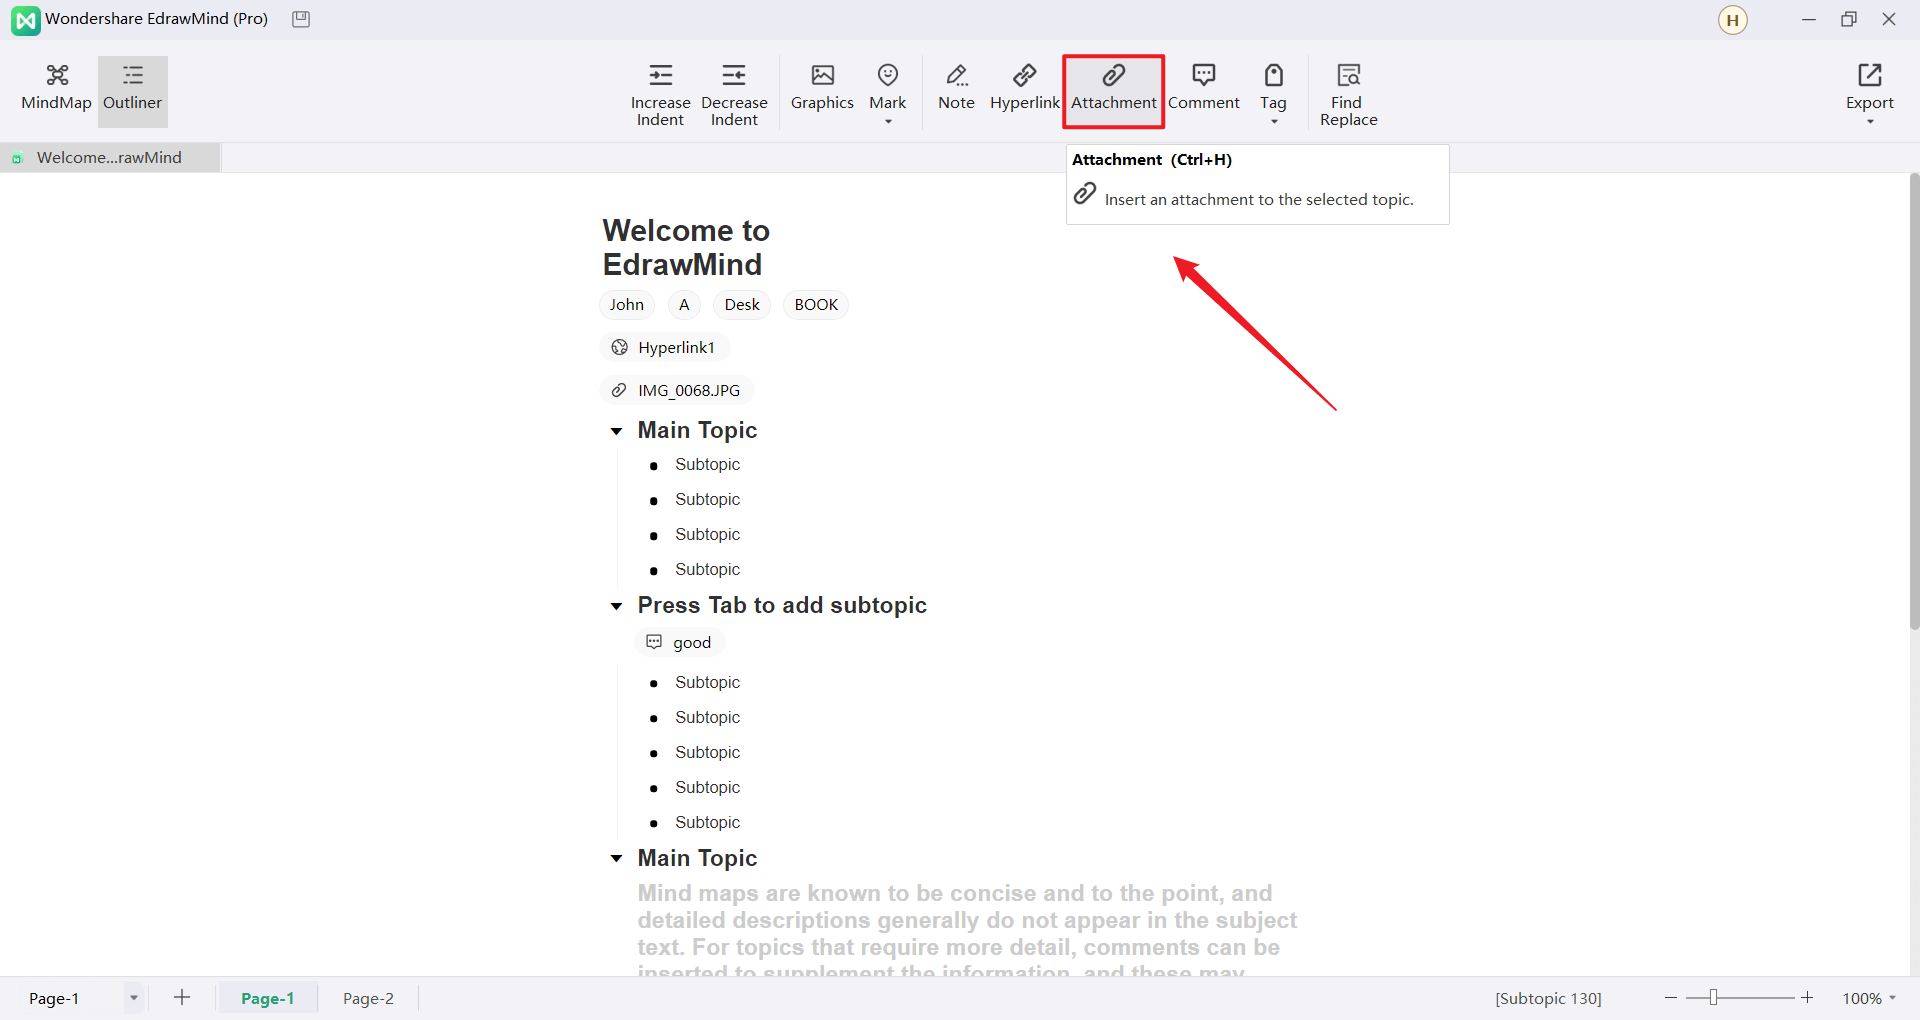
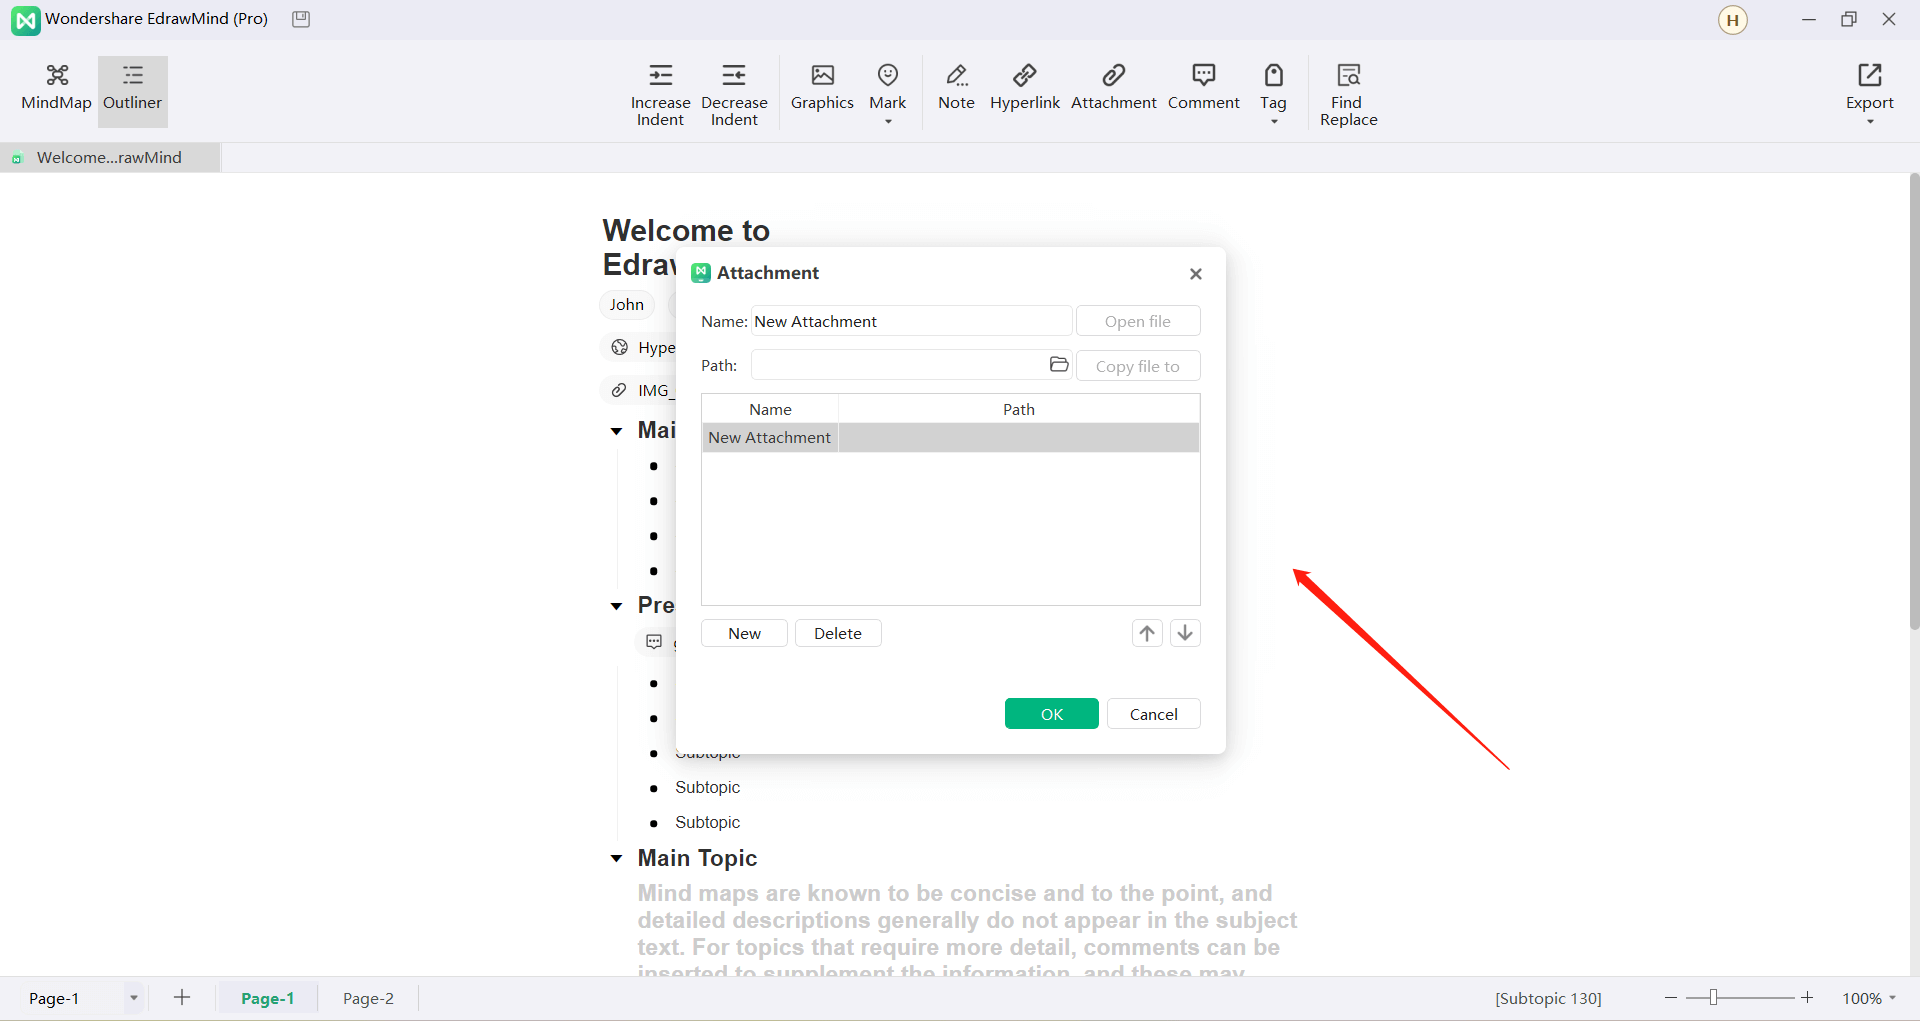
Select a topic and select "Comment" on the upper toolbar to insert a comment.
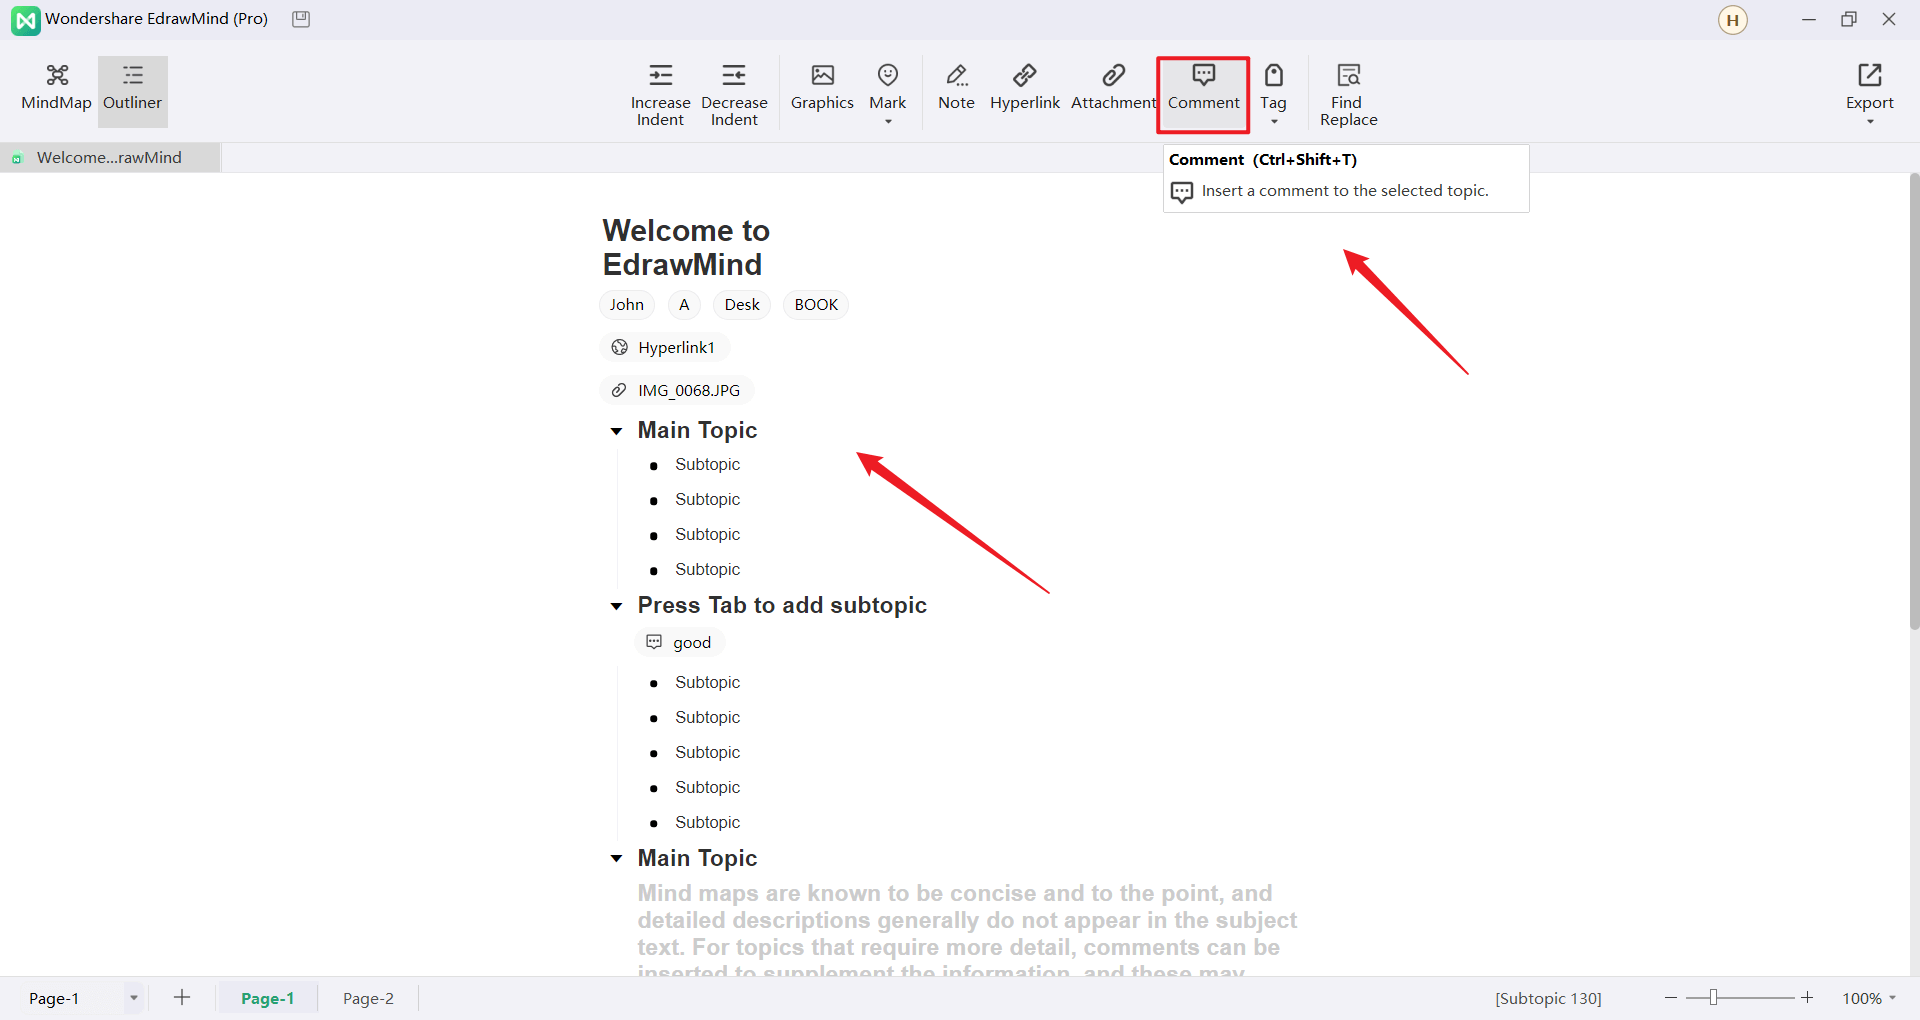
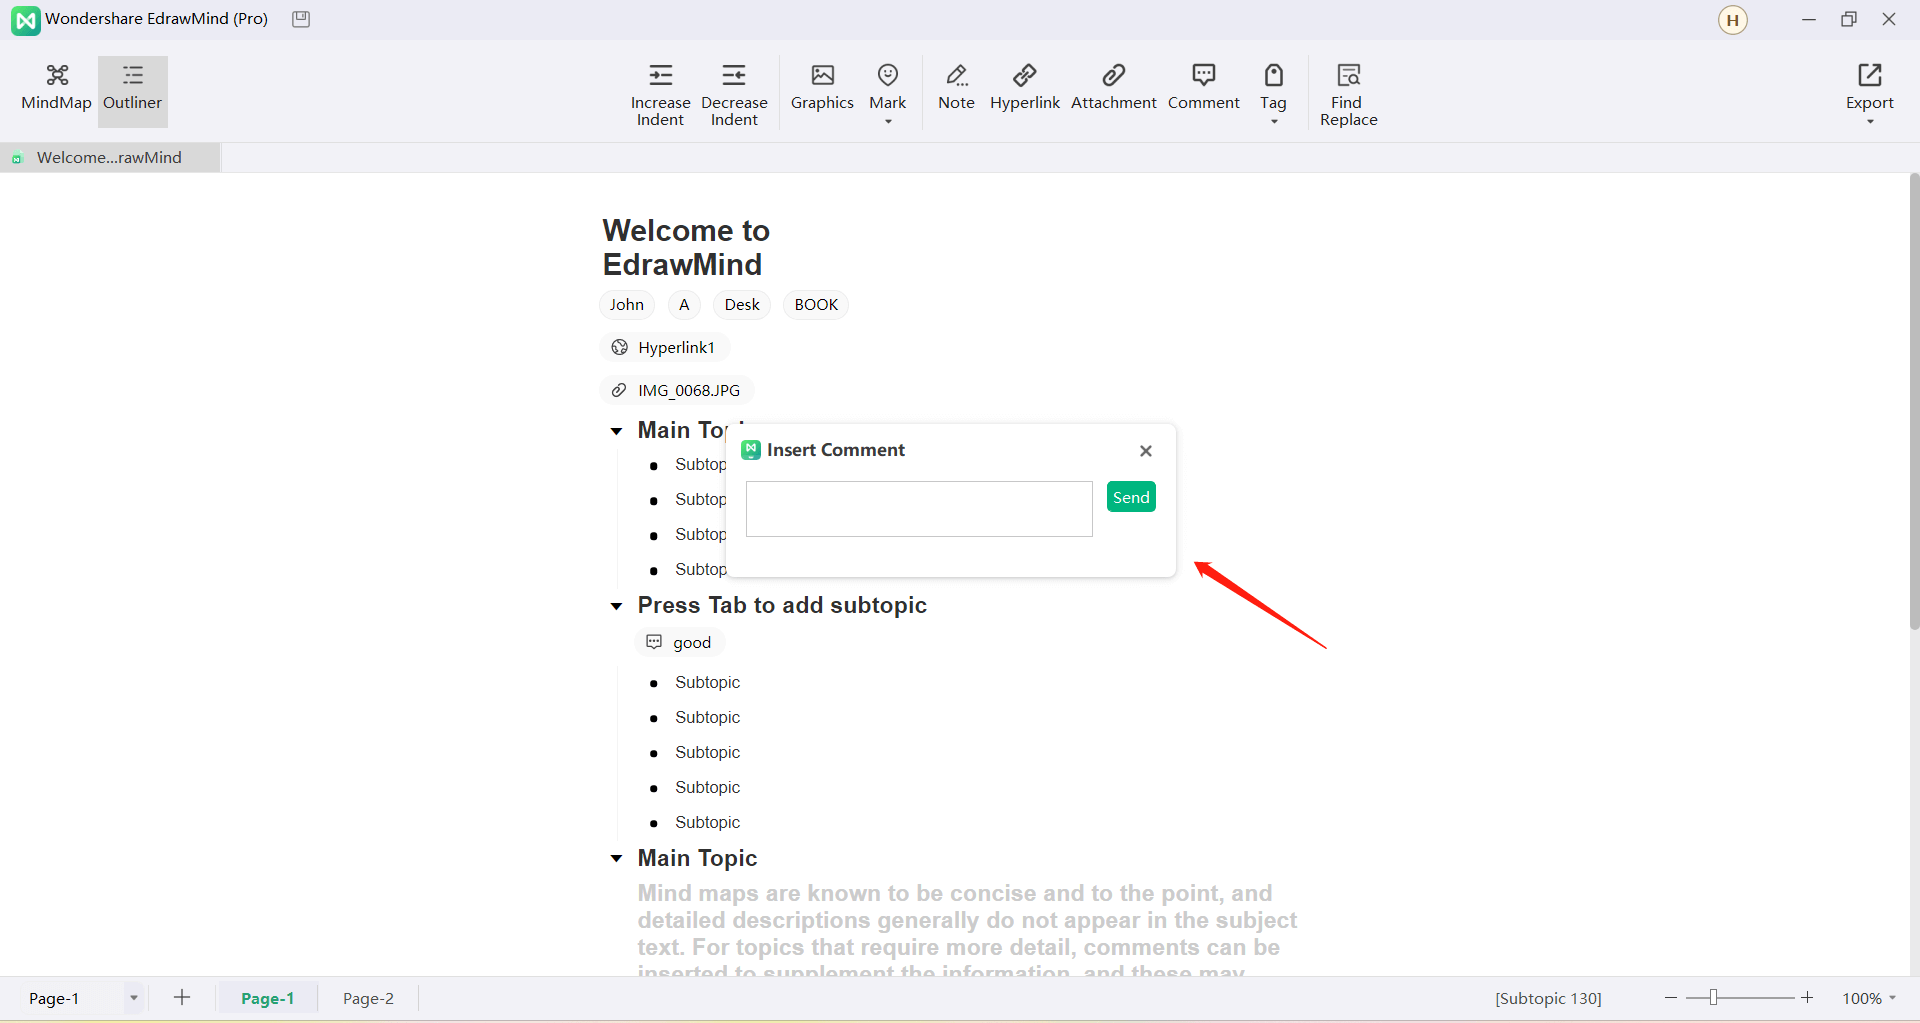
After inserting the element:
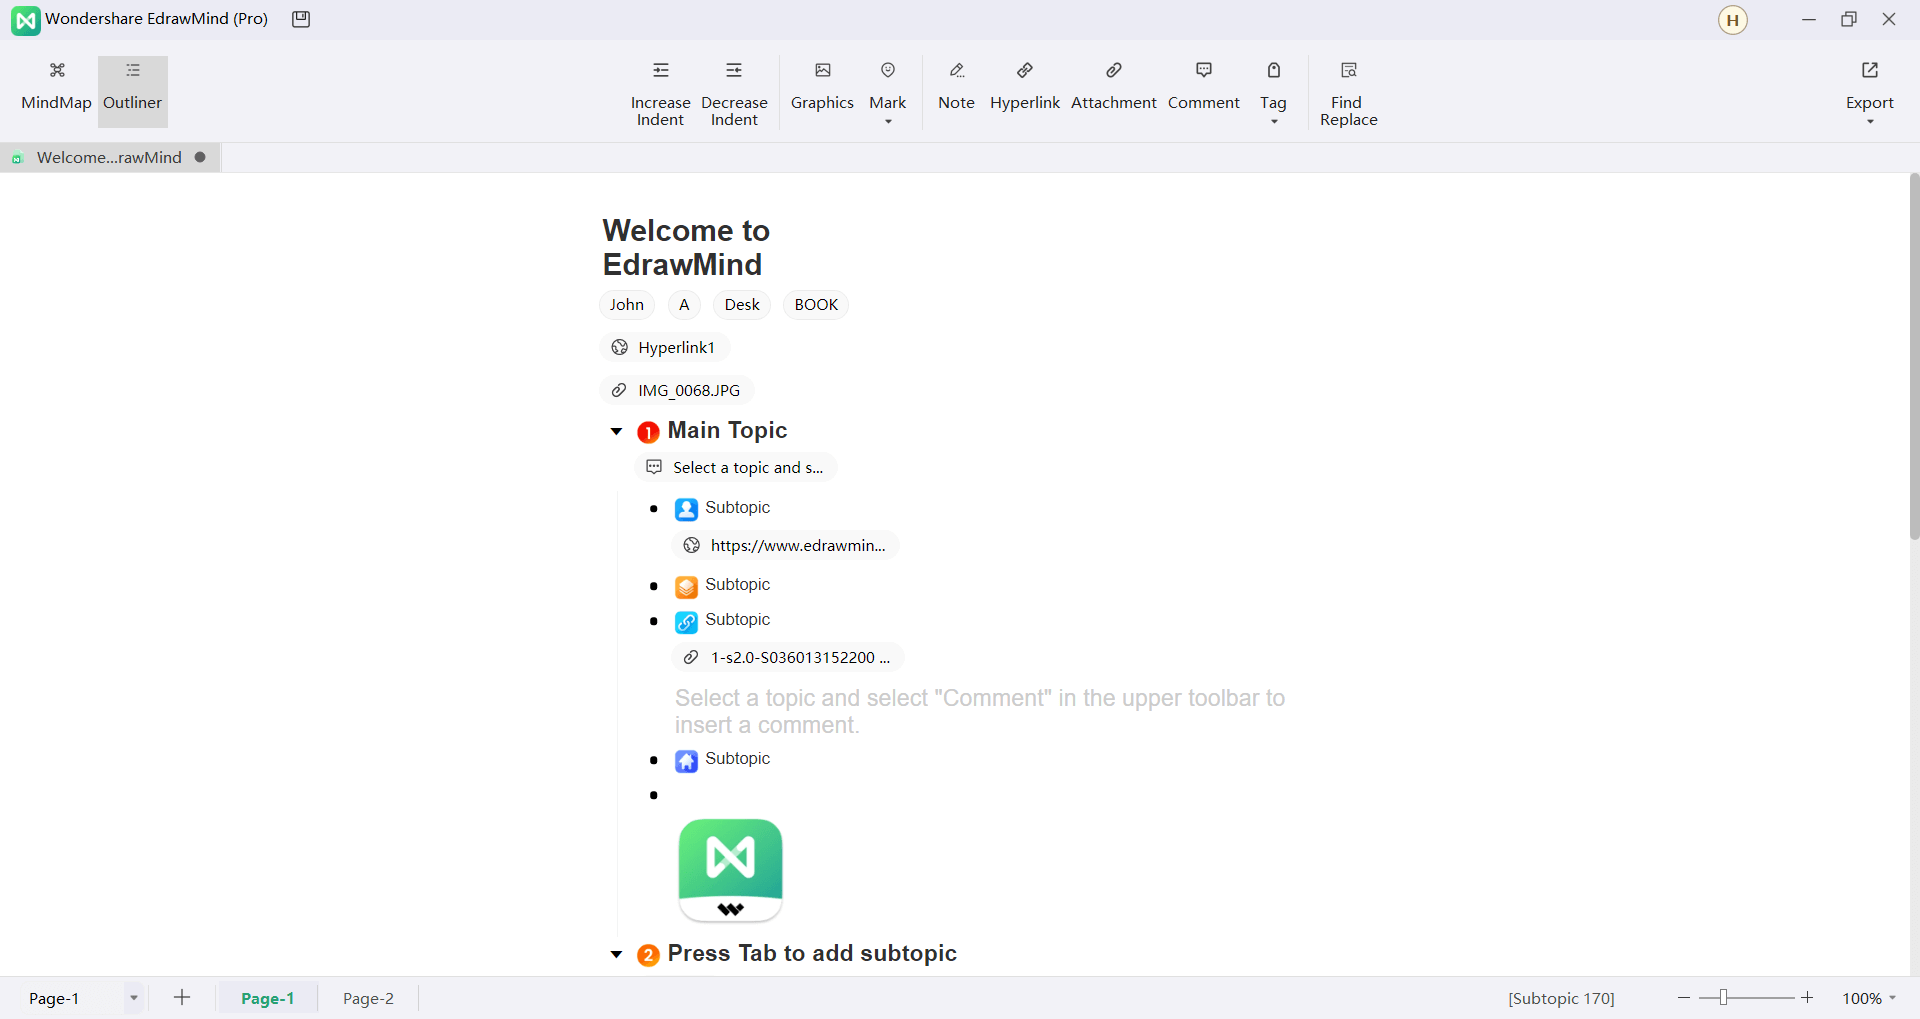
Switching between Mode
On the map editing page, click "Outline" on the upper toolbar to switch between outline mode and mind map mode.
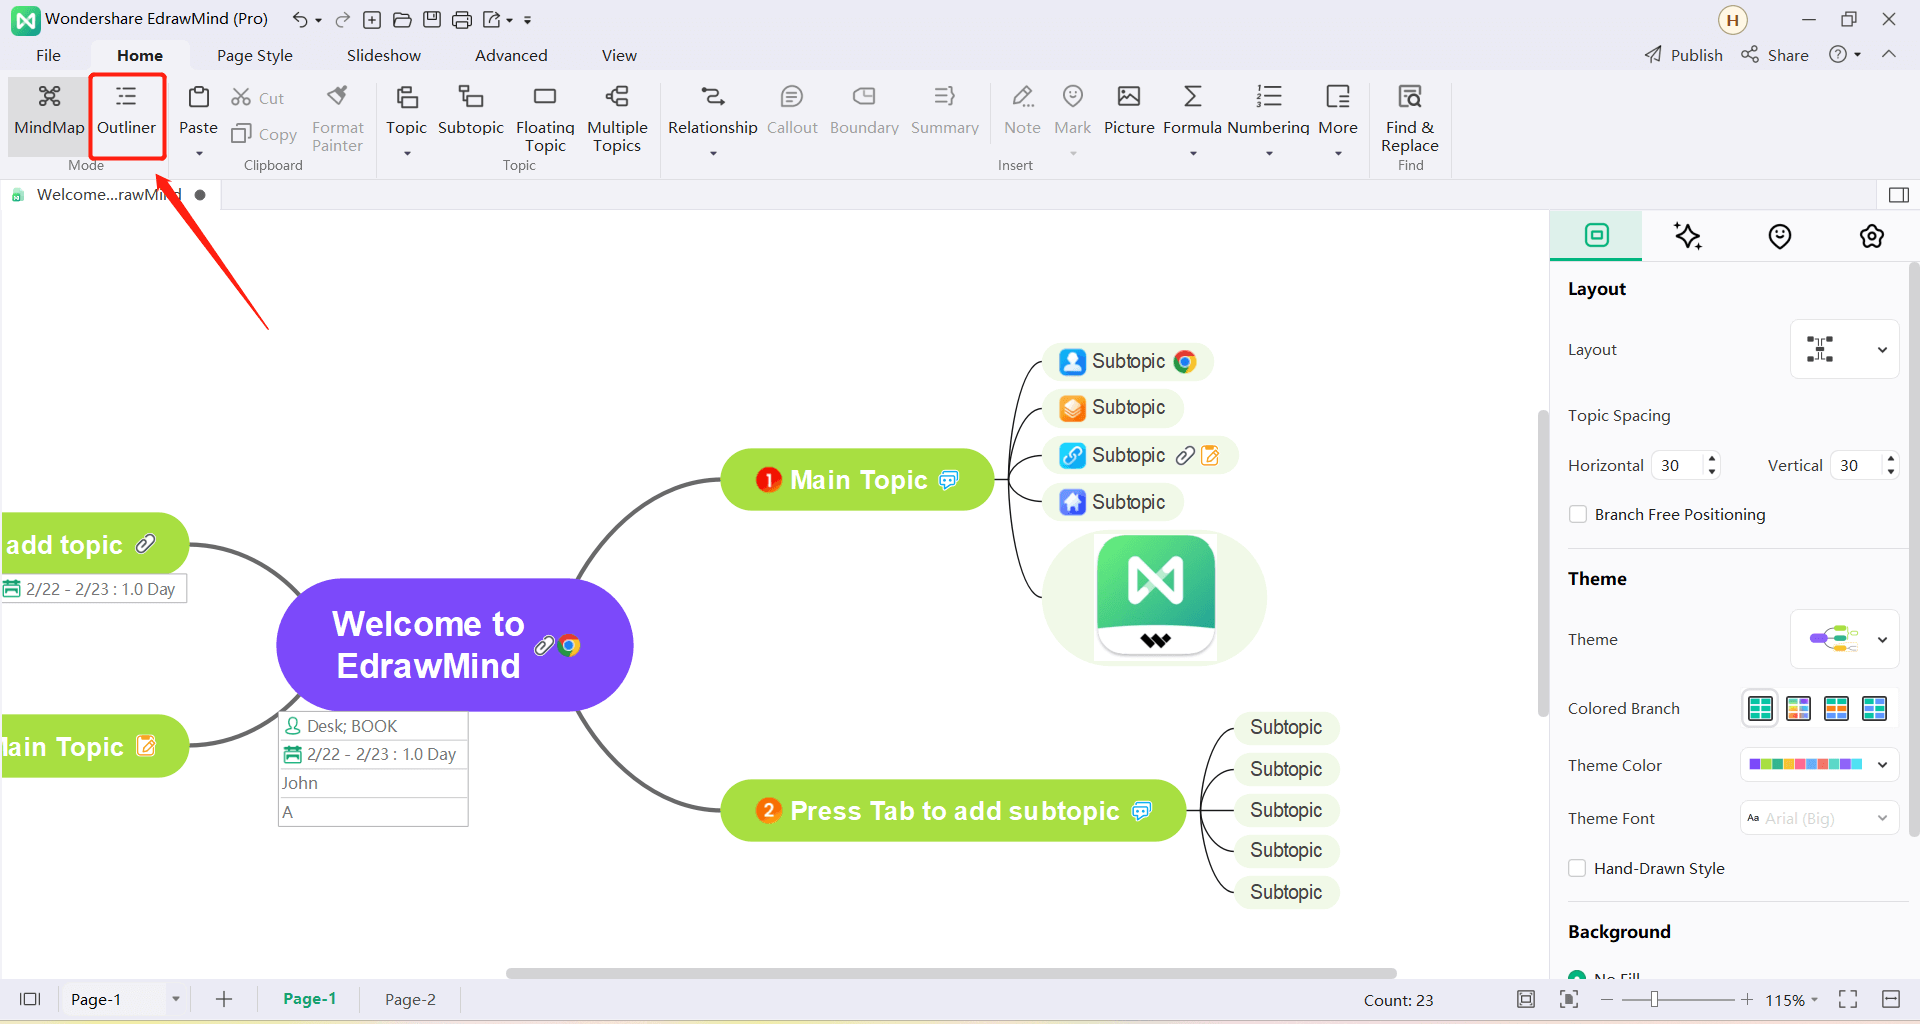
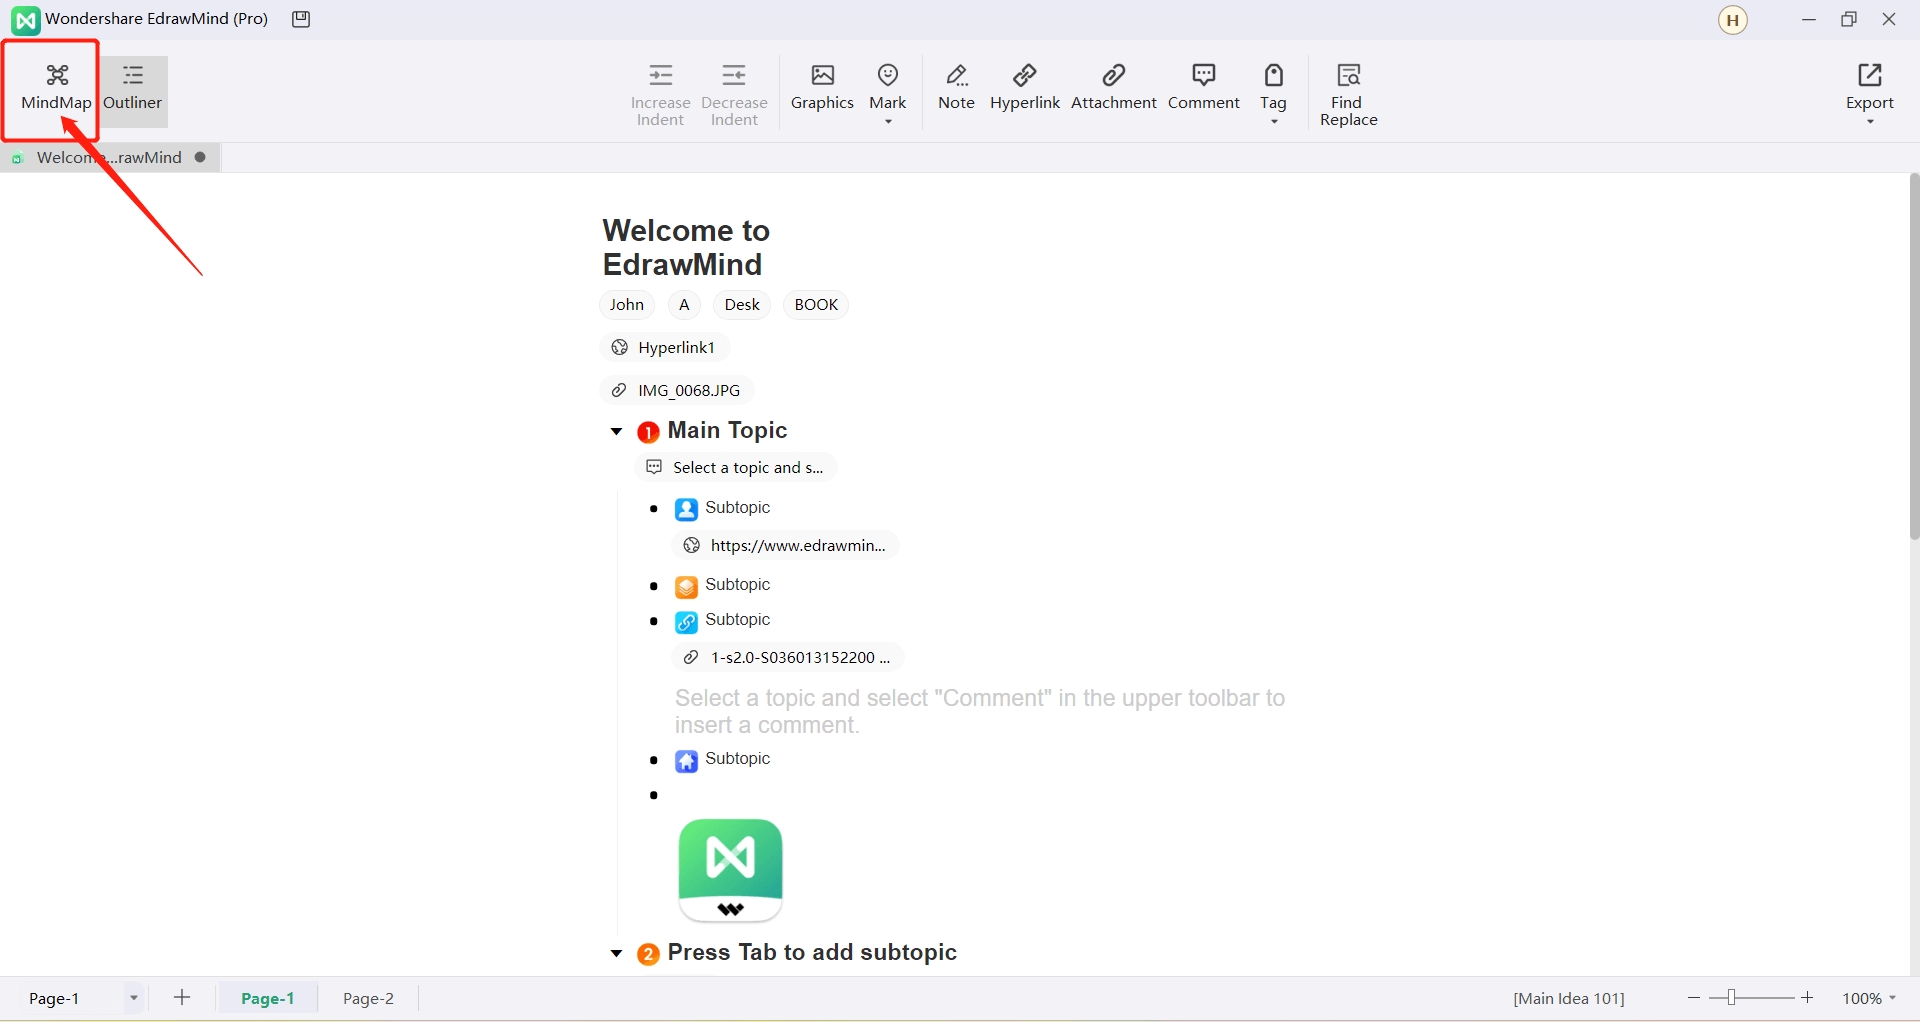
Exporting
On the outline page, click "Export" on the upper toolbar to export files in four formats: "PDF", "Picture", "Word" and "HTML", all of which are supported for editing in Word.
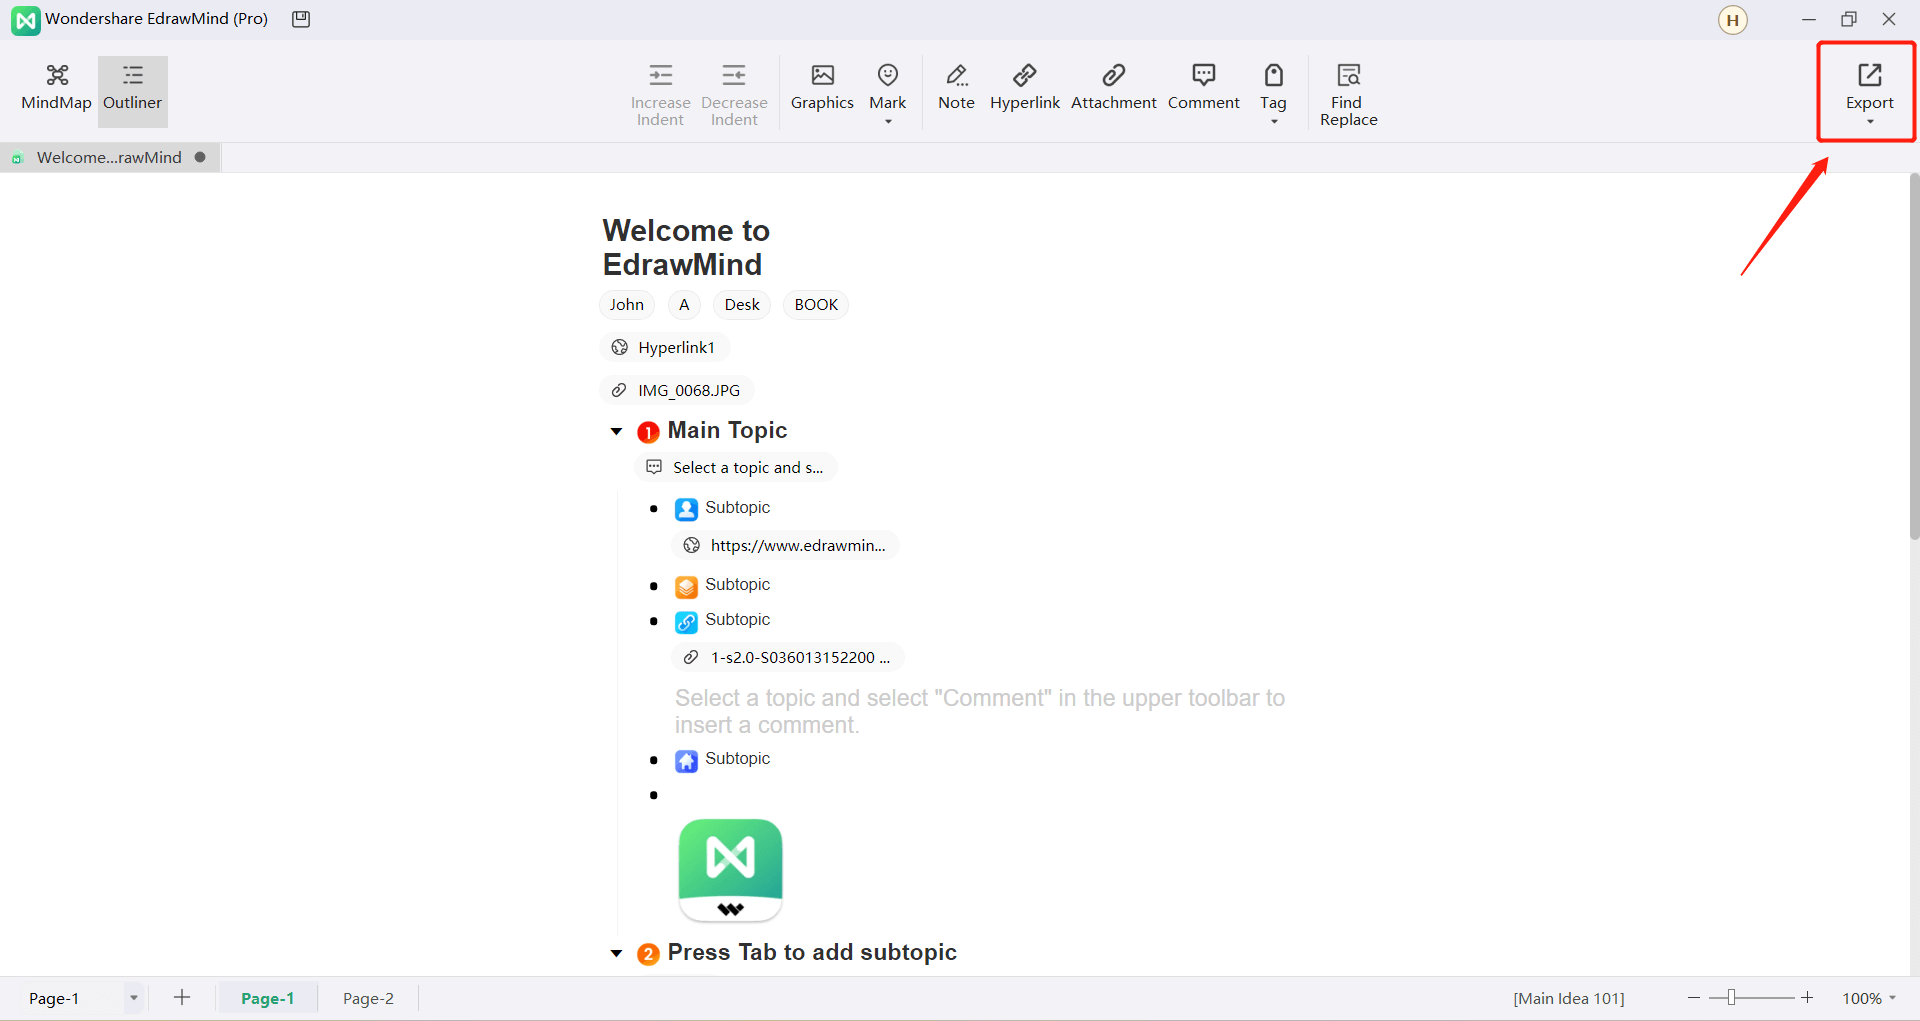
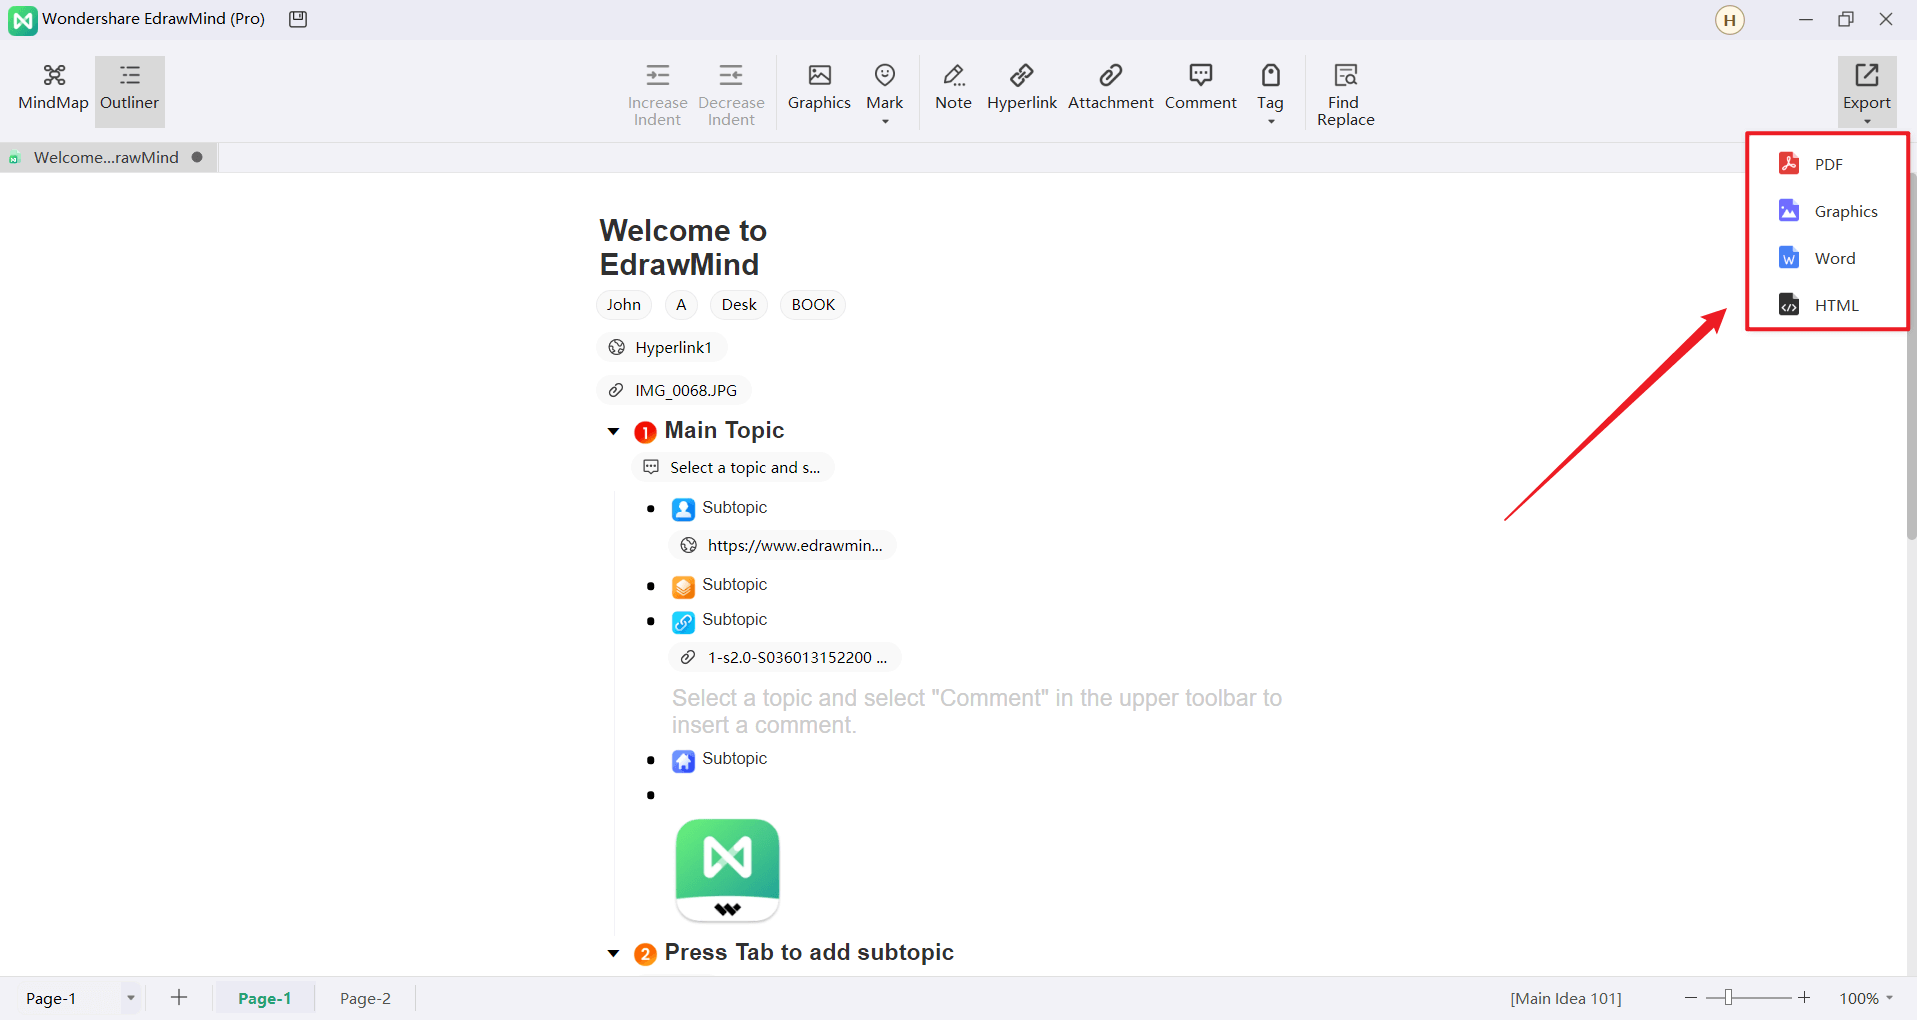
Shortcuts
As shown in the following table (users can view it in "Options" - "Shortcut Keys" in the software), EdrawMind provides default shortcut keys, and most shortcut keys support customization. Users can go to "Options" - "Shortcut Keys" and click "Custom Shortcut Keys" to modify the shortcut keys according to their personal needs.
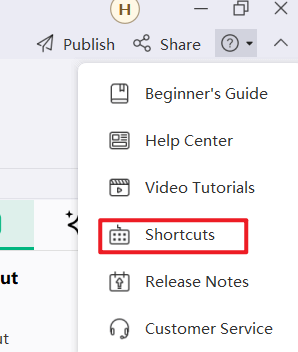
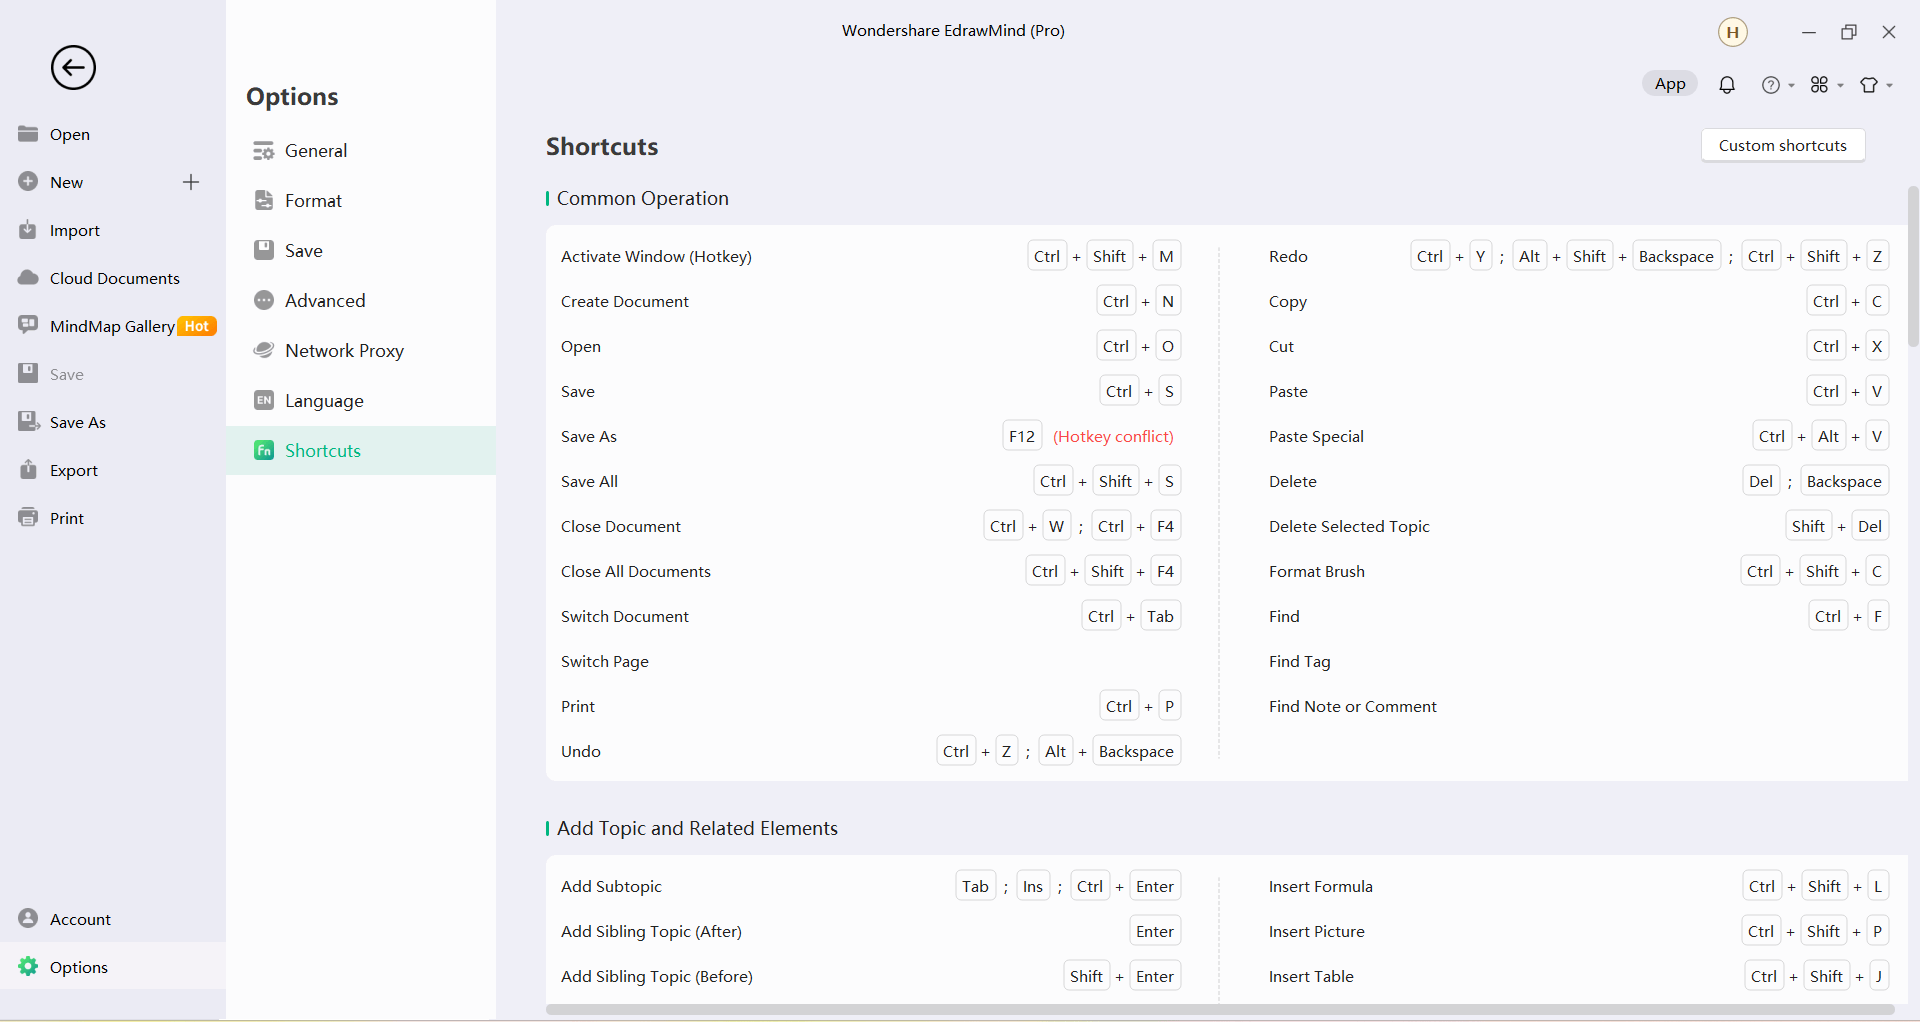
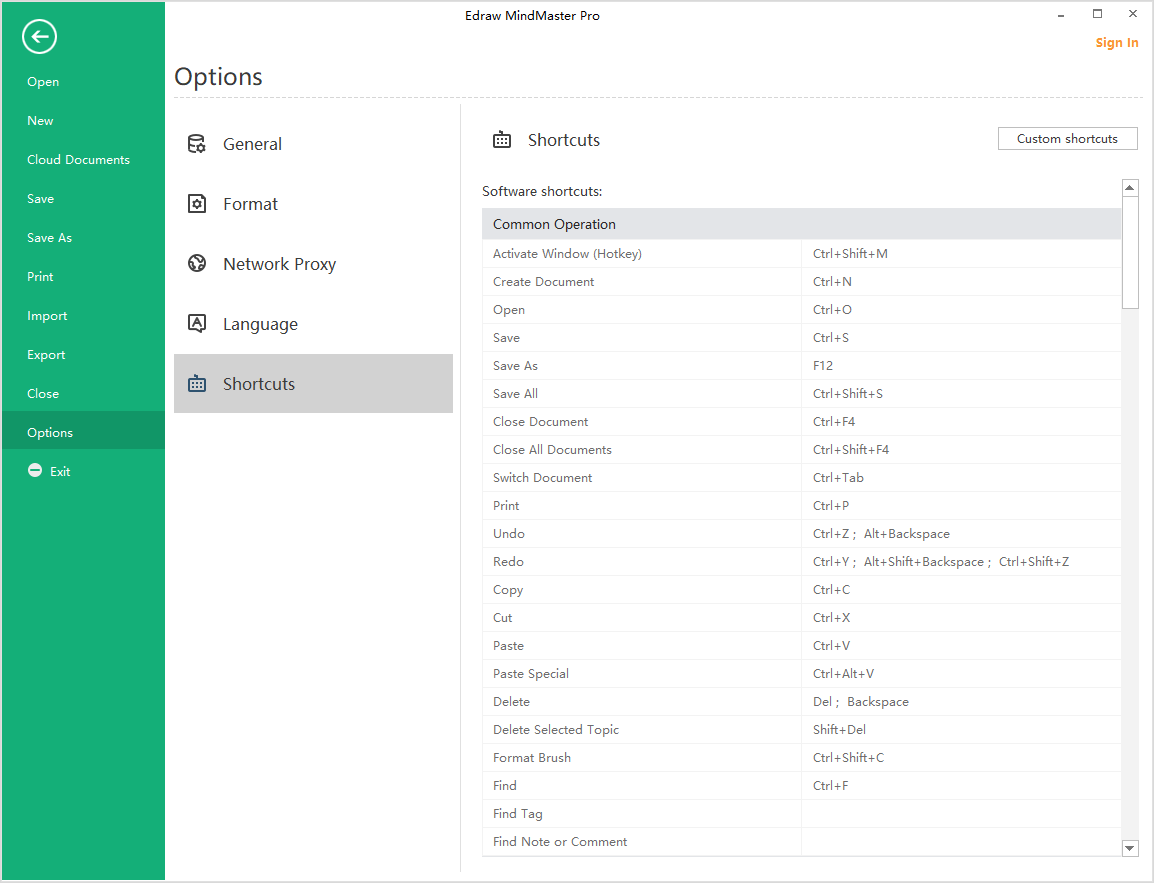
Common Operations
| Function | Shortcuts |
|---|---|
| Activate Window (Hotkey) | Ctrl + Shift + M |
| Create a new document | Ctrl + N |
| Open | Ctrl + O |
| Find | Ctrl + F |
| Save | Ctrl + S |
| Save as | F12 |
| Save all | Ctrl + Shift + S |
| Close current document | Ctrl + F4 |
| Close all | Ctrl + Shift + F4 |
| Switch document | Ctrl + Tab |
| Ctrl + P | |
| Undo | Ctrl + Z; Alt + Backspace |
| Redo | Ctrl + Y; Alt + Shift + Backspace; Ctrl + Shift + Z |
| Copy | Ctrl + C |
| Paste | Ctrl + V |
| Cut | Ctrl + X |
| Format Painter | Ctrl + Shift + C |
| Paste special | Ctrl + Alt + V |
| Delete | Delete; Backspace |
| Delete Selected Topic | Shift + Del |
Add Topic and Related Elements
| Function | Shortcuts |
|---|---|
| Add Subtopic | Tab; Insert; Ctrl + Enter |
| Add Topic | Enter |
| Add Topic Before | Shift + Enter |
| Add Parent Topic | Shift + Insert |
| Add Callout | Alt + Enter |
| Add Floating Topic | Alt + F |
| Add Multiple Topic | Ctrl + M |
| Add Relationship | Ctrl + R |
| Add Boundary | Ctrl + Shift + B |
| Add Summary | Ctrl + ] |
| Add Picture | Ctrl + Shift + P |
| Add Priority Mark | Ctrl + 1, 2, 3... |
| Add Attachment | Ctrl + H |
| Add Note | Ctrl + T |
| Add Comment | Ctrl + Shift + T |
| Add Number | Ctrl + Shift + U |
| Add Task | Alt + G |
Select Topic and Topic Operations
| Function | Shortcuts |
|---|---|
| Select all topics | Ctrl + A |
| Select same type | Alt + A |
| Select more topics | Shift + Arrow keys |
| Select more levels | Shift + Alt + Arrow keys |
| Select same level | Ctrl + Shift + A |
| Select topic | Arrow keys |
| Select first topic in the same level | Home |
| Select last topic in the same level | End |
| Select Main Idea | Ctrl + Home |
| Move up topic | Ctrl + Shift + Up |
| Move down topic | Ctrl + Shift + Down |
| Move topic to top | Ctrl + Shift + Home |
| Move topic to bottom | Ctrl + Shift + End |
Text Editing and Font Settings
| Function | Shortcuts |
|---|---|
| Edit topic text | F2 |
| Edit and move cursor to text start | Shift + Spacebar |
| Edit and move cursor to text end | Spacebar |
| Add line break | Shift + Enter; Ctrl + Enter |
| Bold | Ctrl + B |
| Italic | Ctrl + I |
| Underline | Ctrl + U |
| Increase font size | Ctrl + Shift + Period |
| Decrease font size | Ctrl + Shift +Comma |
| Set font color | Ctrl + Shift + D |
Topic Traversal and Slides
| Function | Shortcuts |
|---|---|
| Traverse topics | F5 |
| Traverse branches | Shift + F5 |
| Display slide page | Ctrl + Shift + F5 |
Map View
| Function | Shortcuts |
|---|---|
| Show different levels | Alt + 1,2,3… |
| Show all levels | Alt + 0 |
| Display branch | Alt + D |
| Focus on topic | F3 |
| Drill/Stop drill | F4 |
| Fit Map to page width | Alt + F3 |
| Fold | Ctrl + F3 |
| Zoom to 100% | Ctrl + 0 |
| Zoom in | Ctrl + Equal |
| Zoom out | Ctrl + Minus |
| Vertically move page | PageUp; PageDown |
| Horizontally move page | Ctrl + PageUp; Ctrl + PageDown |
Full Screen Mode
| Function | Shortcuts |
|---|---|
| Start brainstorming | F8 |
| Full screen (editable) | Ctrl+F5 |
| Laser pointer | Ctrl + L |
| Color pencil | Ctrl + P |
| Draw rectangle | Ctrl + Shift + R |
| Draw oval/ellipse | Ctrl + Shift + E |
| Draw arrow | Ctrl + Shift + W |
| Eraser | Ctrl + E |
| Map zoom in | Ctrl + Equal |
| Select Main Idea | Ctrl + Home |
| Eraser all traces | E (Capital) |
Open Pane/Window
| Function | Shortcuts |
|---|---|
| Open tag manager | Ctrl + G |
| Open clipart pane | Ctrl + Shift + I |
| Open format pane | F6 |
| Open spelling check pane | F7 |
| Open mark pane | F9 |
| Open task pane | F10 |
| Open outline pane | F11 |
Other
| Function | Shortcuts |
|---|---|
| Cancel operation or close dialog | Esc |
| Video Tutorial | F1 |

