Edraw Support Center
Get quick answers and step-by-step instructions in our support center.
Insert Table
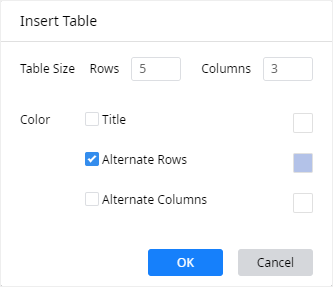
To insert a table, you can
- Go to Insert tab and choose Table, or press Ctrl + Alt + T directly;
- In the pop-up Insert Table window, input the desired numbers of rows and columns;
- Besides, when you want to see different colors shown on the title, rows and columns, check the corresponding options and choose the desired colors on the color menu.

To customize a table, select the table, then you can click Table icon ![]() on the right sidebar.
on the right sidebar.
In the Table Properties pane,, you can
- Modify Table Styles:
- Modify the numbers of rows and columns in the corresponding number boxes;
- Check and Apply colors to the title, banded rows or columns of the table;
- Margin: Change the look of the table margin in 4 different types (No, Narrow, Normal, Wide);
- Border: Change the look of the table borders.
- Insert/Delete Rows & Columns: select a table cell, row or column, click the corresponding buttons to add rows or columns in different orientations, or delete the selected row or column.
- Merge/Split Cells: select the table cells that you want to merge or split, click Merge Cells or Split Cells.
- Distribute Rows & Columns: when the width of columns or the height of rows are different in a table, select the columns or rows, click Distribute Columns or Distribute Rows to make the columns or the rows distribute evenly.

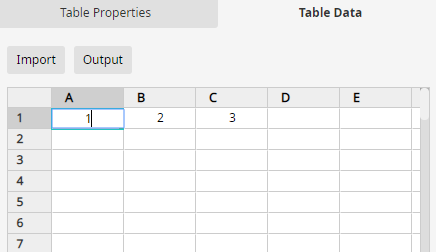
In the Table Data pane,, you can
- Import data: click Import > Local Import to import the data file (xlsx or csv) that you need into the built-in worksheet.
- Export data: click Export to export the table into different types of files (xlsx or csv).

Apart from importing data, you can also input the table data by:
- Double-click on the cells of the table and type numbers or text into them;
- Double-click on the cells of the worksheet on the Table Data pane and type numbers or text into them.