Easiest Steps to Create Software Testing Process Flowchart
Software testing is an investigation which conducted to provide information about the software quality or service under test for stakeholders. Software testing process normally includes 5 steps, which are planning and controlling, analysis and design, implementation and execution, evaluating exit criteria and reporting, and the final step is test closure activities. And software testing process flowchart is a professional diagram which graphically presents the whole process and enables engineers to record each step in detail, check and revise bugs effectively during the process.
Edraw Flowchart Maker is a professional diagram program for creating software testing process flowchart. Below are its incomparable advantages.
- It provides various standard symbols for drag-and-drop and abundant flowchart templates for downloading and easy edition.
- Its smart drawing guide enables users to connect, align and space symbols automatically with no need to do those one by one.
- Users are allowed to insert attachment, notes and even hyperlinks to make flowchart much more resourceful and attractive.
Follow below simple steps to create your software testing process flowchart and you will find creating flowchart with Edraw Flowchart Maker is such a easy and funny thing.
Step 1. Open a Blank Flowchart Drawing Page
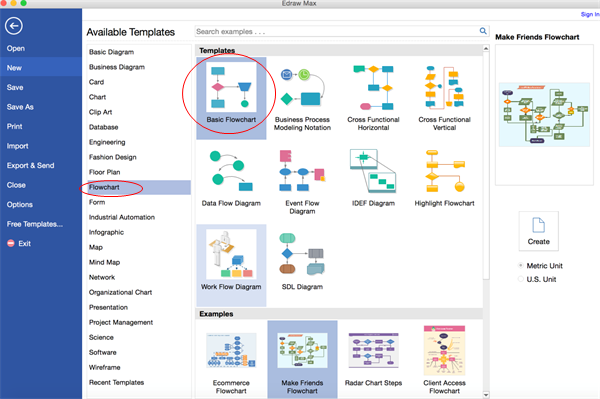
Launch the software, navigate to File menu > New > Flowchart, and then double click the icon of Basic Flowchart in templates window to open a blank drawing page.
Step 2. Add Flowchart Symbols
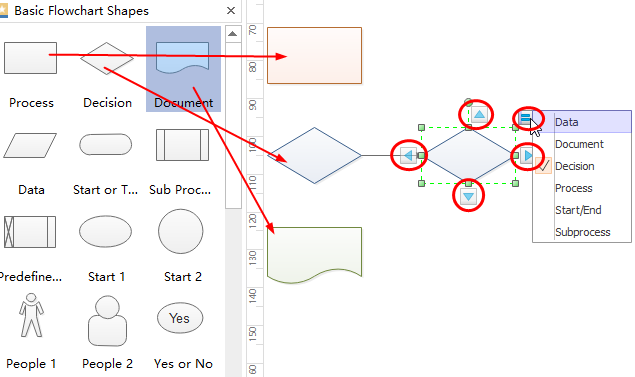
Drag and drop the flowchart symbols from the left libraries or click the floating button around the symbols to add automatically and change the shapes.
Step 3. Add Contents
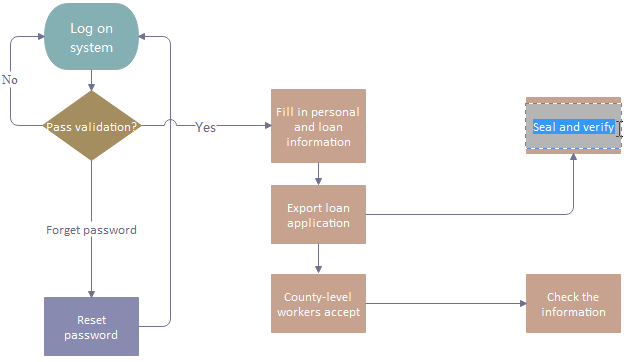
Just double click the symbols and text the key contents, then finish typing by clicking any blank area on the page.
Step 4. Connect the Symbols
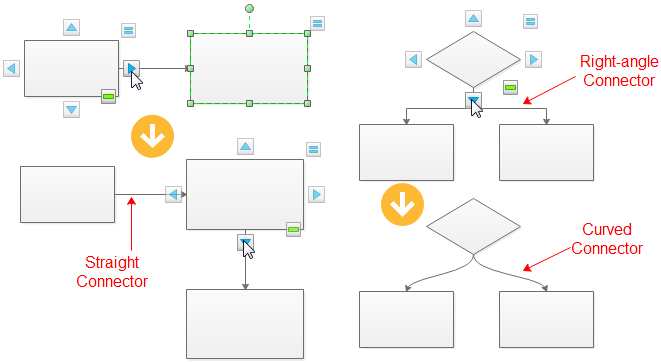
There are two ways to connect the symbols. You can just click the floating button to connect symbols automatically or you can also choose a proper Connector under the Home page to connect them manually.
Step 5. Change the Theme
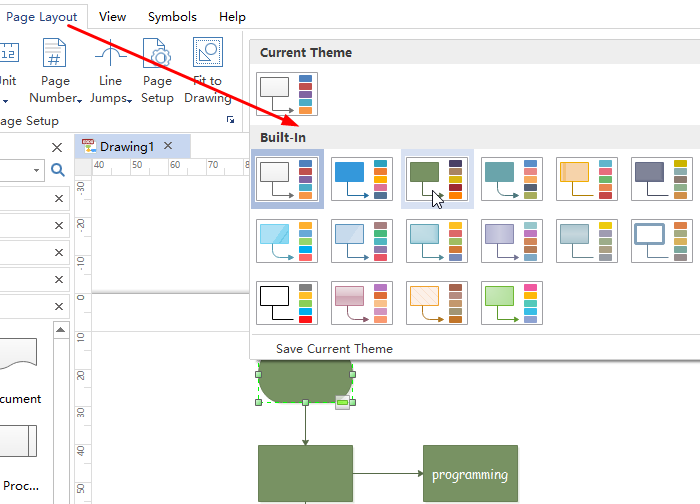
If you do not like the current theme, go to Page Layout and choose the theme you like from built-in themes, and then, you complete the software testing process flowchart with no difficulty.
Step 6. Save or Export your Flow Chart for Loan Management
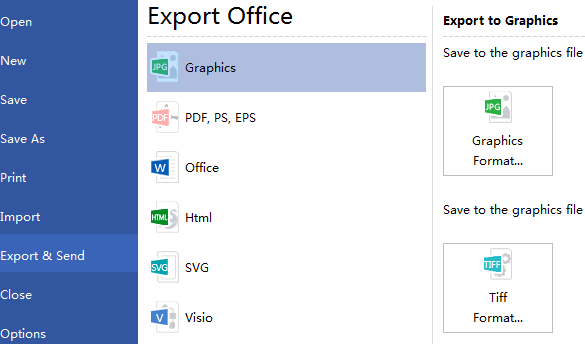
The default format for saving is .eddx but you can export and send it to various formats, such as Word, Excel, PDF, JPG, SVG, PPT, HTML, even Visio is supportable.
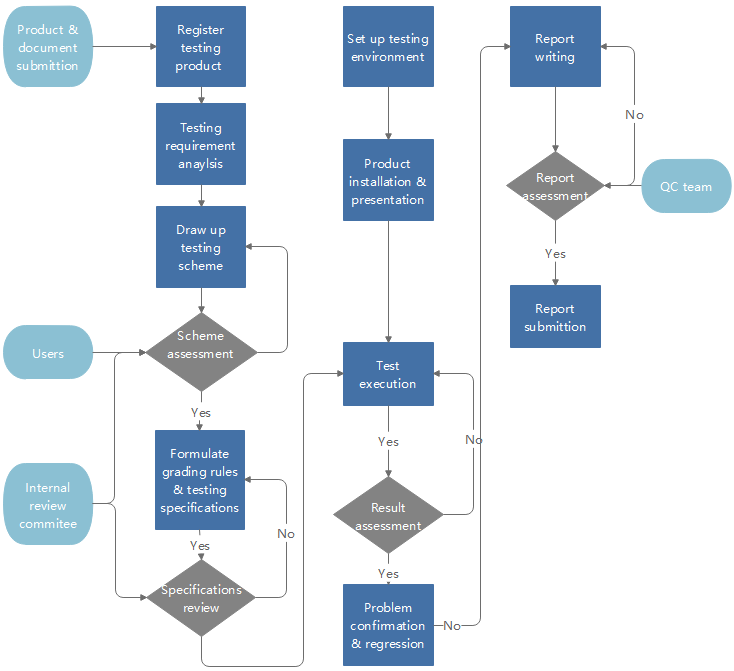
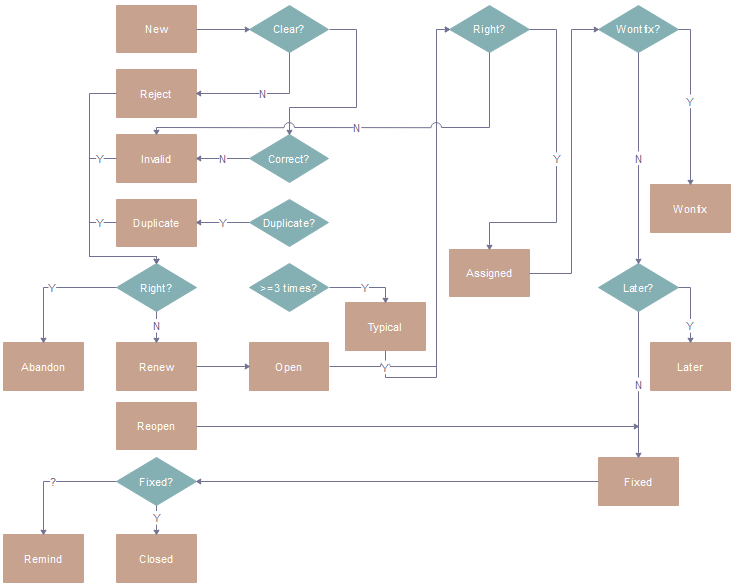
And here is the created software testing process flowchart.
Click flowchart examples to view and download more examples for free!
Related Articles
How to Create Flow Chart for Loan Management
Quick Steps to Create Product Development Flowchart
Tutorial for Creating Quotation Flowchart
